 |
 |
 |
 |
 |
 |
 |
 |
Xara X. An Updated Tour
Shown top left is the new Button and Nav Bar Tool icon
which has been added to the main tool bar. The user interface has been spruced up as well and features the Windows 98 flat button look. What's really cool about the Button and Nav Bar Tool is you
only need to create the starting button image and Xara X can automatically create the other three states as shown. (Notice also the improved Fractal Cloud fill. The fills are less
patterned than they are in Xara 2). Of course if you want to create your own button states, you can do that too. The four states (clicked and selected are optional) are Off, the
appearance of the button when the page loads, Over, the button when the mouse (cursor actually) passes over it), Clicked, the button when you click it, and Selected, the
appearance of the button on the currently-selected page. One of the most requested features for Xara X was creation of mouse rollover effects. And Xara X delivers this in spades.
I added a beveled edge with the new Bevel Tool
and added a drop shadow with the new Drop Shadow Tool.  To create my rollover button I started with a rectangle whose corners I rounded. I added a 2-color Fractal Clouds fill that I think looks like matrixed Turquoise.
I selected 2 for the number of buttons, Vertical,
and increased the spacing to 10 pix. I opted for the buttons to not stretch and all be the same size. Pressing Create creates the two buttons and the Off state seen top of this page. With my new button selected I selected the Button & Nav Bar Tool, then pressed New on the Infobar which opened the New Bar dialog.
I closed the dialog and selected Export on the Property Bar. After going through the simple dialog, Xara X asked if I'd like to preview the buttons. I said you bet and
pressed the button. As I had created two buttons, Xara X created two linked pages and the HTML and Java Script needed. My default Browser launched and I could go
back and forth between my two pages. It's all too wonderful, I tell you! Creating the individual states
couldn't be easier. Mouse Off has already been created. I selected Mouse Over and New State Looks Distinct and pressed Create and like that the Over state was created. I repeated this for the
Clicked and Selected states
Creating the individual states
couldn't be easier. Mouse Off has already been created. I selected Mouse Over and New State Looks Distinct and pressed Create and like that the Over state was created. I repeated this for the
Clicked and Selected states
When you select the Bevel Tool, the selected object displays 8 red arrow handles. Dragging any of these handles away from the object adds a bevel to the
outside of the object by the amount dragged. Dragging one of the arrow handles towards the center places the bevel on the inside. A red arrow and control node appears from the center of the beveled object and can
be dragged to modify the light source. The new Bevel Tool
is interactive and very easy to use.
The new Bevel Tool
is interactive and very easy to use.
You can drag colors from the screen palette and drop them onto the beveled edges making the edge color different from the fill color as shown in the lower right. 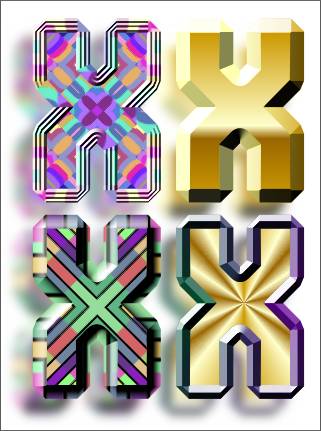 Here are some of the new bevel
shapes. The two X-amples on the right show off Xara X's multicolor fountain fills. The two pattern-filled examples are from the Xa-Fills 3 collection.
Here are some of the new bevel
shapes. The two X-amples on the right show off Xara X's multicolor fountain fills. The two pattern-filled examples are from the Xa-Fills 3 collection.