
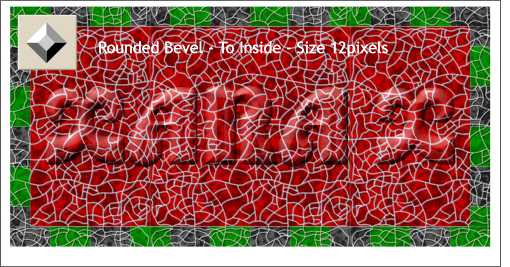
 Select the text and change the fill to the red fill.
With the text still selected, select the Bevel Tool. Select Rounded from the Bevel Type drop down list on the Infobar. Press the four inward pointing arrows icon (To Inside) on the Infobar to direct the bevel to the inside of the text). From the Slider Types drop down list (to the left of the big slider), select Size. Change the size to 12 pixels and press Enter to apply the changes.
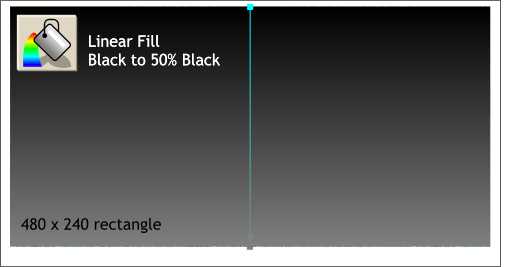 Create a new rectangle that covers all the elements that is 480 x 240 pixels.
Drag the Fill Tool from the top of the rectangle to the bottom (while holding down the Ctrl key to constrain the fill to vertical) to turn the fill into a Linear Fill. Change the top fill color to black (click the small box at the beginning of the fill path arrow and then click the black color on the screen palette). Change the bottom fill color to 50% black.
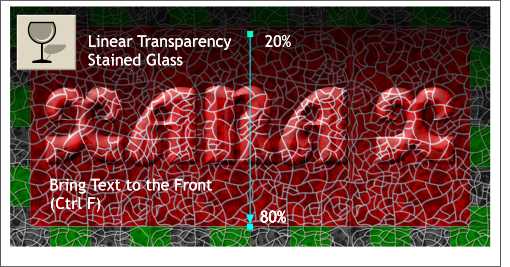 Select the Transparency Tool and click the rectangle to which we just applied the Linear Fill to select it.
Drag downwards while holding down the Ctrl key to constrain the direction of the transparency to vertical, to apply a Linear Transparency.
From the Transparency Type drop down list on the Infobar, select Stained Glass and change the start and ending transparencies to the percentages shown.
NOTE: The start and end points of the transparency should start and end at the green and black rectangular border.
To change the transparency percentages, click on either end of the fill path arrow and move the Transparency slider or key in the amount and press Enter to apply the changes.
Select the text (hold down the Alt key and click until the status bar at the bottom of the screen reads "1 Bevel" then press Ctrl f to bring the text to the front.
|
|
|
|
|
|
|
|
|
|
|
|