
 Enable Snap to Grid (right click on the page and select from the pop up menu).
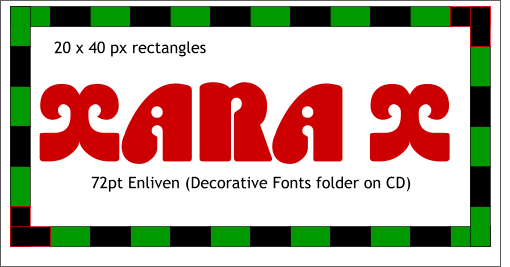
Using the Rectangle Tool, draw a small rectangle 20 x 40 pixels and apply a green fill.
Drag and duplicate the rectangle to the right. (Drag the rectangle to the right until it snaps into place along side the original. Before releasing the left mouse button, click the right mouse button to drop a duplicate). Change the fill to black. Select the two rectangles and drag and duplicate them 5 more times.
Select six rectangles starting with a black rectangle. Click twice to enable rotate/skew mode. Hold down the Ctrl key and drag one of the rounded corner rotation handles until the six rectangle have rotated 90 degrees into the vertical position with the black rectangle on top. Align the six rectangles to the right top, end of the horizontal rectangles to form an L-shape.
Select all the horizontal and vertical rectangles and make a Clone duplicate (Ctrl k or Edit > Clone Shape).
![]() Press the Flip Horizontally and the Flip Vertically icons on the Infobar to complete the frame as shown above.
Press the Flip Horizontally and the Flip Vertically icons on the Infobar to complete the frame as shown above.
Using the Text Tool, key in XARA X and set the font, Enliven (found in the Xara X CD Fonts > Decorative Fonts folder) to 72 points, or select a similar font.
NOTE: To load a font from the CD onto your computer, make sure the Xara X CD is loaded in your CD drive. Open the Fonts Gallery (the Aa icon on the Infobar) and press Disc Fonts... Open the TrueType fonts folder, then press Add. This adds the fonts folders (not the fonts) into the Fonts Gallery. Once the folders have been added, open the Decorative Fonts folder. Select Enliven and press Install. You will be asked if this is what you want to do. Press Install again and the font will be installed in the Windows > Fonts folder on your hard drive and will be available in any Windows application.
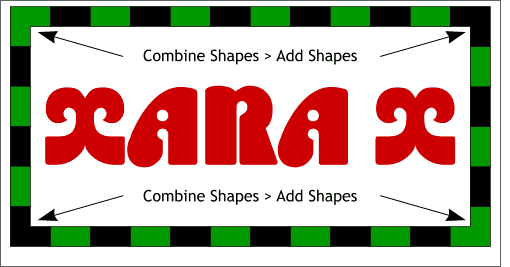 Select each two end rectangles and Combine Shapes > Add Shapes (Arrange menu).
Do this for each pair of corner rectangles.
Using the Rectangle Tool, add another rectangle behind the text and inside the black and green shapes that is 440 pixels wide by 200 pixels tall.
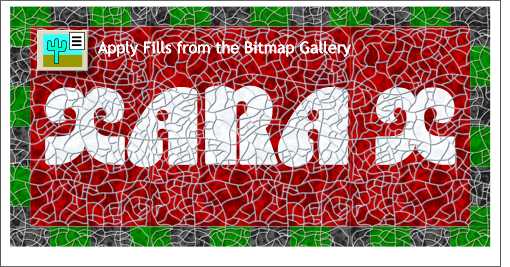 A copy of each of the bitmaps has been placed in the Bitmaps Gallery on the Infobar. We will use those bitmaps to fill
the shapes and text we have just created as shown here.
A copy of each of the bitmaps has been placed in the Bitmaps Gallery on the Infobar. We will use those bitmaps to fill
the shapes and text we have just created as shown here.
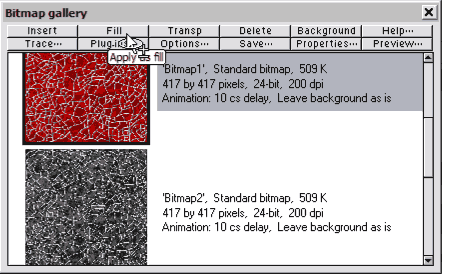 Select the new rectangle. Open the Bitmap Gallery and select the red bitmap. Press Fill to apply the
fill to the rectangle.
Select the new rectangle. Open the Bitmap Gallery and select the red bitmap. Press Fill to apply the
fill to the rectangle.
Select the text and apply the white fill (this is going to change to red, but use the white for now).
Select and group all the black rectangles and apply the black bitmap fill. Group all the green rectangles and apply the green fill.
Because each fill is the same size and because the bitmap fills tile seamlessly, the lines for all the colored fills should match up. They don't have to but this is useful to know.
|
|
|
|
|
|
|
|
|
|
|
|