|
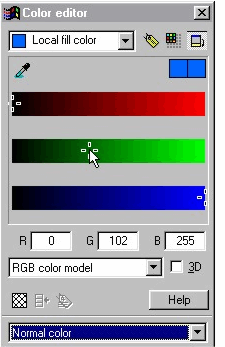
 To modify or mix a color, use the Color Editor
(click the color wheel icon to the left of the screen palette). To modify or mix a color, use the Color Editor
(click the color wheel icon to the left of the screen palette).If the Color Editor only shows half what is shown here, click the icon directly under the X button at the top of the menu to display the
Advanced Options. In the Color Editor, you can edit in RGB, CMYK, HSV, Grayscale and RGB Web/Hex modes. You can name a color by clicking the yellow tag icon to the immediate right of the color drop
down list. Click the button to the right of this to convert any mixed color to a web safe color. Select the colors on the Linear Fill and change their values as shown in the illustrations.
NOTE: If you let the arrow cursor rest over any color on the screen palette, a Tool Tip
appears with the color properties.NOTE within a NOTE: If the colors shown in the Tool Tip are in percentage and not 0-255, you need to change the Color Units setting in the Page Options
dialog. (See page 1). On the other hand, if you are specifying color for CMYK printing, use Percentage and not 0-255. |

