|
 Select the new rectangle and then select
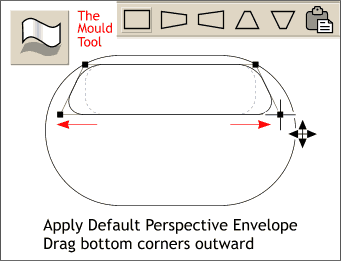
Mould Tool. (Remember this is a British product!) The Mould Tool is used to apply interactively editable, enveloped shapes to objects, text objects, and groups of objects. Select the new rectangle and then select
Mould Tool. (Remember this is a British product!) The Mould Tool is used to apply interactively editable, enveloped shapes to objects, text objects, and groups of objects.On the Infobar, select the
Default Perspective envelope. (The second rectangle button on the Infobar). Drag the bottom corner control handles outward as shown. The modifications are applied in real time. Disable Snap To Grid (
Window pull down menu).
NOTE:
Xara has two kinds of interactive envelope shapes, straight sided and curved sided. The curved sided envelope shapes use Bezier control handles to modify the shape. |

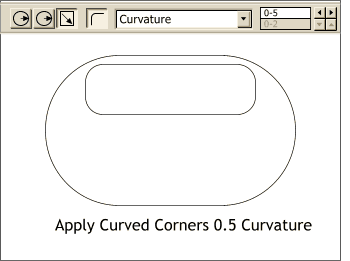 With the new rectangle and the Rectangle Tool
still selected, adjust the corner curvature to 0.5.
With the new rectangle and the Rectangle Tool
still selected, adjust the corner curvature to 0.5.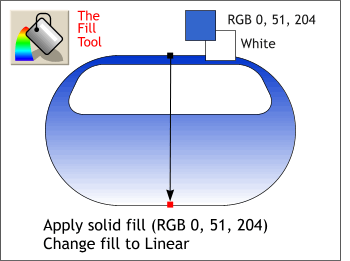 Select the larger curved rectangle and apply a solid deep
blue fill.
Select the larger curved rectangle and apply a solid deep
blue fill.