Xara X. The Infobar (Continued)
|
|||||||||||
Xara X. The Infobar (Continued) |
|||||||||||
|
|
|||||||||||
|
|||||||||||
We have moved down one level. a. Show Selection Bounds Handles
This icon is grayed out until a selection is made. It toggles the 8 tiny control handles (black squares) that enable you to resize, rotate, and skew a selected object. The default setting is Show and the button is depressed. Well not clinically, you know what I mean.
c. Show Fill Edit Handles
To be honest, I have never used this feature before today! Disabled by default, when enabled, any selected object (does not apply to groups of objects) displays both the resizing bounding box handles and the Fill path
arrows (provided the object has a fill other than Flat applied). This is like using two tools at the same time. I'm not sure why this is not the default behavior except that it might be confusing to new users.
d. Show Rotation Handles This is a one time only button and switches between the resizing and rotation/skew handles for a selected object, or group of objects.
Upon deselecting the object, or objects, the icon returns to the default state.
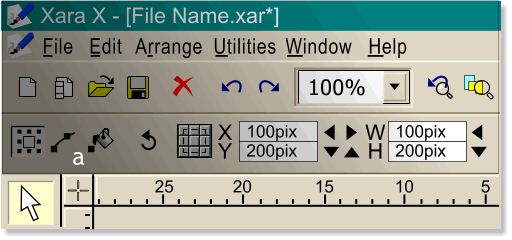
e. Set Set Origin Position (shown above) This icon is actually 9 mini-buttons. Pressing any one of the 9 squares sets the starting position from where a selected
object, or objects, will resize when a value is entered on the Infobar. Pressing any of the nine buttons also sets the rotation point to any of the 9 locations. f. X and Y Coordinates of Selection Shows the X
(horizontal) and Y (vertical) coordinates of a selected object. The units begin in the lower left corner of the selection and increase as you move up and to the right. 0,0 indicates the lower left
hand corner of the page. You can enter settings to precisely place objects on the page. The four arrow keys, to the right of the text entry boxes on the Infobar,
move the selection in one unit increments depending upon your selected Units. g. Width and Height These two windows show the exact width and height of a
selected object, or group of objects. You can enter a value and press Enter on your keyboard to apply the changes. NOTE: If the Lock Aspect Ratio icon (the tiny lock icon), is enabled , entering a value in either the W or H text entry boxes will resize the selection
proportionately. If the Lock Aspect Ratio is disabled (in the raised position), the selection resizes non-proportionately. Drag 0,0 Point When the rulers are displayed (Window > Bars
> Rulers), the cross hair icon at the intersection of the two rulers is called Drag 0,0 Point. Dragging this onto the page resets the rulers. This is useful if you need to orient the rulers to
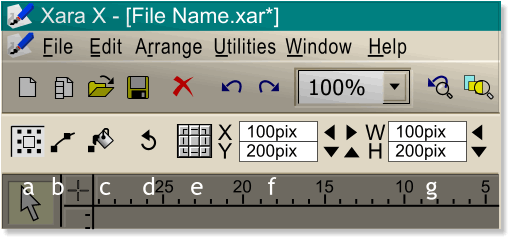
a specific object and makes measuring within an object easier. Ruler Options Right click on the rulers and a pop up menu appears with the following options: Delete All Guidelines
(the fastest way to clear all guidelines from the page), New Guideline (adds a guideline at the location of the click), Guide Layers Properties (opens the Guide Layers Properties dialog), Grid and
Ruler Options (opens the Page Options > Grid and Ruler tabbed section). TIP: A speedy way to add a series of guidelines is to simply double-click on the screen rulers. Every time you double click, a guideline is placed on the page. NOTE:
In the illustrations shown above, the units on the vertical ruler get smaller as they go to the right. This is because this portion of the ruler is to the left of the actual page at the magnification at which I was working. |
|
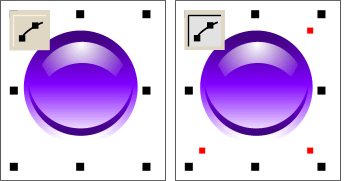 b. Show Object Edit Handles By default this icon is in the deselected position as shown on
the left. When Show Selection Bounds Handles is selected, pressing Show Object Edit Handles displays four additional edit handles (shown on the right in red). Dragging any of these four
edit handles allows you to free resize the object. In this mode you can resize a selection both horizontally and vertically without releasing the mouse button.
b. Show Object Edit Handles By default this icon is in the deselected position as shown on
the left. When Show Selection Bounds Handles is selected, pressing Show Object Edit Handles displays four additional edit handles (shown on the right in red). Dragging any of these four
edit handles allows you to free resize the object. In this mode you can resize a selection both horizontally and vertically without releasing the mouse button.