 |
 |
 |
 |
 |
 |
 |
Xara X. The Quick Shape Tool
![]() The Quick Shape Tool
is used to create polygons, stars and circles. Some of the operations that apply to ellipses and rectangle, also apply to Quick Shapes, which, at the risk of further repetition, we will cover below. At
least you should be fairly clear on the concepts after reading this section.
The Quick Shape Tool
is used to create polygons, stars and circles. Some of the operations that apply to ellipses and rectangle, also apply to Quick Shapes, which, at the risk of further repetition, we will cover below. At
least you should be fairly clear on the concepts after reading this section.
Selecting the Polygon icon, then the Star icon, draws stars. The amount of sides can be specified
in the drop down list on the Infobar.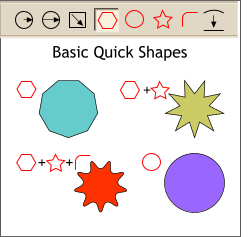 The basic quick shapes are polygons, circles and stars. These shapes can be modifies to have rounded corners.
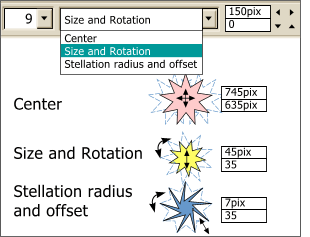 Quick shapes can be modified by selecting
one of three options in the drop down list and using the arrow keys to the right of the text entry window. These are shown on the left and include Center which repositions the shape horizontally and
vertically from the center, Size and Rotation, pretty self explanatory, and Stellation Radius and Offset. Radius moves the inside points in and out while the Rotation rotates the inside points.
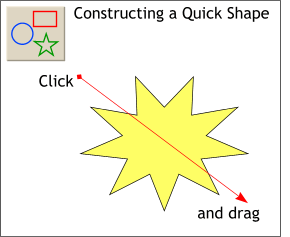 To draw a quick shape, select the Quick
Shape Tool, click and drag. Release the mouse button when the object has reached its desired shape.
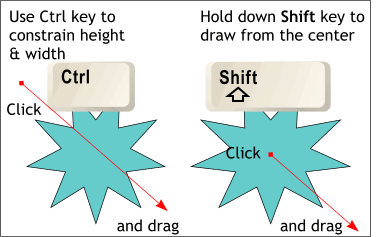 You can use the Ctrl and Shift
keys to modify the shape. Ctrl constrains the shape proportionately. Shift forces the shape to be drawn from the center. A combination of both keys constrains the shape and forces it to be drawn from the center.
When selected, 8 small black boxes appear around the selected object. This is called the bounding box. Dragging any of these black boxes will resize the selection. The four
corner bounding box handles, resize the selected object proportionately. (The relationship of height and width remains the same). Dragging the top or bottom center
handles resizes the selection vertically while the left and right center handles resize the selection horizontally.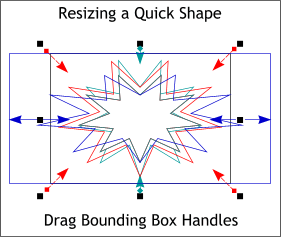 Any selected Quick Shape can be resized,
skewed and rotated.
The bounding box handles change to arrows. Drag the corner handles to free rotate, drag
the middle handles to skew. Hold down the Ctrl key to constrain the rotation or skewing to the angles specified in the Page Options dialog.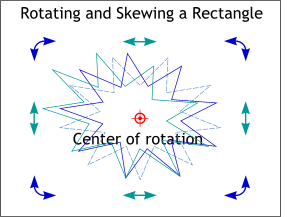 To switch into Rotate/Skew
mode, click twice on the selected object or objects. (Click again to return to Resize mode. Click away from the selection to deselect).
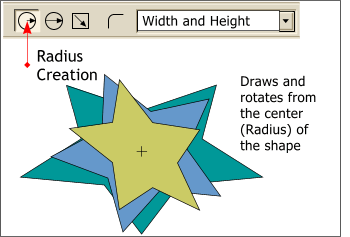 There are three modes of Quick
Shape creation available on the Infobar, the first is Radius Creation. Selecting this mode draws and free rotates from the center of the shape. Holding down the Ctrl key restrains the angle of rotation to the amount
specified in the Page Options dialog (Utilities > Page Options).
NOTE: While holding down the Shift key causes a shape to be drawn from the center, only Radius Creation permits the object to be rotated at the same time.
Holding down the Ctrl key restrains the angle of rotation to the amount specified in the Page Options dialog (Utilities >
Page Options).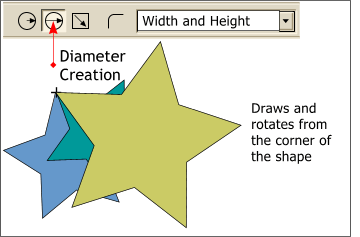 The second mode is Diameter Creation
, which draws and free rotates from the point where the mouse is clicked.
By default, the Editable Items in the drop down list is set to Width and Height.
Clicking the arrow keys or entering an amount in the text entry boxes to the right of the drop down list alters the dimensions of the ellipse.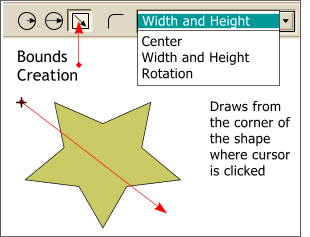 The third mode is Bounds Creation
which also draws from the corner where the mouse is clicked on the screen, but it does not have the capability of rotation.