 |
 |
 |
 |
 |
 |
 |
Xara X. The Rectangle Tool
 The Rectangle Tool
is used to draw rectangles and squares. (No surprises here!) Rectangles can also have rounded corners.
Click where you want the rectangle to start, hold down the mouse button and drag to where you want the rectangle to end and
release the mouse button. Not much to it really!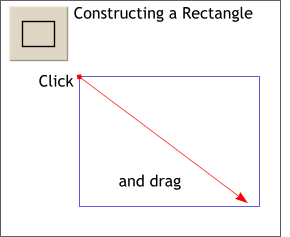 To draw a rectangle, select the
Rectangle Tool by clicking the rectangle tool icon with the Selector Tool.
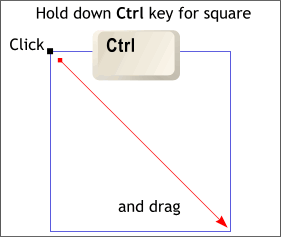 To draw a square, hold down then Ctrl
key while dragging.
To draw a square from the center outward, hold down the Ctrl and Shift keys while dragging.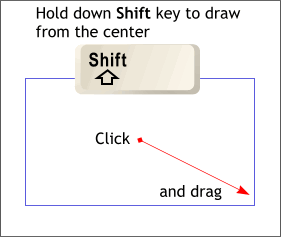 To draw from the center outwards, hold down the Shift key while dragging.
After you create a rectangle or square, the Infobar options shown (top left) appear. The default is Width and Height. You can use the triangle-shaped arrow keys
(to the right of the text entry windows) to change the width and/or the height, or you can key in new values. Press Enter to apply the changes.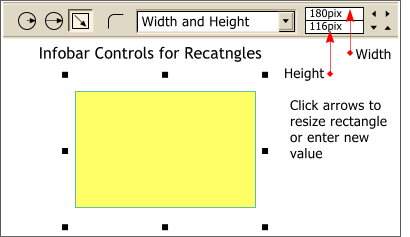 As with most Xara functions,
many options for rectangles are available on the Infobar.
When selected, 8 small black boxes appear around the selected object. This is called the bounding box. Dragging any of these black boxes will resize the selection. The four
corner bounding box handles, resize the selected object proportionately. (The relationship of height and width remains the same). Dragging the top or bottom center
handles resizes the selection vertically while the left and right center handles resize the selection horizontally.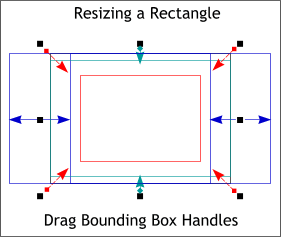 Any selected object or objects can be
resized, skewed and rotated.
The bounding box handles change to arrows. Drag the corner handles to free rotate, drag
the middle handles to skew. Hold down the Ctrl key to constrain the rotation or skewing to the angles specified in the Page Options dialog.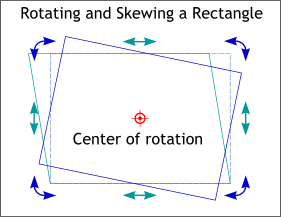 To switch into Rotate/Skew
mode, click twice on the selected object or objects. (Click again to return to Resize mode. Click away from the selection to deselect it).
Holding down the Ctrl key restrains the angle of rotation to the amount
specified in the Page Options dialog (Utilities > Page Options).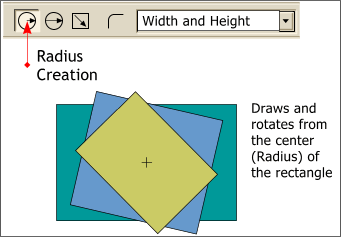 There are three modes of rectangle
creation available on the Infobar, the first is Radius Creation. Selecting this mode draws and free rotates from the center of the rectangle.
NOTE: While holding down the Shift key causes a rectangle to be drawn from the center, only Radius Creation permits the object to be drawn and rotated at the same time.
Holding down the Ctrl key restrains the angle of rotation to the amount specified in the Page Options dialog (Utilities >
Page Options).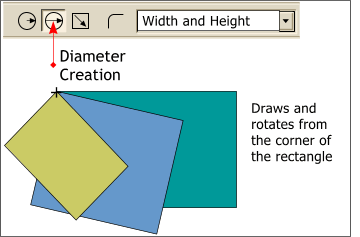 The second mode is Diameter Creation
, which draws and free rotates from the point where the mouse is clicked.
By default, the Editable Items (in the drop down list) is set to Width and Height.
Clicking the arrow keys, or entering an amount in the text entry boxes to the right of the drop down list, alters the dimensions of the rectangle.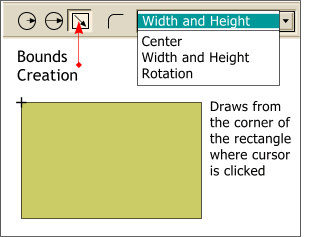 The third mode is Bounds Creation
which also draws from the corner where the mouse is clicked on the screen, but it does not have the capability of rotation.
Rotation rotates the selected rectangle from the center the number of degrees
entered either by pressing the arrow keys or by entering the amount in the text entry window and pressing Enter.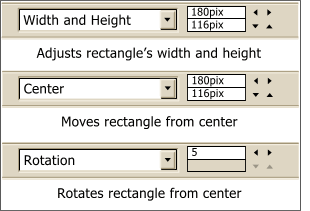 Selecting Center
from the drop down list moves the selected rectangle horizontally and vertically from the rectangle's center.
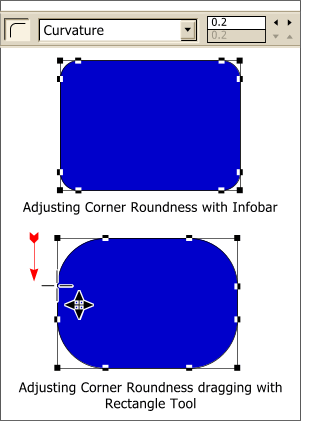 You can round the corners on a rectangle by pressing the Corner Roundness button on the Infobar with the rectangle and the Rectangle Tool selected. There are two ways to adjust the amount of roundness:
enter a number in the text entry window or press the arrow keys, or drag any (except the corner handles) of the bounding box handles.
NOTE: The corner roundness will not be round if the rectangle or square has been resized. If you plan to use the Corner Roundness option, make sure the rectangle or square has not been resized. If necessary, resize the rectangle to the desired size, then create a new rectangle to the exact size and then apply the corner roundness setting.