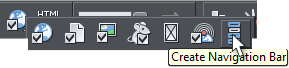
You can duplicate your button and change the text for each page on your site, then use the Repeat on All Pages command (Arrange menu) to place your button on each page of your site. The advantage to this is each button can be a separate color as shown below.But for the majority of sites, a Navigation Bar is a more professional looking solution. And creating a Navigation Bar is really easy to do. Unfortunately, Xara Photo and Graphic Designer 7 does not have a Navigation Bar Tool. If you want to try out the process, you can visit Xara.com and download a trial copy of Web Designer 7 or Designer Pro 7. It is a really cool feature and well worth the upgrade.The first step is to create a soft-grouped button with a mouse off and mouse over state. We’ll use BUTTON 1 above for the demonstration. Select the button then open the Web Properties dialog and select the Navigation Bar Tool.Shown above is the Navigation Bar Properties dialog. I want to create a vertical bar with some space between the buttons. I want all of my buttons to be the same size as designed and so I un-checked Adjust Button Widths to Labels. Some people may prefer uneven button widths. I don’t. I’m just like that. OK?The navigation bar to the left is the result of these changes and is based on the pages in this Workbook. The current page is automatically highlighted using the mouse over state. The button text represent the page names as found in the Page and Layout Gallery.We can edit the button text by clicking twice (do not double click) on each button name then editing the text accordingly. In the example on the right, I have changed the page names to all caps and removed the underscores. The order of the pages can be changed by dragging the page title up or down. If you have a button like the mysterious e and Zbuttons on my Workbook Navigation Bar, you can add a Tooltipdescription in the Tooltip box. If you mouse over the e and Z buttons on the Workbook navigation bar you can see the tool tips that reveal Send e-mail and Download Zipped Workbook. There is no need to add tool tips for the normal buttons because you know where they go to.You can duplicate Navigation Bars. One can be vertical and one can be horizontal. Each Navigation Bar can have different text or link to other pages or URLs. For example you may wish to have a horizontal bar that links to the pages and a vertical bar that links to other websites or an e-mail address. Click in the URL box for the button you want to link and change the URL as needed. Buttons can also link to pop-up layers. You can add buttons or delete buttons by using the Add and Delete buttons at the bottom of the menu. I’ll cover this next.Click the + toadd a sub-menuYou might find it desirable to simplify the menu so when your visitor mouses over a button a sub-menu appears. In this case we’ll create a sub-menu that contains all of the 6 Workbook pages plus a download link and a Send e-mail link. If you have created a Navigation Bar, double click on the bar to open the Navigation Bar Properties menu. Click on all or some of the page titles and press Delete. You can use the Deletebutton in the dialog or press the Delete key on our keyboard. I renamed the HOME button WORKBOOK 90.Press the small + button for the page to which you wish to add a sub menu or menus.Double click the text Double Click to Add Sub-menu. New Item is highlighted so you can edit the text on this link. Click (No URL Set) to add a link.The screen shot above shows all 6 Workbook pages added plus an e-mail and download link. Mouse over the button to the left to see the sub menus. If the menu is horizontal and the sub menus can drop down.I like a little more separation between the menu items. You can add a horizontal line under a title by selecting the title then pressing Add Separator. You can see the results of this in the example to the left.You may think that the sub-menus would look better if they were the same color as the buttons. I agree and here is how to do this.Press Menu Styleto edit thesub-menusClick the Menu Style button, shown in the lower right of previous illustration.Click Edit to change the colors for the main sub-menus and the mouse over sub-menus. You can change the font, I use Trebuchet MS for the Xara Xone. You can add a border and border color plus a few other adjustments such as the speed of the fly out menu and the transparency. In the example to the left I have added a 1 pixel outline in dark red. And I selected Slow for the fly out speed.The best way to see how these settings work is to experiment. You cannot break anything and you just might learn something.My wish is that someday the fly out menus will use the same style as the first tier buttons for the sub-menu buttons. But as of the last conversations I had with the development team there were two chances of this ever happening: Slim, and very, very slim.This menuopens downward


 You can duplicate your button and change the text for each page on
your site, then use the Repeat on All Pages command (Arrange menu)
to place your button on each page of your site. The advantage to this is
each button can be a separate color as shown below.
You can duplicate your button and change the text for each page on
your site, then use the Repeat on All Pages command (Arrange menu)
to place your button on each page of your site. The advantage to this is
each button can be a separate color as shown below.


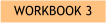
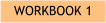
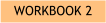
 But for the majority of sites, a Navigation Bar is a more professional
looking solution. And creating a Navigation Bar is really easy to do.
Unfortunately, Xara Photo and Graphic Designer 7 does not have a
Navigation Bar Tool. If you want to try out the process, you can visit
Xara.com and download a trial copy of Web Designer 7 or Designer Pro
7. It is a really cool feature and well worth the upgrade.
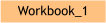
The first step is to create a soft-grouped button with a mouse off and
mouse over state. We’ll use BUTTON 1 above for the demonstration.
Select the button then open the Web Properties dialog and select the
Navigation Bar Tool.
But for the majority of sites, a Navigation Bar is a more professional
looking solution. And creating a Navigation Bar is really easy to do.
Unfortunately, Xara Photo and Graphic Designer 7 does not have a
Navigation Bar Tool. If you want to try out the process, you can visit
Xara.com and download a trial copy of Web Designer 7 or Designer Pro
7. It is a really cool feature and well worth the upgrade.
The first step is to create a soft-grouped button with a mouse off and
mouse over state. We’ll use BUTTON 1 above for the demonstration.
Select the button then open the Web Properties dialog and select the
Navigation Bar Tool.
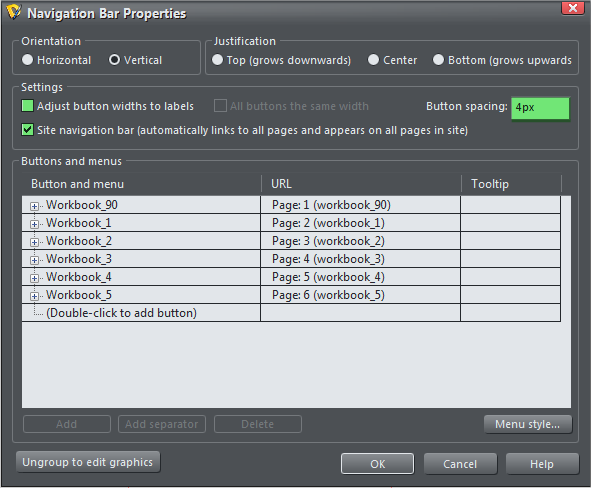 Shown above is the Navigation Bar Properties dialog. I want to create
a vertical bar with some space between the buttons. I want all of my
buttons to be the same size as designed and so I un-checked Adjust
Button Widths to Labels. Some people may prefer uneven button
widths. I don’t. I’m just like that. OK?
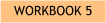
The navigation bar to the left is the result of these changes and is
based on the pages in this Workbook. The current page is automatically
highlighted using the mouse over state. The button text represent the
page names as found in the Page and Layout Gallery.
Shown above is the Navigation Bar Properties dialog. I want to create
a vertical bar with some space between the buttons. I want all of my
buttons to be the same size as designed and so I un-checked Adjust
Button Widths to Labels. Some people may prefer uneven button
widths. I don’t. I’m just like that. OK?
The navigation bar to the left is the result of these changes and is
based on the pages in this Workbook. The current page is automatically
highlighted using the mouse over state. The button text represent the
page names as found in the Page and Layout Gallery.


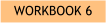
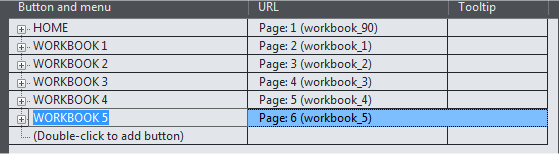 We can edit the button text by clicking twice (do not double click) on
each button name then editing the text accordingly. In the example on
the right, I have changed the page names to all caps and removed the
underscores. The order of the pages can be changed by dragging the
page title up or down. If you have a button like the mysterious e and Z
buttons on my Workbook Navigation Bar, you can add a Tooltip
description in the Tooltip box. If you mouse over the e and Z buttons on
the Workbook navigation bar you can see the tool tips that reveal Send
e-mail and Download Zipped Workbook. There is no need to add tool
tips for the normal buttons because you know where they go to.
You can duplicate Navigation Bars. One can be vertical and one can be
horizontal. Each Navigation Bar can have different text or link to other
pages or URLs. For example you may wish to have a horizontal bar that
links to the pages and a vertical bar that links to other websites or an
e-mail address. Click in the URL box for the button you want to link and
change the URL as needed. Buttons can also link to pop-up layers. You
can add buttons or delete buttons by using the Add and Delete buttons
at the bottom of the menu. I’ll cover this next.
We can edit the button text by clicking twice (do not double click) on
each button name then editing the text accordingly. In the example on
the right, I have changed the page names to all caps and removed the
underscores. The order of the pages can be changed by dragging the
page title up or down. If you have a button like the mysterious e and Z
buttons on my Workbook Navigation Bar, you can add a Tooltip
description in the Tooltip box. If you mouse over the e and Z buttons on
the Workbook navigation bar you can see the tool tips that reveal Send
e-mail and Download Zipped Workbook. There is no need to add tool
tips for the normal buttons because you know where they go to.
You can duplicate Navigation Bars. One can be vertical and one can be
horizontal. Each Navigation Bar can have different text or link to other
pages or URLs. For example you may wish to have a horizontal bar that
links to the pages and a vertical bar that links to other websites or an
e-mail address. Click in the URL box for the button you want to link and
change the URL as needed. Buttons can also link to pop-up layers. You
can add buttons or delete buttons by using the Add and Delete buttons
at the bottom of the menu. I’ll cover this next.


 Click the + to
add a sub-menu
Click the + to
add a sub-menu
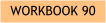
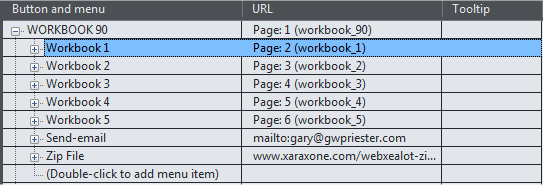
 You might find it desirable to simplify the menu so when your visitor
mouses over a button a sub-menu appears. In this case we’ll create a
sub-menu that contains all of the 6 Workbook pages plus a download
link and a Send e-mail link. If you have created a Navigation Bar, double
click on the bar to open the Navigation Bar Properties menu. Click on
all or some of the page titles and press Delete. You can use the Delete
button in the dialog or press the Delete key on our keyboard. I renamed
the HOME button WORKBOOK 90.
Press the small + button for the page to which you wish to add a sub
menu or menus.
You might find it desirable to simplify the menu so when your visitor
mouses over a button a sub-menu appears. In this case we’ll create a
sub-menu that contains all of the 6 Workbook pages plus a download
link and a Send e-mail link. If you have created a Navigation Bar, double
click on the bar to open the Navigation Bar Properties menu. Click on
all or some of the page titles and press Delete. You can use the Delete
button in the dialog or press the Delete key on our keyboard. I renamed
the HOME button WORKBOOK 90.
Press the small + button for the page to which you wish to add a sub
menu or menus.

 Double click the text Double Click to Add Sub-menu. New Item is
highlighted so you can edit the text on this link. Click (No URL Set) to
add a link.
Double click the text Double Click to Add Sub-menu. New Item is
highlighted so you can edit the text on this link. Click (No URL Set) to
add a link.
 The screen shot above shows all 6 Workbook pages added plus an e-mail
and download link. Mouse over the button to the left to see the sub
menus. If the menu is horizontal and the sub menus can drop down.
The screen shot above shows all 6 Workbook pages added plus an e-mail
and download link. Mouse over the button to the left to see the sub
menus. If the menu is horizontal and the sub menus can drop down.
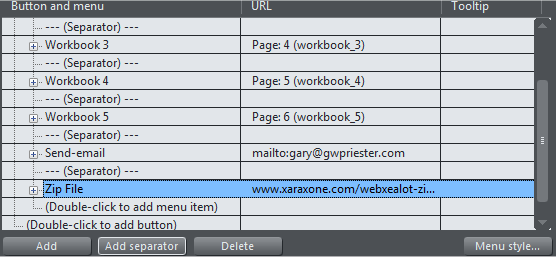 I like a little more separation between the menu items. You can add a
horizontal line under a title by selecting the title then pressing Add
Separator. You can see the results of this in the example to the left.
You may think that the sub-menus would look better if they were the
same color as the buttons. I agree and here is how to do this.
Press
Menu Style
to edit the
sub-menus
I like a little more separation between the menu items. You can add a
horizontal line under a title by selecting the title then pressing Add
Separator. You can see the results of this in the example to the left.
You may think that the sub-menus would look better if they were the
same color as the buttons. I agree and here is how to do this.
Press
Menu Style
to edit the
sub-menus
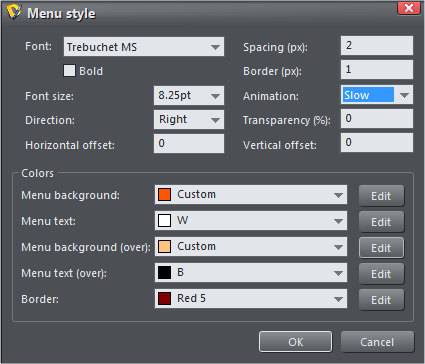
 Click the Menu Style button, shown in the lower right of previous
illustration.
Click Edit to change the colors for the main sub-menus and the mouse
over sub-menus. You can change the font, I use Trebuchet MS for the
Xara Xone. You can add a border and border color plus a few other
adjustments such as the speed of the fly out menu and the
transparency. In the example to the left I have added a 1 pixel outline
in dark red. And I selected Slow for the fly out speed.
The best way to see how these settings work is to experiment. You
cannot break anything and you just might learn something.
My wish is that someday the fly out menus will use the same style as
the first tier buttons for the sub-menu buttons. But as of the last
conversations I had with the development team there were two chances
of this ever happening: Slim, and very, very slim.
Click the Menu Style button, shown in the lower right of previous
illustration.
Click Edit to change the colors for the main sub-menus and the mouse
over sub-menus. You can change the font, I use Trebuchet MS for the
Xara Xone. You can add a border and border color plus a few other
adjustments such as the speed of the fly out menu and the
transparency. In the example to the left I have added a 1 pixel outline
in dark red. And I selected Slow for the fly out speed.
The best way to see how these settings work is to experiment. You
cannot break anything and you just might learn something.
My wish is that someday the fly out menus will use the same style as
the first tier buttons for the sub-menu buttons. But as of the last
conversations I had with the development team there were two chances
of this ever happening: Slim, and very, very slim.
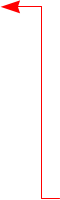
 This menu
opens
downward
This menu
opens
downward