


 One of the most frequent questions in the TalkGraphics Web Design
Chat forum is about buttons and navigation bars. While it is possible to
use a pre-built navigation bar, why would you want to when you can
have the fun and satisfaction of designing your own unique bar.
In this section, we’ll design a custom button, then create and edit a
Navigation Bar. We’ll add a few sub menus and edit these as well. It
really is easy. Trust me. Would I lie to you?
Buttons can have three states: Mouse Off, the button you see as the
page loads, Mouse Over, the appearance of the button when the cursor
passes over the button, and Mouse Down, the appearance of the
button when it is physically clicked. For now we will concern ourselves
with the Mouse Off and Mouse Over button states.
One of the most frequent questions in the TalkGraphics Web Design
Chat forum is about buttons and navigation bars. While it is possible to
use a pre-built navigation bar, why would you want to when you can
have the fun and satisfaction of designing your own unique bar.
In this section, we’ll design a custom button, then create and edit a
Navigation Bar. We’ll add a few sub menus and edit these as well. It
really is easy. Trust me. Would I lie to you?
Buttons can have three states: Mouse Off, the button you see as the
page loads, Mouse Over, the appearance of the button when the cursor
passes over the button, and Mouse Down, the appearance of the
button when it is physically clicked. For now we will concern ourselves
with the Mouse Off and Mouse Over button states.
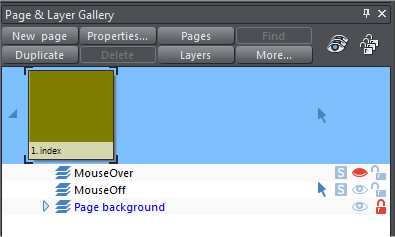 When you create a new Website, Xara creates two layers, a MouseOff
and MouseOver layer as seen in my example above. Anything placed on
the MouseOver layer will not be visible when the page loads. And in
the case of buttons, anything on the MouseOver layer will only be
visible if the two button states are linked to something, another page,
or website address.
Lets create a simple button, just so you can see how incredibly easy
this process is.
When you create a new Website, Xara creates two layers, a MouseOff
and MouseOver layer as seen in my example above. Anything placed on
the MouseOver layer will not be visible when the page loads. And in
the case of buttons, anything on the MouseOver layer will only be
visible if the two button states are linked to something, another page,
or website address.
Lets create a simple button, just so you can see how incredibly easy
this process is.
 In the Page and Layout Gallery, make sure the MouseOff layer is
selected (the blue arrow pointer indicates the selected layer).
Select the Rectangle Tool (m). Click on the page and drag a small
rectangle about the size shown above. Double click on any corner with
the Rectangle Tool to apply curved corners.
Drag and drop a color from the screen palette onto the rectangle. I
have dropped Brown.
Select the Text Tool (t). Click in the center of the rectangle and add
the text MY BUTTON in Arial, 10pt. Change the fill color to Pale
Orange and click the Center Justify icon on the Infobar.
Select text and move it over the button shape until you see a small red
dot in the center of the rectangle to indicate the text and rectangle
are centered. This is a new feature called smart alignment.
Drag a selection rectangle around the button with the Selector Tool
(the arrow pointer). From the Arrange menu select Group or use the
keyboard shortcut, Ctrl g. You have just created the MouseOff button!
In the Page and Layout Gallery, make sure the MouseOff layer is
selected (the blue arrow pointer indicates the selected layer).
Select the Rectangle Tool (m). Click on the page and drag a small
rectangle about the size shown above. Double click on any corner with
the Rectangle Tool to apply curved corners.
Drag and drop a color from the screen palette onto the rectangle. I
have dropped Brown.
Select the Text Tool (t). Click in the center of the rectangle and add
the text MY BUTTON in Arial, 10pt. Change the fill color to Pale
Orange and click the Center Justify icon on the Infobar.
Select text and move it over the button shape until you see a small red
dot in the center of the rectangle to indicate the text and rectangle
are centered. This is a new feature called smart alignment.
Drag a selection rectangle around the button with the Selector Tool
(the arrow pointer). From the Arrange menu select Group or use the
keyboard shortcut, Ctrl g. You have just created the MouseOff button!
 Select the MouseOff button and copy it to the clipboard (Ctrl c or Edit
> Copy). In the Page and Layer Gallery, select the MouseOver layer,
and click the red eye icon to open the eye and make the layer visible.
From the Edit menu, select Paste in Place.
Highlight the text with the Text Tool and change the color to White.
Hold down the Ctrl key and click on the rectangle with the Selector
Tool (the Ctrl key lets you select an object within a group—in this case
the rectangle). Change the color to Orange.
Select the MouseOff button and copy it to the clipboard (Ctrl c or Edit
> Copy). In the Page and Layer Gallery, select the MouseOver layer,
and click the red eye icon to open the eye and make the layer visible.
From the Edit menu, select Paste in Place.
Highlight the text with the Text Tool and change the color to White.
Hold down the Ctrl key and click on the rectangle with the Selector
Tool (the Ctrl key lets you select an object within a group—in this case
the rectangle). Change the color to Orange.
 In the Page and Layer Gallery, select the MouseOff layer again.
Marquee select both buttons (drag a selection rectangle around the
buttons with the Selector Tool). The status line in the lower left of the
screen will indicate that 2 Groups on 2 Layers are selected.
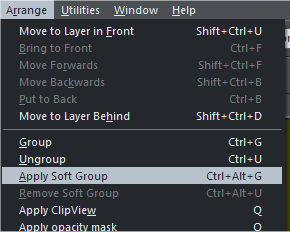
From the Arrange menu, select Apply Soft Group. A soft group lets you
edit on two layers at the same time. For example, if you decide to
change the text from “MY BUTTON” to “A BUTTON”, and if both buttons
are a soft group, the wording will change on both buttons.
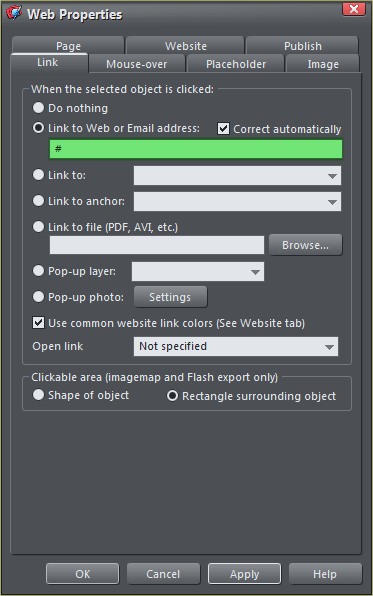
In the Web Properties menu (Utilities > Web Properties) select the
Link tabbed section and enter the pound sign # for the link. This links
to the same page and lets us preview the mouse over action.
In the Page and Layer Gallery, select the MouseOff layer again.
Marquee select both buttons (drag a selection rectangle around the
buttons with the Selector Tool). The status line in the lower left of the
screen will indicate that 2 Groups on 2 Layers are selected.
From the Arrange menu, select Apply Soft Group. A soft group lets you
edit on two layers at the same time. For example, if you decide to
change the text from “MY BUTTON” to “A BUTTON”, and if both buttons
are a soft group, the wording will change on both buttons.
In the Web Properties menu (Utilities > Web Properties) select the
Link tabbed section and enter the pound sign # for the link. This links
to the same page and lets us preview the mouse over action.
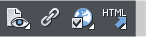
 In both Web Designer and Designer, many of the
Web Properties functions are accessible from the
Infobar as shown on the left. The eye and page icon
lets you preview the page in Xara’s built in web browser, the linked
chain opens the Link dialog, the globe icon opens the entire Web
Properties menu and the HTML icon opens the Publish dialog.
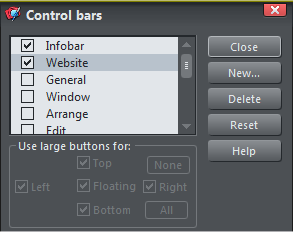
In Photo and Graphic Designer these icons are missing. You can add
them to the Infobar easily enough.
From the Window menu, select Control Bars... Check the check box
for Website and you’re in business. If you hold down the Alt key, you
can drag the Website toolbar up to the top where it is easier to access.
So press the eye and page icon to open the preview browser and to test
your button. If you followed my instructions, your button will have a
mouse over effect when you mouse over it. If yours does not, go back
and make sure you did all the steps as I instructed.
Also note that the version 7 products all let you preview your page in
any of your installed browsers so you can make sure your website will
work in all the different browsers (if you have them installed).
In both Web Designer and Designer, many of the
Web Properties functions are accessible from the
Infobar as shown on the left. The eye and page icon
lets you preview the page in Xara’s built in web browser, the linked
chain opens the Link dialog, the globe icon opens the entire Web
Properties menu and the HTML icon opens the Publish dialog.
In Photo and Graphic Designer these icons are missing. You can add
them to the Infobar easily enough.
From the Window menu, select Control Bars... Check the check box
for Website and you’re in business. If you hold down the Alt key, you
can drag the Website toolbar up to the top where it is easier to access.
So press the eye and page icon to open the preview browser and to test
your button. If you followed my instructions, your button will have a
mouse over effect when you mouse over it. If yours does not, go back
and make sure you did all the steps as I instructed.
Also note that the version 7 products all let you preview your page in
any of your installed browsers so you can make sure your website will
work in all the different browsers (if you have them installed).


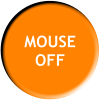
 [Mouse over the buttons]
Buttons can and should not only provide interactive feedback, they can
also provide a small surprise. And buttons do not need to look like
buttons, though do bear in mind that life is not a contest to see how
subtle and obscure we can make them either.
[Mouse over the buttons]
Buttons can and should not only provide interactive feedback, they can
also provide a small surprise. And buttons do not need to look like
buttons, though do bear in mind that life is not a contest to see how
subtle and obscure we can make them either.

 Mouse over the
button, then
click and hold
the button
Mouse over the
button, then
click and hold
the button

 [The button works - Go ahead and try it]
Now that you see how easy the process is, get creative and see what
kinds of fun buttons you can design. On the next page we’ll create a
button bar, but for now, explore the options and have fun.
[The button works - Go ahead and try it]
Now that you see how easy the process is, get creative and see what
kinds of fun buttons you can design. On the next page we’ll create a
button bar, but for now, explore the options and have fun.