|
|
|
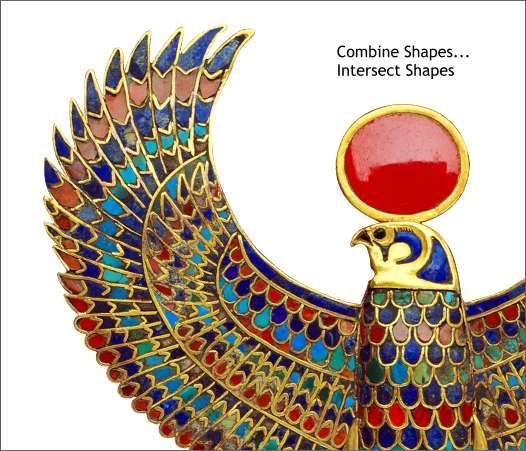
One of the more frequently asked questions in the Xara Conference and in my e-mail is how to drop out the background in a bitmap image. If the background happens to be white, there is a very simple solution. If the background is not white, there is another method that is a bit labor intensive, but one that produces excellent results. First, the easy method.
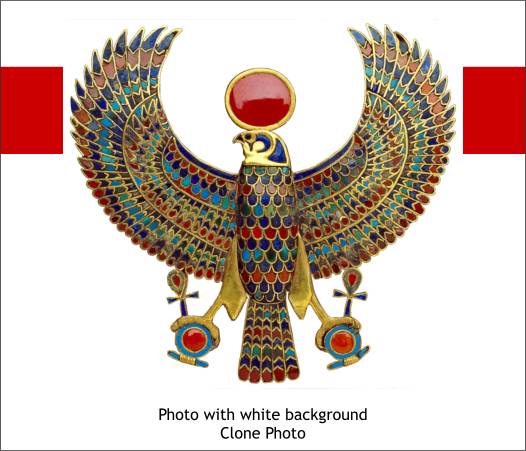
The image above has a white background. And the original image had a resolution of 300dpi. A deep red rectangle placed behind the image shows the edges of the white background.
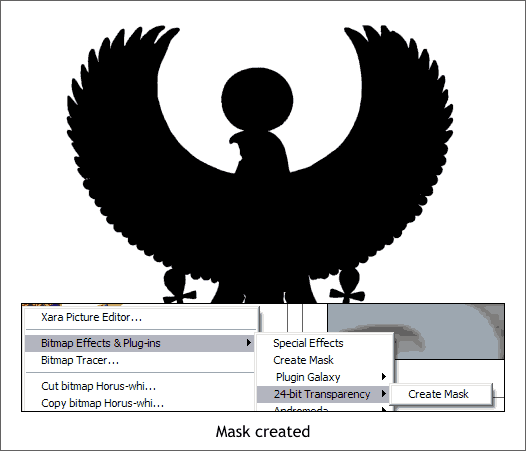
The easiest way to drop out the background for this image is to use Sean Sedwards' 24-Bit Mask plug-in. You can download it here. There is also a tutorial on this page. Install the plug-in in a folder where you can easily find it, open Page Options dialog (Utilities > Options...), go to the Plug-ins tabbed section, Browse to folder containing the plug-in. Click Add. Clone the photo (Ctrl k). Right click on the clone and select Bitmap Effects and Plug-ins > and select 24-bit Transparency > Create Mask. The photo will be converted to a black and white image. A copy of the new black and white image is automatically placed in the Bitmap Gallery so you can delete the black and white image on the page.
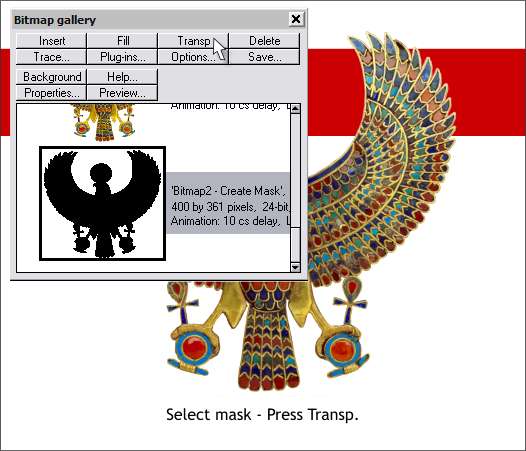
Select the color bitmap. Open the Bitmap Gallery (F11), select the black and white image, and press Transp. The white drops out as you can see in the example above. This produces the best results when the image is high resolution. With web resolution images, the edges may be a bit rough.
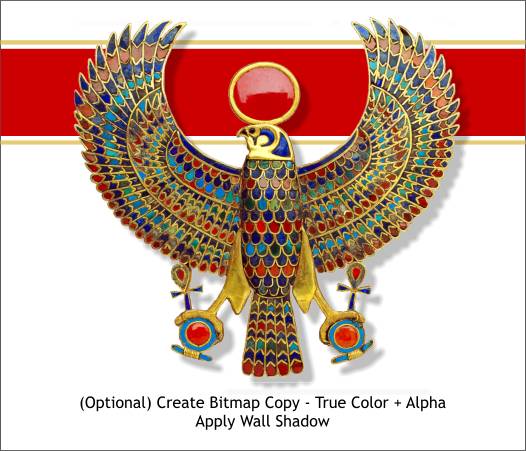
In the example above, a new bitmap was created (Arrange > Create Bitmap Copy...) and the True Color + Alpha Color Depth selected. Then a Wall Shadow was added with the Shadow Tool . The red stripe looks kind of funky but that is a result of the JPEG compression.
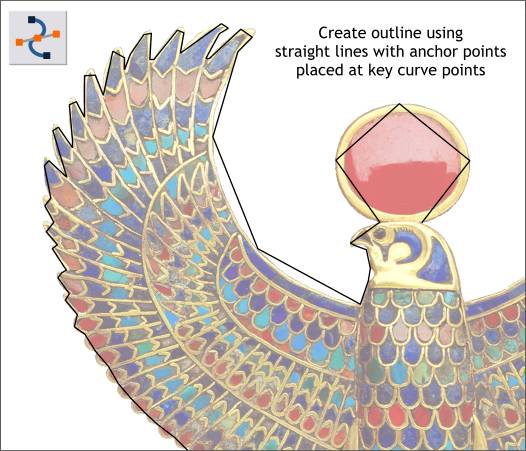
Method 2 is more labor intensive but produces excellent results. And for those of you who use a bitmap editing application such as Photoshop or PaintShop Pro, the time required is about the same (provided you are drawing the outline by hand and not using the magic wand tool to make the selection). Using the Shape Editor Tool, click a series of short line segments as shown above. Try to place a control point and the start and end points of each curve segment. Drop the last anchor point on top of the starting anchor point to create a "closed shape". (When the shape is closed it will automatically be filled with a solid color, usually black). Set the fill color to none by left clicking on the crosshatched box to the left of the screen palette. This can take a little time to get used to, but once you do it a few times, the placement of the points around the curve will make more sense and the process will go quicker. TIP: Add about 50%, Flat, Mix transparency to the bitmap to make it easier to see your line segments.
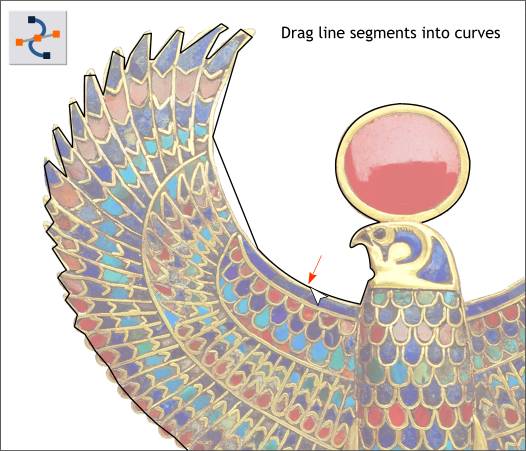
Once you have completed your mask shape, set the fill to none. With the outline still selected, select the Shape Editor Tool and drag the line segments (like you would a rubber band) into graceful curves. NOTE: The Shape Editor Tool is one of the few Xara Tools that cannot make a selection. The shape or path needs to be first selected with the Selector Tool (the arrow pointer).
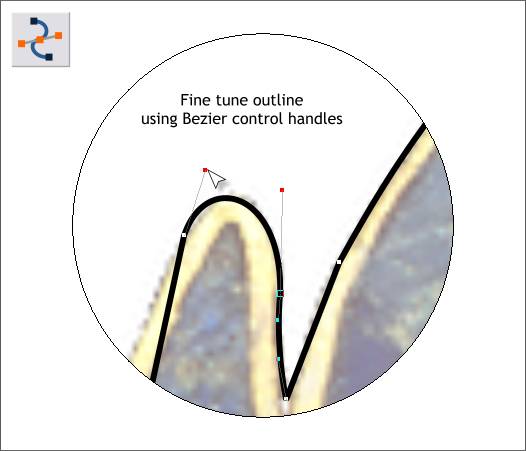
While dragging line segments is effective, sometimes a bit of fine tweaking is necessary. When 2 curves are joined together, you can click on the common control point and adjust the Bezier control handles. This gives you better control of the shape of the path. Drag the red handles in any direction as well as in and out to better fit the outline to the shape.
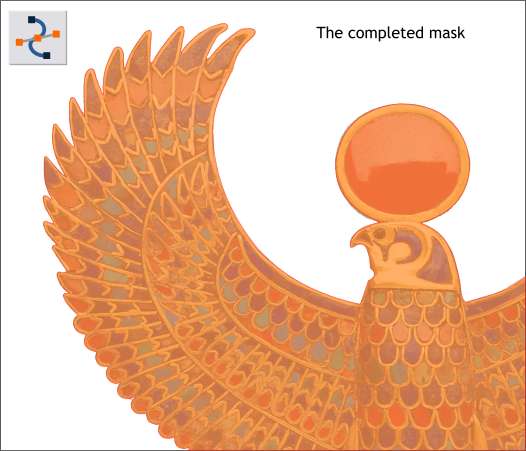
Shown above if the completed mask shape. I have added an orange fill and applied transparency to see the fit of the mask to the image. Select the bitmap and remove the transparency.
Select the bitmap and the mask and Arrange > Combine Shapes... Intersect Shapes. The mask cuts out the image like a cookie cutter. TIP: To select an object that is below another object, hold down the Alt key and click. Once you have selected the shape below, hold down the Shift key and click the top object to select both. This is called "drilling down" and each time you Alt click you select the next object down. Refer to the status bar in the lower left of the screen to identify each selection.
Here is the masked image. No white fringe, just clean, sharp, vector corners.
|
||
|
|


