|
|
|
EPS (Encapsulated PostScript) used to be the preferred method of preparing a file for a commercial printing company. Adobe has changed all that with its Acrobat PDF (Portable Document File) format. All of my files that go to magazines and printers is in this format. And I have never heard a complaint. There are still some publications that insist on a Macintosh created Quark XPress file. I encountered this just a few weeks ago from a magazine in Florida. I told them that this was outdated and unenlightened thinking and showed a marked prejudice for the 97% of all computer users who work in Windows. I went on to say, I would send them a PDF/X document and that was that. They reluctantly agreed. (Someone has to set these people straight and it might as well be me!). A PDF/X document is a refined version of PDF that includes pre-flighting to ensure correct color space and fonts. Adobe Acrobat uses a "distiller" to convert a file into a PDF format. And while you have about a billion and a half different adjustment you can make to the file, Acrobat is very expensive and not really necessary unless you are doing really high end work. Xara recommends a freeware product PDF995 which you can find here and which we will use for this tutorial. This is a bare bones PDF creation utility but it works very well and uses Jens Benthien's favorite postscript creation module, GhostScript. You can also get a Shareware version that include the ability to edit your PDF file and add a digital signature here for $29.95 US. So, in this tutorial, we'll convert our 2-color business card into a PDF file which we can give to our printing company. Before we begin, you will need to download and Install PDF995. (If you have Adobe Acrobat or any other program that can Print a PDF file you can use it instead).
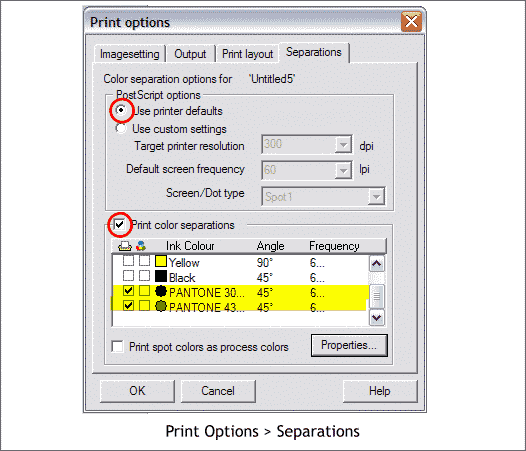
From the File menu, select Print Options... In the Separations Options dialog (shown above) check Use Printer Defaults. (If your printing company has a specific requirement, check Use Custom Settings and select from these options). Check Print Color Separations. You should see the two Pantone colors we used as well as the CMYK colors. Uncheck the CYM and K check boxes. (If checked, the C, M, Y, K will output 4 blank pages and you will be charged for the extra film). NOTE: If you are printing in CMYK, and not spot, and you have used both CMYK and spot colors, check the Print Spot Colors as CMYK. But only if you are printing CMYK.
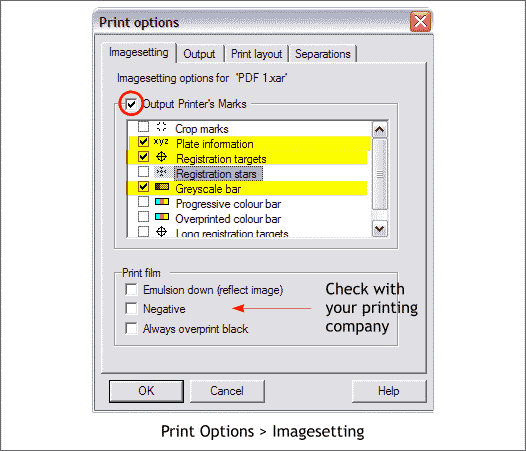
Xara can also place printer's marks on the film which is useful to the printing company when they prepare the printing plates. We do not need to add crop marks as these are placed on the outer edges of the actual page. And we added our own crop marks. We will need to check the marks highlighted in yellow. Plate Information will print among other things, the Pantone color used on that plate. As film is black and white only, the printing professional will use this to determine which plate prints which color. Registration Targets are used to register (align) one plate to the other. And a Grayscale Bar lets the printer calibrate the density of the ink flow to your document. Check with your printing company for their choice of Print Film options. Normally, you would print Emulsion Side Down as the film contacts directly with the press plate and does not have to go through the thickness of the film. Negative is the standard as film is normally output as negative. But check first. Do not check Always Over Print Black as we do not have any black to over print.
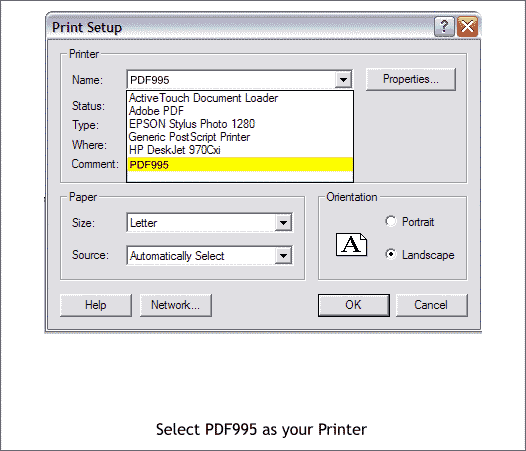
Open the Print Setup dialog (File > Print). Select PDF995 from the Printer drop down list of printers. Select from the Size drop down list the size of the page you want to output. NOTE: In order for the printer's marks to be seen, the printed page must be larger than the page size in Xara. I made my Xara page 8 inches by 6 inches in the landscape orientation. Press OK to exit the Print Setup dialog then press Print to create the PDF file. PDF995 works like a printer and prints the document information to a PDF document. You will need a PDF reader, like Adobe's free Acrobat Reader to view the document when it is created. Now comes the maddening part and the reason you might want to fork over the $9.95 for the program, or the $29.95 for the whole package. PDF995 automatically attempts to connect to the Internet through your browser and takes you to a page of advertising. If you like this product, pay for it and save yourself the aggravation.
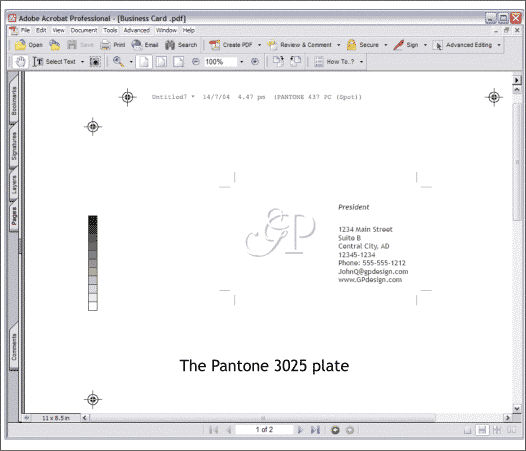
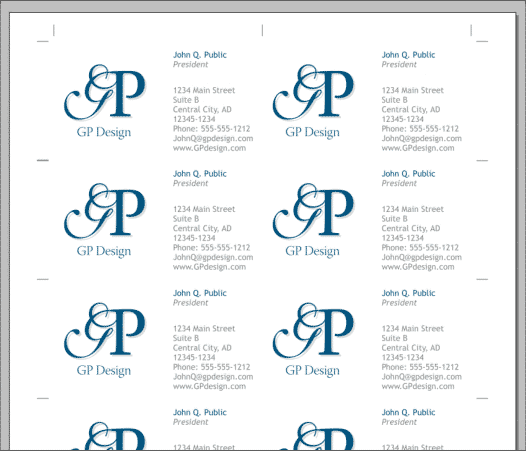
After you dispense with the advertising interruption, Acrobat Reader will open and display your document. Because we selected the Print as Separations option, there will be two pages, the Pantone 3025 plate shown in the screen capture above, and the Pantone 437 plate on the next page. In the screen capture above, the portion of the drop shadow minus the teal colored image above, is displayed in a lighter shade of gray. When printed, it will be a series of dots giving the impression of a lighter color. The area of the shadow that has been removed is referred to as knocked out. Click here to open the actual PDF file (46K). Just give this file to your printing company, select your printing paper stock and tell them how many cards you need and leave the rest to them. FINAL NOTE: It will probably make more sense for your printing company to print more cards per page. This will require less sheets of printing paper and will be more economical. Depending upon how many cards they can put on the page and what size sheet they are printing on, you can create a page with more cards like the one shown below.
Multiple cards arranged on the page You will only need the crop marks shown. This is all the information the printer needs to trim out the cards to the correct size. (You can prepare your 4 color cards in the same manner. But before you go to all this trouble, ask your printing professional how she or he would like you to prepare your art. A single card may be all he or she requires). And so we end another Workbook. I have covered a lot of information and I hope it was useful. If you have any questions or comments or corrections, please use the feedback form on the next page to send me your comments. Gary W. Priester
|
||
|
|


