|
|
|
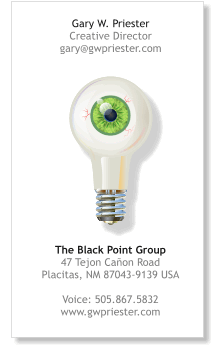
I created my business card in Xara (my logoŚ"the bright eye-dea" was also created in Xara). I had my cards printed at a Texas company, CopyCraft, that prints 1,000 cards, at 300 LPI (about 600 dpi) on a coated white stock for $100.00 US. The printing is excellent. And the turn around time is short. The only drawback is you are limited to the one card stock. There are many companies that print 4 color cards with similar prices. To make my life easier, I exported my card as a TIFF at 600 dpi, converted the TIFF to CMYK in Photoshop. At this resolution, the text turned out sharp and the color looks great. Now, Xara X1 has CMYK TIFF export capability so there is no need to go through Photoshop. In the next exercise, we will create a business card using 2 Pantone spot colors. Pantone® Spot colors are a special palette of solid colors created by Pantone, Inc. Spot colors are specially mixed solid colors and are used most often for 1 to 3 color printing. For many people, having cards printed in 2 or 3 spot colors is less expensive than 4 color process printing.
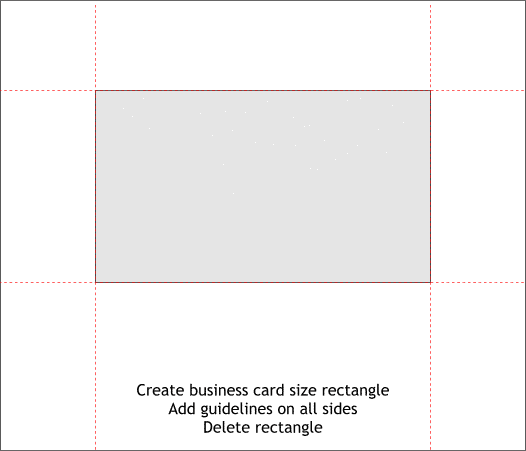
I will be using the standard US 3.5 x 2 inch business card for this tutorial. You can use whatever size is appropriate for you. Draw a rectangle to the exact size of the card. Drag guidelines from the screen rulers (Ctrl L to display screen rulers) and snap them to the four sides of the card. Delete the rectangle after you have snapped the guides. TIP: Zoom in close to the card rectangle to ensure the most accurate snap.
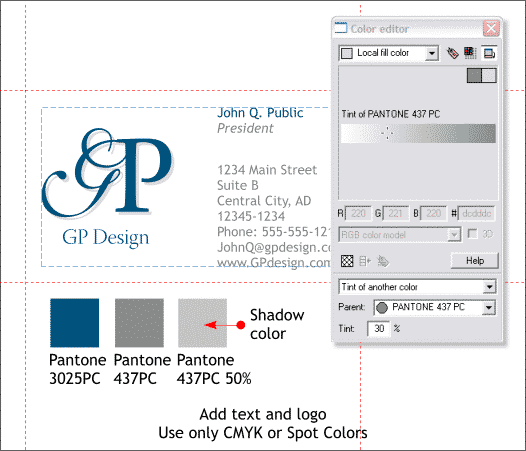
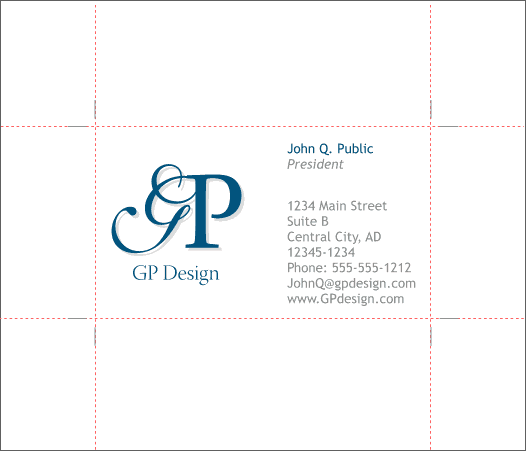
Arrange your logo and text on the card. I have used a guide (blue dashed outline) to help position the logo and text evenly on the card. The Pantone colors are found at the bottom of the Color Gallery in the Pantone Solid to Process folder. The logo and the president's name are Pantone 3025 PC (PC means intended for coated stock), and the gray type is Pantone 437 PC. A duplicate of the logo was offset 2 pixels down and to the right and sent to the back (Ctrl b ). The duplicate serves as a shadow and was filled with the same 437 gray and then the color was edited in the Color Editor (Ctrl e) using the Tint of Another Color option at the bottom of the dialog and the percentage set to 30%. When the shadow is printed, it will be a 30% screen (small dot pattern) of the solid 437 color. IMPORTANT: Pantone sells color swatch books and fan books with Pantone Spot Colors. You can refer to these books to see the exact color as it will look when printed. Some of these colors may not print as they appear on the screen and to be absolutely certain of how a color is going to print, refer to the color swatch book. You can but these books in art supply stores or directly from Pantone. NOTES: I used the tint of the solid color instead of Xara's more excellent soft drop shadow (Shadow Tool) for this reason; Xara converts the soft drop shadow to a bitmap which then becomes an RGB object. This RGB object (the shadow) will no longer be a spot color. There are work arounds for this but I am not going to get into that today. If you blend using 2 spot colors, the intermediate colors become RGB colors and will not print. SPOT TO PROCESS: While Pantone spot colors are intended to be printed as solid colored inks, you can also use these spot colors in a CMYK document. The colors are spot colors but also have CMYK equivalents. But only about 1/2 of the spot colors will print exactly like the colored swatch. About 1/4 will come close, and the last 1/4 will not even be close.
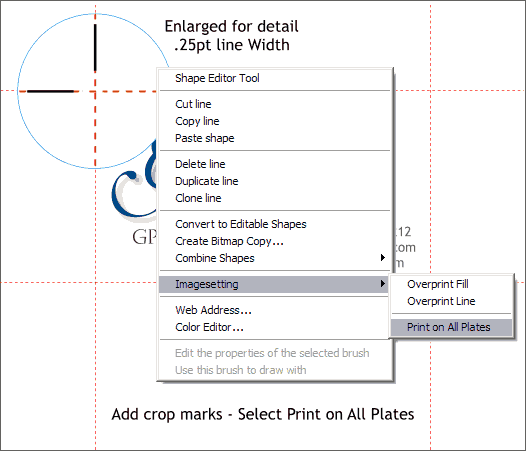
The printer will need some help trimming your cards. To help, add .25 pt trim lines (also called hairlines) outside each corner as shown above in the enlarged area. Move the lines back from the intersection of the guidelines a little bit. The lines can be either one of the two spot colors. Select all the trim lines and right click on any of the trim lines. From the pop up menu, select Imagesetting > Print on All Plates. This will print the trim lines on both printing plates. NOTE: It is not really necessary to print the trim lines on both plates. But you can use Print on All Plates to create registration marks that will appear in the same place on all printing plates to help the printer align the colors. There is a better way to let Xara do this which we will cover on page 5.
And here is the card ready to go to the printer. On page 5, we'll save the card as a PDF (Portable Document File) to give to the printing company. Additional NOTE: Avery markets a line of perforated business card paper. You can print 6 to 8 cards per sheet. They sell software to help you print your cards but who needs it? Just buy a box of the perforated cards, carefully measure the placement of the cards, and create a template in Xara that matches the placement of the cards. Duplicate your card and place the duplicates on the template. (Save your template File > Save Template) Print the first on a plain sheet of paper and determine if there is a right or wrong direction to insert the perforated sheets. Once you have determined the correct direction for the paper, press Print and you're on your way!
|
||
|
|


