
 WEBSITE AND WEBSITE GRAPHICS CREATED WITH XARA DESIGNER PRO 6


 Download Zipped Tutorial
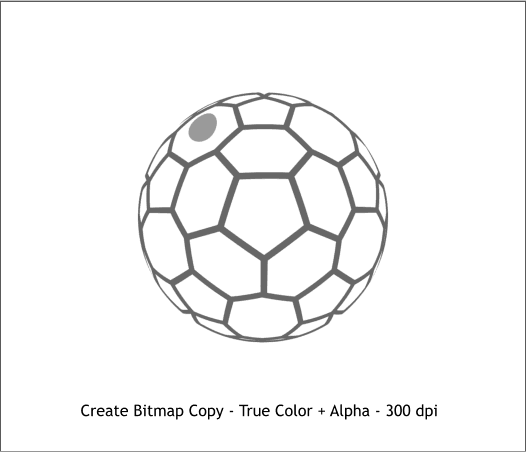
 Select the cloned shapes and from the Arrange menu select Create
Bitmap Copy. Use the default color depth True Color + Alpha. In the
Bitmap Size tabbed selection, select 300dpi. Hold down the Shift key
(to create the bitmap in the exact same place) and press Create.
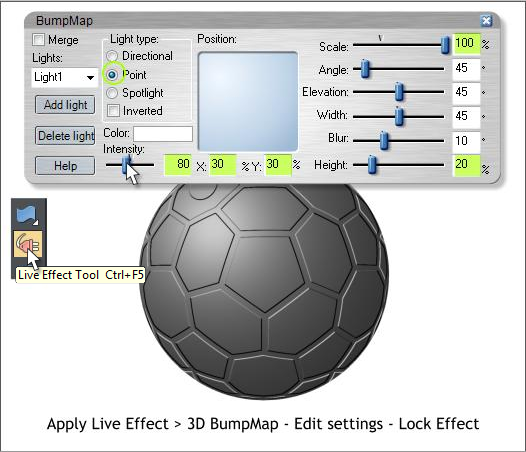
With the bitmap still selected, select the Live Effect Tool (Ctrl F5).
Click New > on the Infobar and select 3D BumpMap from the Add New
Effect drop down list.
Edit the settings as shown above. This adds depth to the bitmap copy.
Click the padlock icon on the Infobar to lock the effect.
Select the cloned shapes and from the Arrange menu select Create
Bitmap Copy. Use the default color depth True Color + Alpha. In the
Bitmap Size tabbed selection, select 300dpi. Hold down the Shift key
(to create the bitmap in the exact same place) and press Create.
With the bitmap still selected, select the Live Effect Tool (Ctrl F5).
Click New > on the Infobar and select 3D BumpMap from the Add New
Effect drop down list.
Edit the settings as shown above. This adds depth to the bitmap copy.
Click the padlock icon on the Infobar to lock the effect.
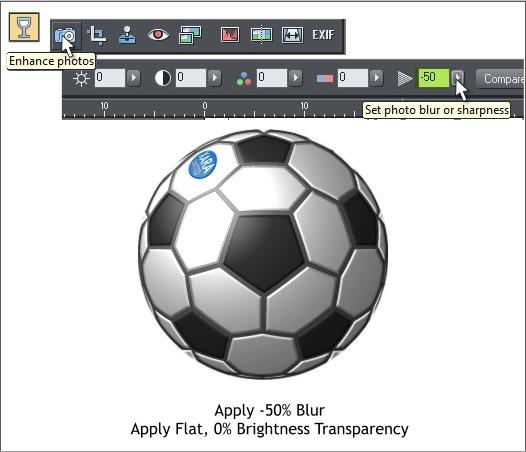
 Switch to the Photo Tool > Enhance Photos mode.
Set the Photo Blur/Sharpness setting to -50 (blur). This softens the
hard edges of the panels.
Finally, with the bitmap selected, switch to the Transparency Tool
(F6). From the Transparency Type drop down list on the Infobar select
Brightness. This applies the bitmap’s light and dark values to the
enveloped objects.
Switch to the Photo Tool > Enhance Photos mode.
Set the Photo Blur/Sharpness setting to -50 (blur). This softens the
hard edges of the panels.
Finally, with the bitmap selected, switch to the Transparency Tool
(F6). From the Transparency Type drop down list on the Infobar select
Brightness. This applies the bitmap’s light and dark values to the
enveloped objects.


