 |
 |
|||||||
| 0 1 2 3 4 5 6 7 8 9 10 11 Download Zipped Tutorial | ||||||||
|
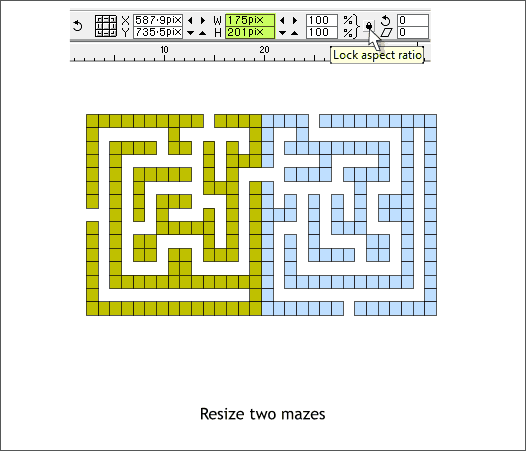
This next step requires a leap in faith but the reason will be made clear soon. Click the tiny black padlock icon (Lock Aspect Ratio) on the Infobar so it is in the up position (disabled). When Lock Aspect Ratio is disabled, objects can be scaled non-proportionally. Select the pale green maze and in the W text entry box enter 175pix and in the H text entry box key in 201pix. Do not get creative, these numbers have to be exact). Press Enter (or Return ) to apply the resizing. Repeat this resizing step to the blue and the purple mazes.
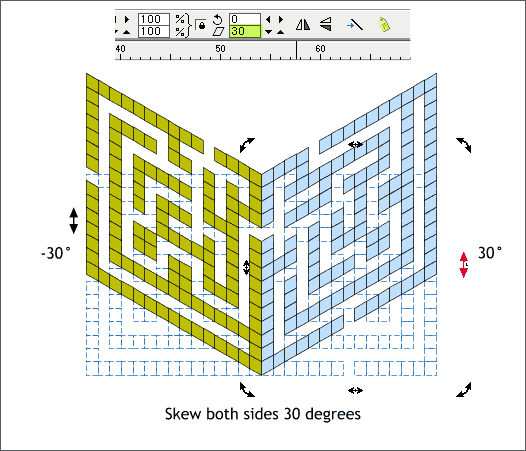
Click twice on the blue maze to enable rotate/skew mode. Place the cursor over the right middle control arrow handle. The cursor changes to a vertical arrow (shown above right in red). Drag this handle upwards until the Skew Angle of Selection amount (on the Infobar shown above) reads 30. Repeat this for the green maze and the purple maze. TIP: If you enter a value in the Skew Angle of Selection text entry box and press Enter the selection will skew side-to-side, not up and down. We need the skewing to be vertical. To do this by dragging the skew arrow control handle is dicey at best. So, right click on the page and select Page Options... In the General tabbed section make sure the Angle Constraint: amount is 15 or 30. (I prefer 15). Press OK or Apply . Hold down the Ctrl key when you drag the skew arrow handle and the skew will be constrained to 15 or 30 degrees. This makes it easier to skew to the exact amount. NOTE: That said. Often the constrained amount will be more like 29.90. This is close enough for government work as they say, and will suit our needs just fine.
|
||||||||
|
|
||||||||

