


 WEBSITE AND WEBSITE GRAPHICS CREATED WITH XARA DESIGNER PRO 6


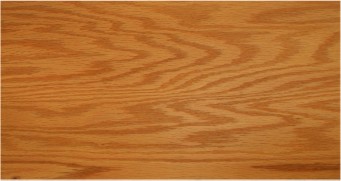
 Find the image of the wood fill
in the index_html_files folder
in the zipped download and
bring it onto the page.
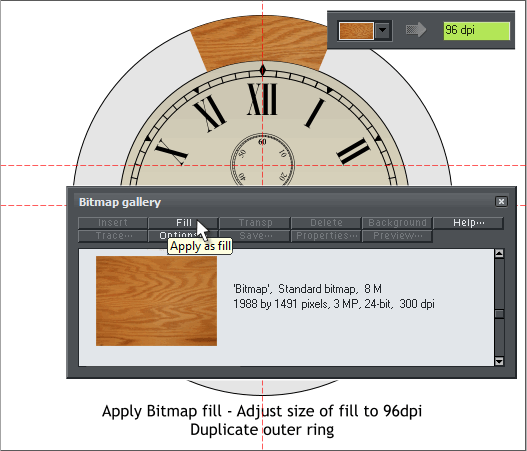
Select the wedge shape above
12 o’clock. Open the Bitmap
Gallery (F11), select the wood bitmap and press Fill. Switch to the Fill
Tool (F5). Click twice on the wedge shape. On the Infobar change the
Bitmap Resolution to 96 dpi.
Find the image of the wood fill
in the index_html_files folder
in the zipped download and
bring it onto the page.
Select the wedge shape above
12 o’clock. Open the Bitmap
Gallery (F11), select the wood bitmap and press Fill. Switch to the Fill
Tool (F5). Click twice on the wedge shape. On the Infobar change the
Bitmap Resolution to 96 dpi.
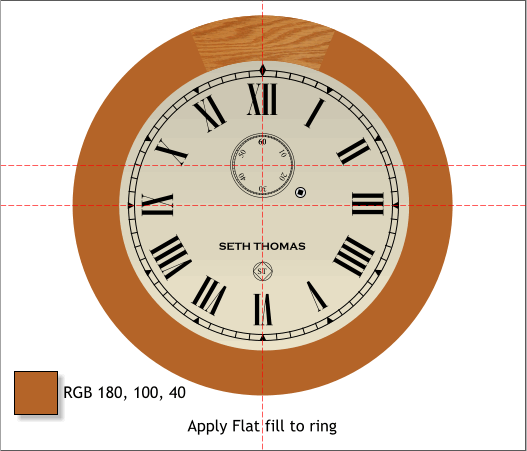
 Apply a flat fill to the O-shape.
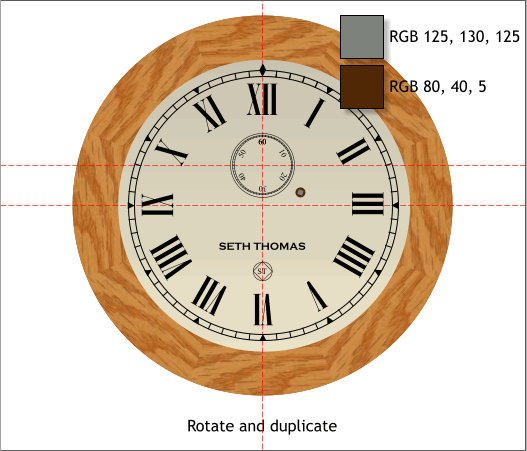 Apply the two flat colors shown to the key hole and metal thing.
(If you know the name of the protrusion the key fits over, let me know).
Duplicate the wedge shape and rotate -45 degrees. Repeat until all 8
sections are in place. Rotate around the intersected guidelines.
TIP: Click twice on the wedge shape to enable rotate/skew mode.
Drag the center of rotation to the cross section of the two
guidelines. Hold down the Ctrl key and drag any of the corner
arrow rotation handles with the RIGHT mouse key. When you
release the mouse key a duplicate shape will be dropped. Repeat.
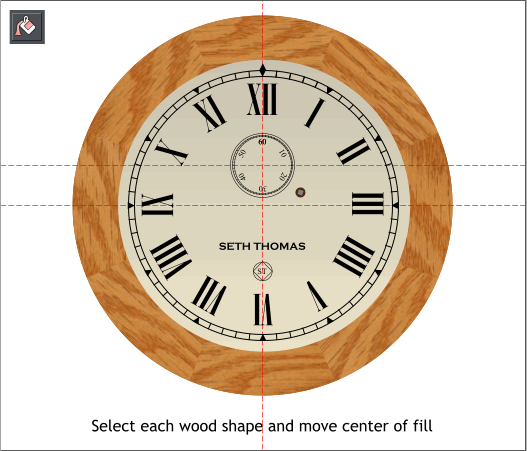
Select the Fill Tool (F5). Click on each wood shape, then click the
center of the fill (where the two fill path arrows meet) and drag the fill
to create a different fills. Repeat this for the other shapes. This makes
the round face appear to be made up of several different pieces of
wood and not just the same piece each time.
H 1 2 3 4 5 6 7 8 9 Download Zipped Tutorial
Tutorial ©2010 Gary W. Priester
Apply the two flat colors shown to the key hole and metal thing.
(If you know the name of the protrusion the key fits over, let me know).
Duplicate the wedge shape and rotate -45 degrees. Repeat until all 8
sections are in place. Rotate around the intersected guidelines.
TIP: Click twice on the wedge shape to enable rotate/skew mode.
Drag the center of rotation to the cross section of the two
guidelines. Hold down the Ctrl key and drag any of the corner
arrow rotation handles with the RIGHT mouse key. When you
release the mouse key a duplicate shape will be dropped. Repeat.
Select the Fill Tool (F5). Click on each wood shape, then click the
center of the fill (where the two fill path arrows meet) and drag the fill
to create a different fills. Repeat this for the other shapes. This makes
the round face appear to be made up of several different pieces of
wood and not just the same piece each time.
H 1 2 3 4 5 6 7 8 9 Download Zipped Tutorial
Tutorial ©2010 Gary W. Priester


