|
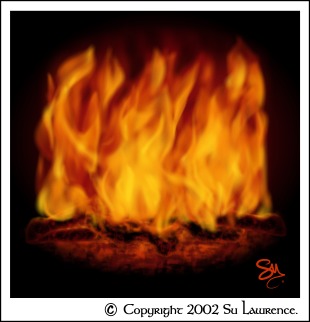
The smaller logs were done with similar settings, but I also added a black linear transparency to
make the end of the log, furthest away from the fire, darker. I only used two log shapes and just moved them around to disguise the sameness of shape. Being a bit lazy there!
You might want to experiment with different colours, feathers and resizes; such as maybe
resizing the black log shape (with the Bark6 transparency) away from the bottom edge to give a bigger glow there. After doing this tutorial, I decided to give the Step 3. log shape a linear fill, with Med Red
on the bottom to accentuate the glow from the 'coals' a bit more. The photo I had as a reference, only gave me an idea of the sort of lighting effects due to it being a totally
different colour, shaped fire and logs, so I had to ad lib this a bit, however I am still hunting around for more suitable photos.
Phew! Well I'm off for a cup of tea, it took quite a while to go through all the steps but
hopefully it won't take so long for you to go through it! If you get stuck anywhere, don't understand something or have other questions or comments feel free to drop me a line.
~ Su Lawrence
© Copyright 2002 Su Lawrence. All rights reserved.
If you have enjoyed this tutorial, or if you have any comments or questions, please use the
form on the next page to send your comments to Su. These tutorials take a lot of time and effort to produce and the only compensation offered is your thanks and comments Ed
|