|
Part One - Colours
 First of all pick your colours. (I was using the 0-255
Colour Unit setting. Click on File menu > Page Options > Units and check 0-255, also set the Page Units to Pixels while you are here). First of all pick your colours. (I was using the 0-255
Colour Unit setting. Click on File menu > Page Options > Units and check 0-255, also set the Page Units to Pixels while you are here).
I looked at the colours from various fire photos and a lot of them are what I call 'off' i.e. they are not all pure
colours that you get in the standard colour bar. Pretty much any photo of flames will do depending on what sort of fire you wish to create as different
things burn with different colours and heat. I think if there is a trick then this is close to it, getting the colour of real flames is half the battle.
Make sure you get the darkest and lightest colours and the brightest red, orange and yellow for the best range. Use the Colour Picker in the colour editor (the eyedropper icon) until you get a
colour you like and save as 'New Named Colour' (see Figure 1.). There's no need to close the Colour Editor, after saving as a named colour, just select the bitmap photo press the ESC key
and then pick another colour.
NOTE: To use the Colour Picker, just drag the eyedropper icon from the
Color Editor over the bitmap. The colour being sampled directly beneath the colour picker is shown in the Current Colour box to the right of the dialog.
 Here are the colours I used (picked from the photo) with the RGB values. Here are the colours I used (picked from the photo) with the RGB values.
Dk Red: 108, 12, 12. Med Red: 161, 7, 13. Red Orange: 202, 47, 5. Dk Orange: 219, 77, 4. Med Orange: 246, 118, 6.
Lt Orange: 255, 141, 3. Yellow Orange: 255, 170, 2. Med Yellow: 255, 208, 23.
I arranged the colours in order in the colour bar to aid in choosing them later. (See Figure 2).
Part two - Background Rectangles
I started off just trying to create the flame effect first which is why the background colours
were in rectangles. (Please note: this was very much a trial and error effort and it is more of a 'how I did this' rather than a definitive tutorial. So you might find that some steps are not
absolutely necessary for the final effect, such as the rectangle below in Step 2. I found having all 3 rectangles gave an added overall glow to the final look, but I expect it will depend on the
amount of flame shapes you draw on top).
I will refer to the colours I used, stated previously, if you have your own picked colours in order
you can simply replace these with your colours in the same order.
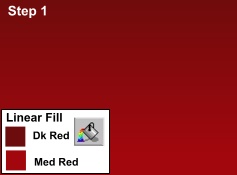 Step 1
. Create a rectangle (237 pixels width x 175 pixels height to give an idea of the scale I used and so match with feathers/fills etc. used). Give this a linear fill with Med Red
at the bottom, indicating more heat there, and Dk Red at the top. Step 1
. Create a rectangle (237 pixels width x 175 pixels height to give an idea of the scale I used and so match with feathers/fills etc. used). Give this a linear fill with Med Red
at the bottom, indicating more heat there, and Dk Red at the top.
|

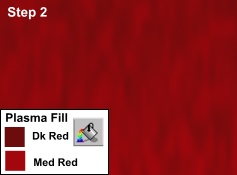
 Step 2. Clone (CTRL K) the rectangle and apply a fractal plasma fill keeping the same colours. The values used were: Repeating, Fade.
47 dpi, fractal scale 30.
Step 2. Clone (CTRL K) the rectangle and apply a fractal plasma fill keeping the same colours. The values used were: Repeating, Fade.
47 dpi, fractal scale 30.
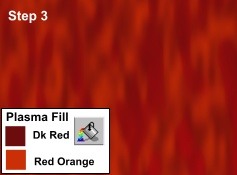 Step 3
. Clone this rectangle and simply replace the Med Red colour with Red Orange. I adjusted the transparency Profile to: top box -0.1, bottom box -0.7, again to give more definition.
Step 3
. Clone this rectangle and simply replace the Med Red colour with Red Orange. I adjusted the transparency Profile to: top box -0.1, bottom box -0.7, again to give more definition.