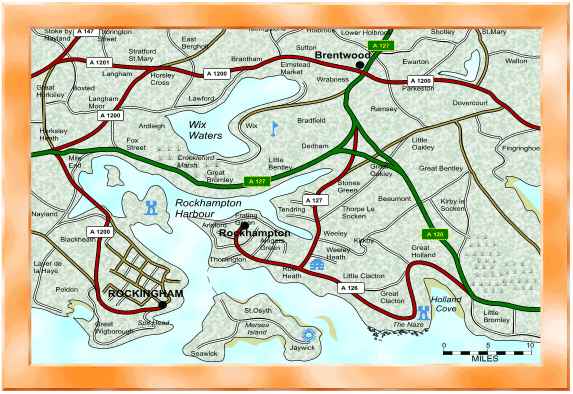
Above is the original raster image we will produce our vector image from. (Of course it's only a bitmap of the final Xara drawing but for copyright reasons I can't use a real scanned map.
But for the sake of this tutorial it will suffice.)It is a 85 Kb jpg at 615 x 421 pixels. As a matter of interest the .swf file which is used in the the final movie is 45 Kb.
You can download the bitmap above by just right clicking over the image in this browser, and select "save image as". LET'S GET STARTED. Open Xara and import the bitmap from the file in which you saved it.
Any new Xara file only has one default foreground layer, so Xara will import the bitmap into this layer, called "layer 1" by default.
Open the layers gallery (the "stacked page" icon) and rename this layer (via the properties button) "BITMAP". Check the VISIBLE column and uncheck the EDITABLE column (this
ensures you won't accidentally move the bitmap later). Whilst the layers gallery is open add another layer (via the new button). Rename this layer "10SEA". 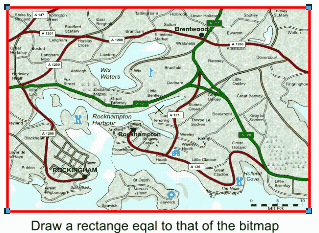 I'll explain why I number the layers later. I'll explain why I number the layers later.
Now in layer 10SEA draw a rectangle on top of and equal in size to that of the imported bitmap.
Set the FILL colour to a very pale blue and the LINE colour to none.
TIP: You can open the colour editor and use the COLOUR PICKER to select the required colour for the sea from the bitmap.
Return to the layers gallery and set the layer 10SEA to not visible, not editable. Create a new layer called COAST.In the COAST layer select the freehand tool and set the freehand smoothing slider (top left)
to between 10 to 20 %. Set the line colour to Magenta (purple) and line width to .25 or .5 pt. Zoom into a part of the coast that you wish to commence drawing and follow the coastline
as closely as possible. In this case were not going to be navigating a super tanker using the map so it doesn't have to be exact! 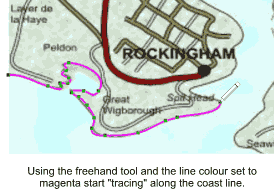
You may have to zoom in and out a few times or use the push tool (hand icon) to complete the whole coast line.
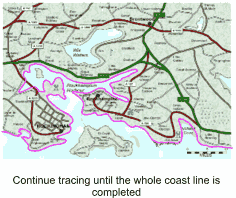 Having completed following the coastline along its length, switch to the shape editor tool (wiggly line icon) and draw lines inland to the top of the bitmap, then along it's top margin, then down to the start point.
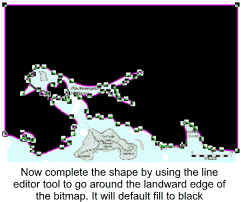 The line now turn's into a filled shape. (default FILL black). Make the fill NO COLOUR. You can now see the underlying bitmap again. The line now turn's into a filled shape. (default FILL black). Make the fill NO COLOUR. You can now see the underlying bitmap again.
 Save your work! You'll be a lot of tracing so get into the habit of saving regularly as there's nothing more frustrating than having to retrace an object twice! Save your work! You'll be a lot of tracing so get into the habit of saving regularly as there's nothing more frustrating than having to retrace an object twice!
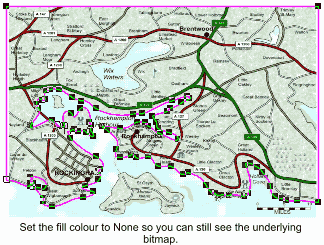
Next you need to "trace" the outlines of the islands. Make these the same MAGENTA line colour and NO COLOUR fill. When you've completed this, select all and group.
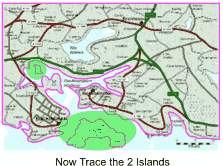 There's an inlet on the right hand side. Trace this but ensure the line extends right, over the bitmap extremities.
|