 |
 |
 |
 |
 |
 |
 |
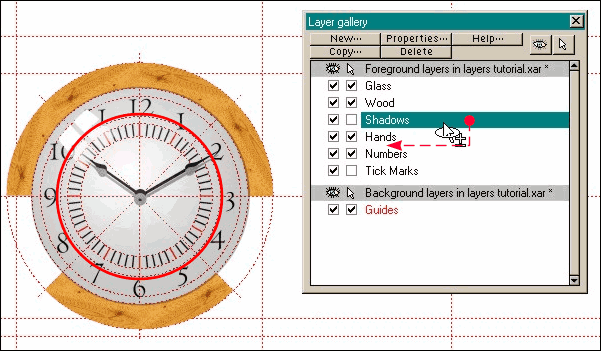
Here is most of the clock. I added the Shadows layer after the Hands layer so the shadow for the hands is currently over the hands and not under them where shadows are supposed to be. Selecting the Shadows
layer (click the text--in this case Shadows--to select a layer) and dragging it under the Hands layer, automatically places the shadows under the hands. What could be easier, I ask you.
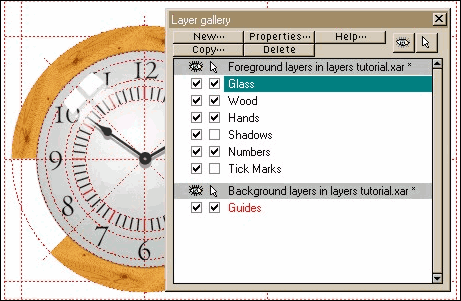 Placing all those tick marks was a real
project. Now that I've got them where I want them, I don't want those guys getting moved or deleted because that would really tick me off! So I unchecked the Edit Layer box (the arrow icon). I did the same for the
Shadows layer.
Placing all those tick marks was a real
project. Now that I've got them where I want them, I don't want those guys getting moved or deleted because that would really tick me off! So I unchecked the Edit Layer box (the arrow icon). I did the same for the
Shadows layer.
Making the various layers visible and invisible, individually or in groups, makes it easier to concentrate on one section at a time.
That's just about all you need to know about layers. But because I have a little more space left on the page here are a few more tips. You can Cut, or Copy items from one layer, select another layer, and Paste
the objects to the selected layer. You can copy the entire contents of a layer by pressing the Copy button. You'll be promoted to enter a name for the new layer.
When you're finished with your drawing you can leave everything in layers, or if you prefer you can copy and paste all the elements onto one layer and delete the empty
layers. I wouldn't recommend this however after it took so long to get everything organized! Un-checking the Guides Visible check
box (the eye icon) shows my image with out the distraction of the guides.
Un-checking the Guides Visible check
box (the eye icon) shows my image with out the distraction of the guides.