 |
 |
 |
 |
 |
 |
 |
New Users Guide Layers
In reality, every object in Xara, or any other vector software application, is on its own layer. You can bring objects in front of, or behind other objects, which is in essence moving them between layers.
So if we can do all this, why bother learning about, or using the Layers Gallery? Well if you've ever created a complex drawing and then wished there was a way to
only work on one portion without seeing or disturbing other portions of the drawing, you have your reason. So let's see how this Layer Gallery works.![]() Xara's Layers Gallery (located on the Infobar in Gallery Row) is one of Xara's
best features that your editor (still me) forgets about until it's too late. (Your editor also forgets the keyboard shortcut for the Layers Gallery which is F10)
Xara's Layers Gallery (located on the Infobar in Gallery Row) is one of Xara's
best features that your editor (still me) forgets about until it's too late. (Your editor also forgets the keyboard shortcut for the Layers Gallery which is F10)
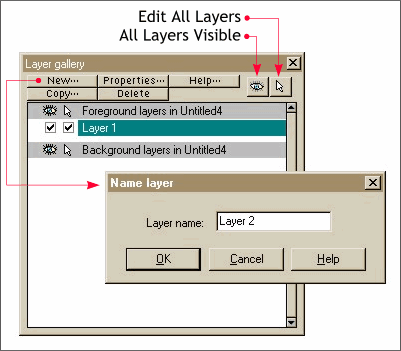
To the left of Layer 1 are two check boxes. The first check box is below the eye icon and makes the selected layer visible and invisible.
The second box enables, and disables the ability of objects on a layer to be edited. When un-checked all objects on the layer are locked in place. Adding a New Layer is as easy as clicking New
and naming the layer. When you click OK a new layer is added and becomes the currently selected layer. When you first open the
Layers Gallery you see one layer, Layer 1, Xara's default layer.
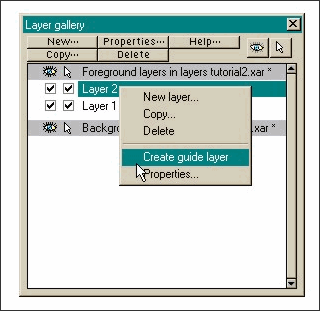
To add a Guideline layer, right click in the white portion of the window and
select Create Guide Layer. One of the first layers you should add is a Guide Layer. Everything you place on this layer becomes a red dotted outline (or a color of your choice in the Properties dialog). Use this layer to
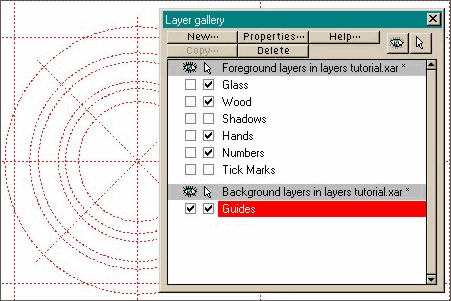
add all your guidelines and working drawing shapes and then toggle the layer on and off by selecting and deselecting the check box under the eye icon.
The other elements are all there, you just can't see them. Here is a complete set of layers for a
clock face illustration. All layers have been made invisible except the guide layer.
Layer Review Continued on the Next Page