
Xara Modules Tutorial
|
|||||
|
Xara Modules Tutorial |
|||||
|
|
||||||||||||||||||||||||||||||||
|
I selected Photo Effects > Book Flip > Create New. TIP: You can preview any of the modules by selecting the Preview option. |
|
Step 5 Click Add New Image. In the Status Message: text entry box you can enter text that will appear in the visitor's Browser status line. You can also enter an URL if you would like the effect to link to a different page than the default Xara Modules, or you can leave this blank and there will be no link.
|
|
Repeat until you have loaded all the images you want to use. Press Get Files and Xara Modules will upload the files to their site. NOTE: You can only upload 6 images at a time. If you need more images, just upload a second set, and more sets if necessary. |
|
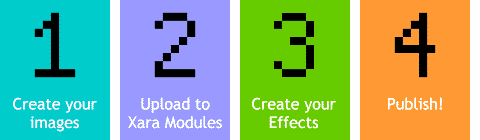 Step 1 Create your images and export
them as either GIF, PNG or JPEG to a folder on your computer.
Step 1 Create your images and export
them as either GIF, PNG or JPEG to a folder on your computer.
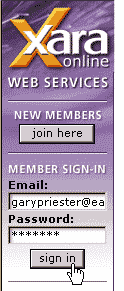 Step 2 Log on to the
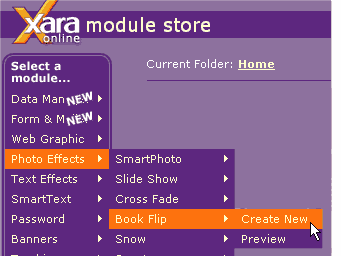 Step 4 Select an effect from the Select a Module menu.

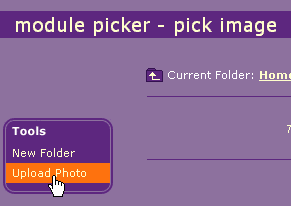 Step 6 Press Upload Photo. This
takes you to a page from which you can browse your hard drive and select up to six images to upload.
Step 6 Press Upload Photo. This
takes you to a page from which you can browse your hard drive and select up to six images to upload.
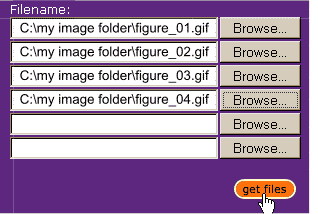 Step 7 Press the Browse...
button and locate your first file.
Step 7 Press the Browse...
button and locate your first file.