
Xara X. The Bevel Tool (Continued)
|
|||||
|
Xara X. The Bevel Tool (Continued) |
|||||
|
|
||||||||||||||||||||||||||||||||||||||
|
The first two icons place the bevel on the Outside or the Inside. Pressing these icons is a good way to reverse the bevel direction. The next three icons effect the way the bevel is treated when line sections join one another. Miter Join: creates an angled join where the line segments come together. Round Join: creates a rounded join. Bevel Join: creates a blunt join. You can see the effect of these three join types quite clearly at this size. When applied to smaller bevels it is harder to tell the difference. |
|
In each example the far right image has the maximum amount of bevel applied. TIP: To achieve the maximum inside bevel for any object, drag the red control handle all the way to the center. You will see the outline of the selected object, or objects, shrink in size and eventually disappear when you reach the center. |
|
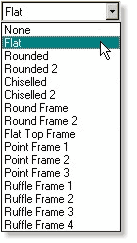 Shown here are the 15 bevel types found in the Bevel
Type drop down list on the Infobar. This list is only available when the Bevel Tool is selected and a bevel has been applied to a selected object.
Shown here are the 15 bevel types found in the Bevel
Type drop down list on the Infobar. This list is only available when the Bevel Tool is selected and a bevel has been applied to a selected object.
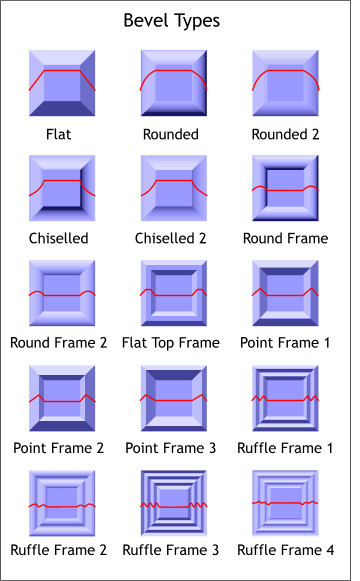 And here are the 15 bevel types.
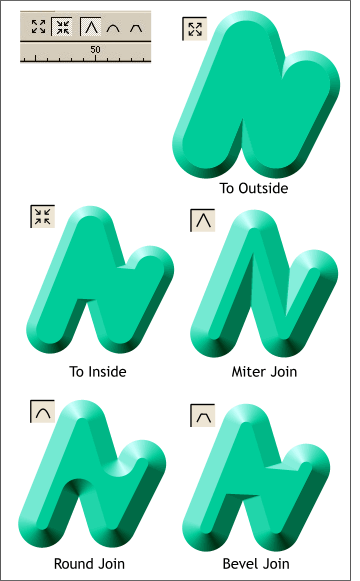 There are five bevel modifier icons on the Infobar that
affect the bevel.
There are five bevel modifier icons on the Infobar that
affect the bevel.
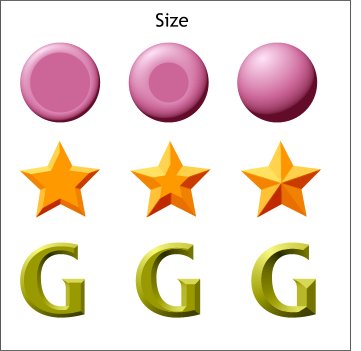 Increasing the size of the bevel changes the overall
look of the bevel.
Increasing the size of the bevel changes the overall
look of the bevel.