 |
 |
 |
 |
 |
 |
 |
Creating an Image Swap Continued
Click the Frames tab (shown below). Press the
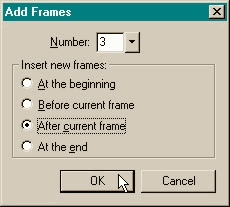
small triangle/arrow button on the top right and select Add Frames. Change the Number to 3 and leave After Current Frame checked. Press OK. This has been pretty easy, don't you think? Next we will add three additional frames. The rollover effect will automatically take over Frame 2. We will use Frames 3 and 4 for our swap images.
You should see nothing on this layer or frame. Everything should be blank, unless the Web Layer
is visible, in which case make it invisible. Using the Text Tool, key in a capital A. I have used Adobe's Critter font available from Center the two (Modify > Align). Copy them to the clipboard (Ctrl C). Select Frame 4 from the frames drop down list.
Paste (Ctrl V) the text and symbol into Frame 4. Change the symbol to a B (a bear symbol in Critter). Change the text to read B is for BEAR. Select both the symbol and the text (hold down the
Shift key when you click to multiple select). From the Insert pull down menu, select Slice. This designates the swap area which will be made visible when the mouse passes over the target image. Select the Layers
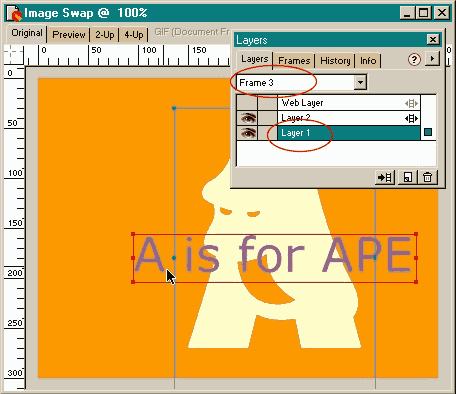
tabbed section and click on the title Layer 1 to select it. From the Frames drop down list, select Frame 3.
OK. Let's review for a moment. We have created two buttons with mouse over effects, and we have just now created two separate swap images that will be
activated when the mouse passes over the trigger images (the A and the B buttons). Our final step is to associate the triggers with the swap images. Set the layer to Layer 1 and the frame to Frame 1
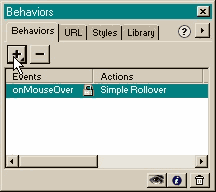
. Select the A. Click the + button to add an event. From the fly out menu, select Swap Image. Open the Behaviors menu, (Window > Behaviors).
You'll notice that the Events and Actions so far for the A are onMouseOver and Simple Rollover.
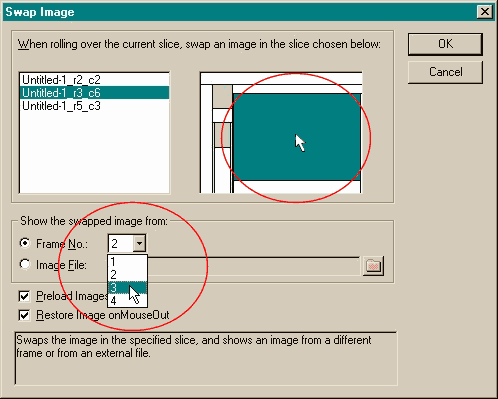
We need to specify two things, the slice to be activated and the frame upon which the image resides. Click the large rectangle (the slice area for the text and symbol), and select frame 3
from the drop down list which contains the ape and text. Press OK to apply the changes. Select the B in the main work area and repeat the last steps. In the Swap Image
dialog, select the large green rectangle again to designate the swap area, and then select Layer 4 for the swap image. Press OK. The Swap Image dialog
will open as shown on the left.
NOTE : Because the swap images were both the same size, one slice will work for both. If you have different-sized swap images, you will need to add a separate slice for each swap image.