 |
 |
 |
 |
 |
 |
 |
Creating an Image Swap Continued
Drag the A to the position shown.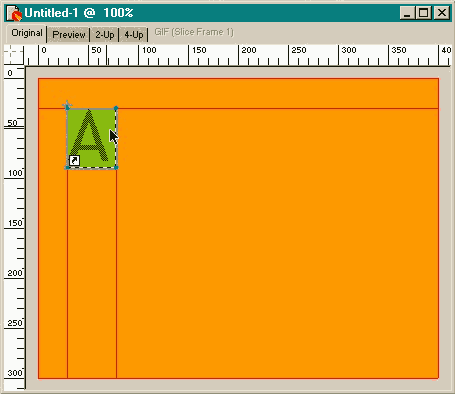 We're back in the
main window. You'll notice the A is enclosed in a green rectangle and there are some red lines. The green rectangle designates a slice and the red lines represent the image slice sections that will be created when
we are finished.
We're back in the
main window. You'll notice the A is enclosed in a green rectangle and there are some red lines. The green rectangle designates a slice and the red lines represent the image slice sections that will be created when
we are finished.
 Drag and drop a duplicate A
directly below the original A.
Drag and drop a duplicate A
directly below the original A.
NOTE: To drag and drop in Fireworks , drag then press the Alt key to drop the duplicate.
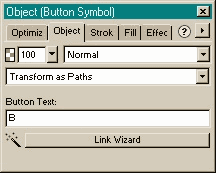
In the Object tabbed section change the A to a B in the Button Text
entry window and press Enter. A dialog will appear asking if you want the change to apply to all or current instances. Select Current. (The All option changes the original text as well).
To test where we are so far, click the eye symbol next to the Web Layer to make this layer invisible. Next press the Preview tab. Fireworks does some
quick calculations and in a moment or two you can test the effect of your rollovers. This is a good place to take an eye break, and to name and save your file, raid the
fridge, walk the dog, check your e-mail, etc. I'll be waiting for you on the next page.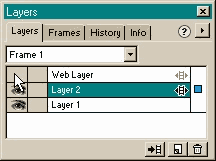 Notice that a new layer, Layer 2
, has been added which contains both button states.
Notice that a new layer, Layer 2
, has been added which contains both button states.