|
|
|
In this mini-tutorial we'll create a stylish holiday tree. If you are so disposed you can call it a Christmas tree. I'll leave that up to you. We'll use a blend of two ellipses and a custom brush.
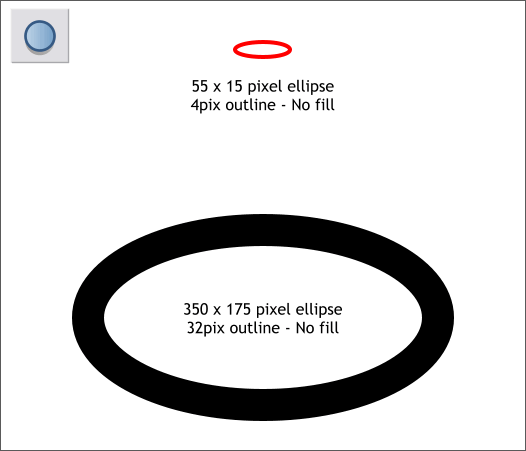
Draw two ellipses with the Ellipse Tool (L) to the sizes shown. Size is not critical so just make the ellipses about the same size unless you are a perfectionist and have to do everything by the book. Change the outline widths as shown and set the fills to none. I have changed the top ellipse to red to make it easier for you to see the next steps. You may or may not do this. It is entirely up to you. I don't care one way or the other.
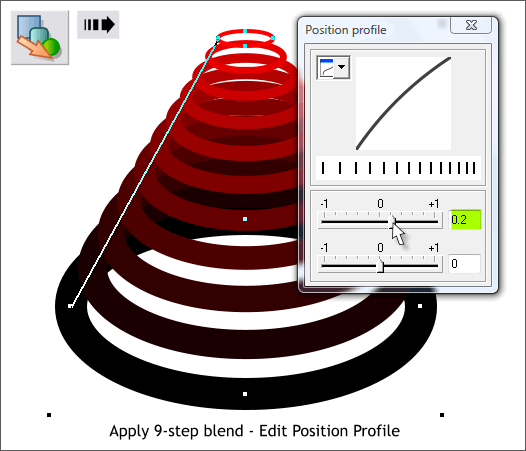
Select the Blend Tool (F7 or W). Drag from the larger ellipse to the smaller ellipse. Press the Position Profile arrow on the Infobar to open the Position Profile dialog. Move the top slider a short distance to the right to about 0.2. This visually evens the spacing between the ellipses.
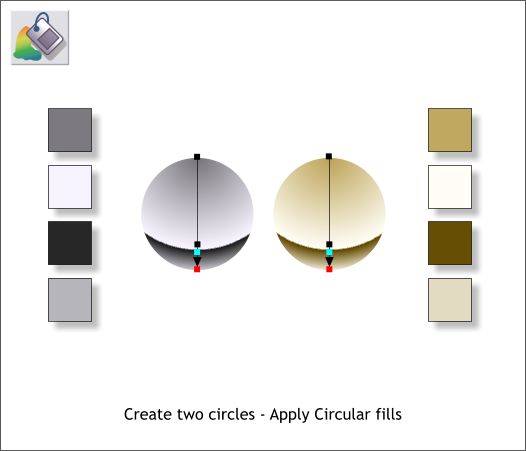
Create two circles and apply two Circular fills with the Fill Tool (F5). Drag the center of the fill to the top of each circle and drag the fill path arrow to the bottom of the circle. Add two new color control points toward the bottom and place the two points close together. Use the colors shown. As a good exercise, try to match the colors in the Color Editor (Ctrl e) in the HSV Color Model. As a clue, the silvers are very unsaturated variations of Hue 260. The gold colors are variations of Hue 45. TIP: You can move the control points on the fill path arrow with the arrow keys on your keyboard. For a vertical fill use the up and down arrow keys. Hold down the Alt key and press the arrow keys to move the control points by smaller increments. For a horizontal fill path, use the left and right arrow keys.
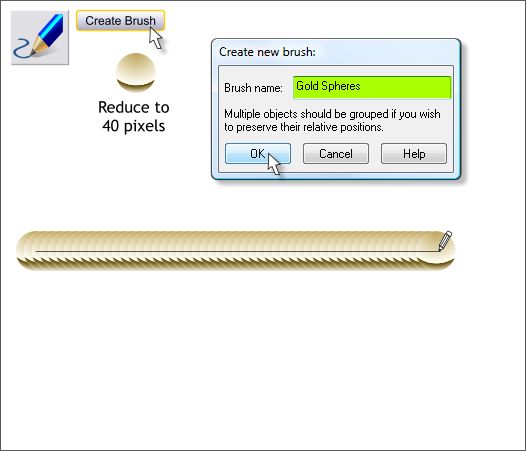
Select the gold circle and reduce the size to about 40 pixels. Switch to the Freehand and Brush Tool (F3 or n). Press Create Brush, name your brush and press OK. Drag out a line with the Freehand and Brush Tool. Go ahead and play around with this brush for a while. Sign your name, for example, or draw squiggly shapes, have fun. We'll wait for you.
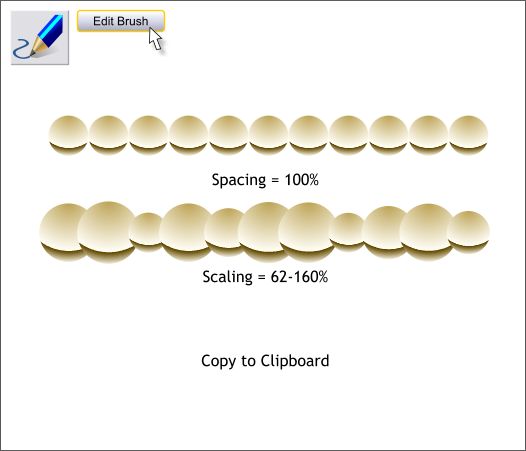
Click Edit Brush. In the Spacing tabbed section, increase the spacing to about 100%. In the Scaling tabbed section, change the Scaling slider setting to about 62-160% . These are approximate settings and unless you are one of those perfectionists, you can eyeball it. Copy the modified brush to the clipboard (Ctrl c).
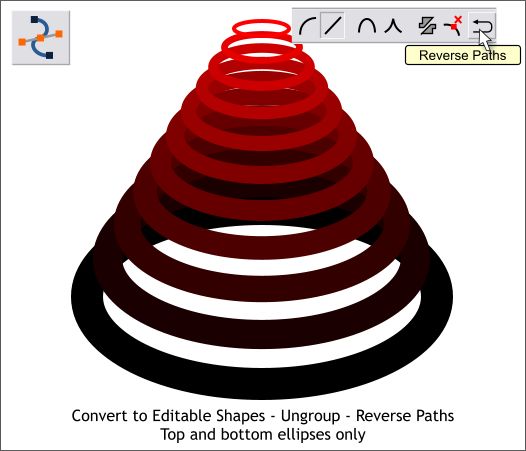
Select the blended ellipses. From the Arrange menu select Convert to Editable Shapes and then Arrange > Ungroup or Ctrl u. For reasons best known to programmers, when you create a blend, the paths for the first and last items are the reverse of the blend step paths. We need all these paths to be traveling in the same direction. So, select the first and last ellipses, switch to the Shape Editor Tool, and press Reverse Paths icon on the Infobar. There will be no sign of this change.
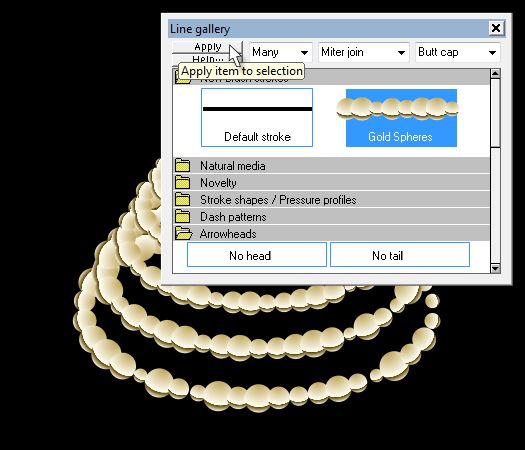
Ah, your editor (that's me) has messed up royally. Not a problem. Select the gold brush stroked line again with the Freehand and Brush Tool. Click Edit Brush. In the Edit Brush dialog, press Save . Close the edit brush dialog. This saves the changes you made to the brush. Ahem. Now select the blended ellipses. Open the Line Gallery (F12) then open the New Brush Strokes folder. (When I mess up, I really mess up! It's the folder under the useless tool tip). Press Apply . With any luck, the gold balls will be applied to the ellipses, and if you remembered to reverse the paths as I asked you to, all of the ellipses will have the balls in the same orientation. If you were recalcitrant and omitted this step thinking it to be superfluous, you will now see the error of your ways. Each brush stroke should automatically get smaller as the width of the ellipses get smaller.
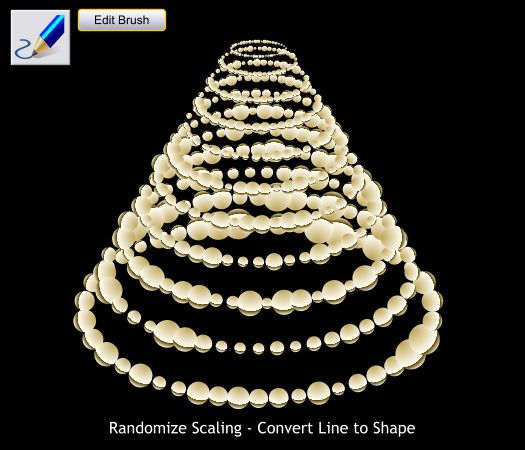
One at a time, select the rings with the Freehand and Brush Tool. In the Edit Brush dialog, increase the Randomize slider a bit and press the Randomize button to randomize the scaling so each ring appears different. With all the rings selected, Arrange > Convert Line to Shape. The brush is now individual vector shapes and can no longer be edited as a brush.
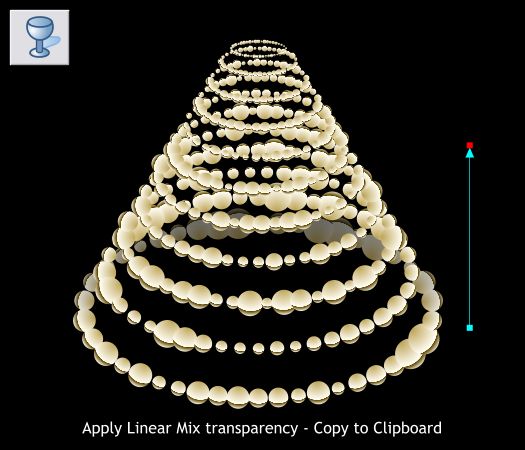
Select the bottom ring with the Transparency Tool (F6). Click in the center of the bottom ring (I have started to the right to make it easier to see), and drag upwards and past the top of the bottom ring. Copy this ring to the clipboard (Ctrl c or Edit > Copy).
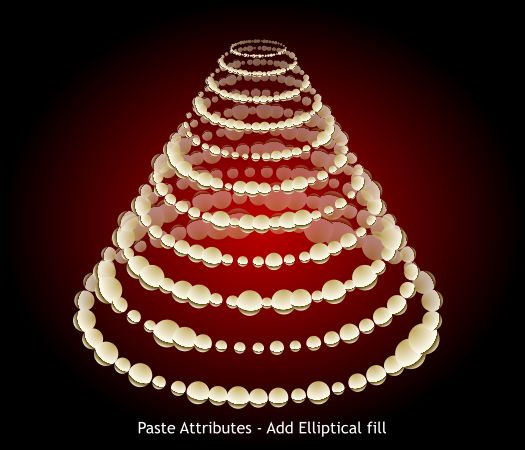
Select all the rings and Edit > Paste Attributes or press Shift Ctrl a. Add a rectangle behind the tree shape and apply an Elliptical fill with the Fill Tool (F5). My fill is black and red. You can use any colors you want unless you prefer for me to tell you exactly which colors to use in which case use black and red. You are probably wondering why I had you go to all the trouble of creating a silver ball when our tree is made up entirely of gold balls. Wonder no more.
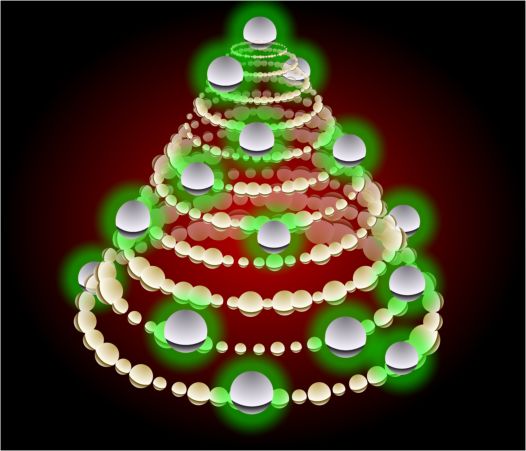
Make duplicates of the silver balls, scale them in different sizes and arrange them on the tree as shown. As the pièce de résistance, select all the silver balls, switch to the Shadow Tool (Ctrl F2), and apply a Glow Shadow. To expand the glow drag any of the glow areas outwards a bit. To change the color, however you have to drag and drop a glow color from the screen palette onto the fill for each of the silver spheres. So you will need to drag and drop the colors onto each of the glows.
|
||||||
|
|


