|
|
|
For the final mini-tutorial we'll create a repeating copper coil brush. It's fun. And it's easy. Did I already say that?
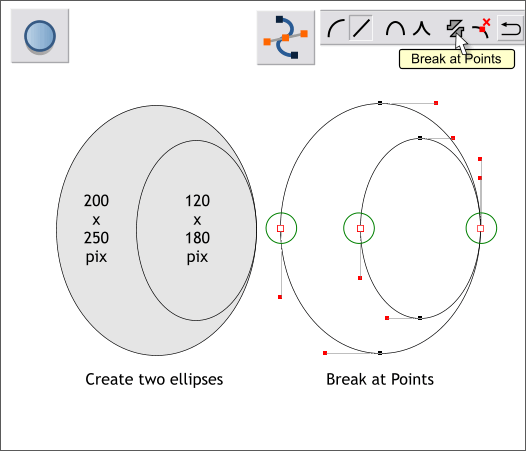
Create two ellipses to the sizes shown. Left center align the ellipses. With both ellipses selected, from the Arrange menu, select Convert to Editable Shapes. Switch to the Shape Editor Tool (F4). Drag a selection rectangle around the center control points to select them. On the Infobar, click the Break at Points icon. As you might expect, this breaks the lines apart.
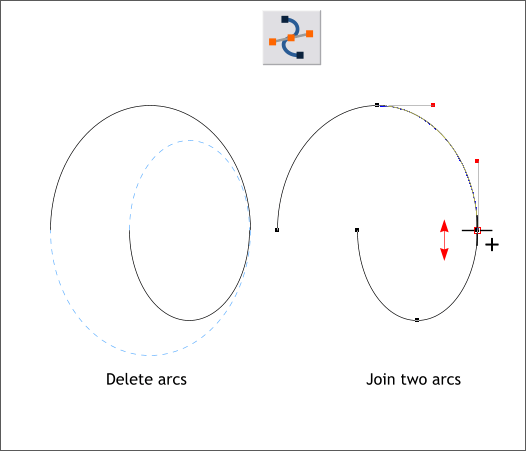
Delete the arcs shown above left in blue dashed lines. Select both arcs then select the Shape Editor Tool. Place the cursor over the area where the two arcs come together. When the cursor is over the point where the two arcs meet it will change to a cross hair and a 4 sided arrow. Drag down and then back. The cursor will change to a + to indicate the two arcs are now joined.
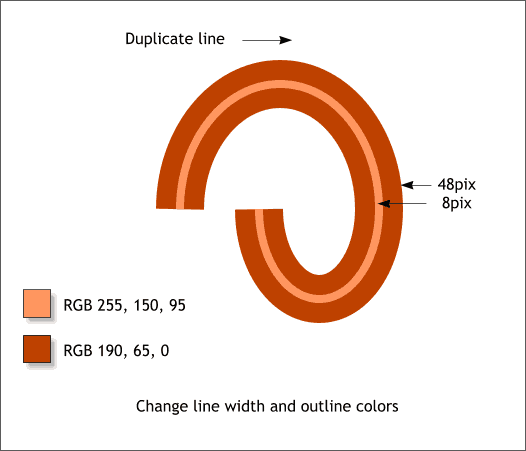
Change the line Width to 48pix and change the line color to the deep orange RGB color shown. Clone the line, change the outline color to the pale orange color and change the Width to 8pix.
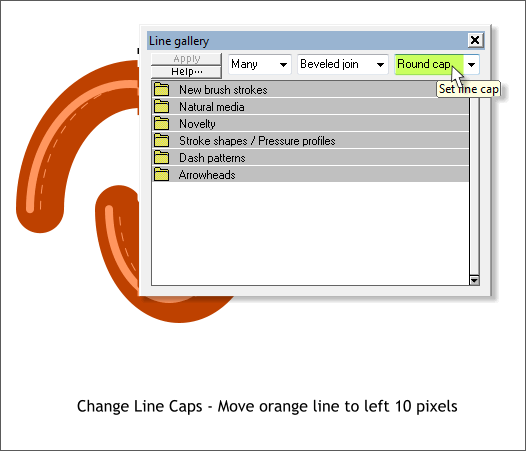
Select both lines (hold down the Shift key and click on each line to multiple select). Open the Line Gallery (F12). From the Set Line Cap drop down list select Round Cap. Close the Line Gallery. Select the thinner line and nudge it about 10 pixels to the left.
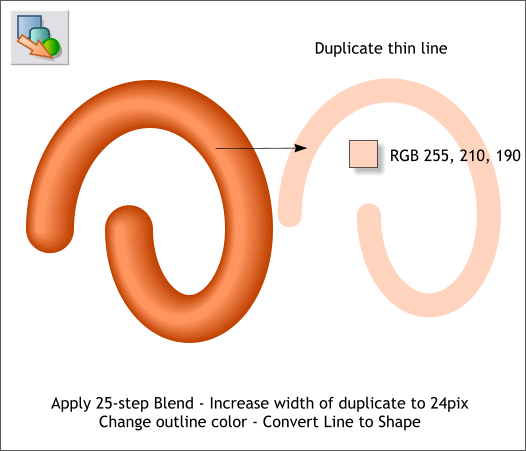
Duplicate the thinner line (Ctrl d), increase the line Width to 24pix and change the out line color to pale orange. Select the line. From the Arrange menu, select Convert Line to Shape. Select the Blend Tool (F7 or W). Click on the larger line and drag to the thinner line to create a blend. On the Infobar, change the Number of Blend Steps to 25 and press Enter to apply the change.
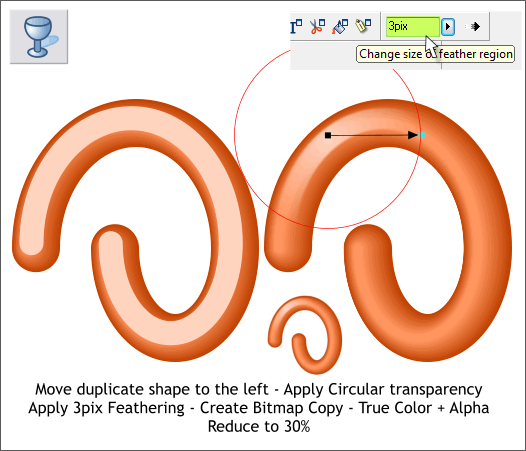
Position the light orange shape over the blend as shown on the left. It is slightly left of center. Select the Transparency Tool (F6). From the Transparency Shapes drop down list on the left side of the Infobar, select Circular. Drag the center of the transparency up and to the left as shown and drag the outer control handle at the end of the fill path arrow towards the center a small distance. Apply 3pix of feathering to soften the highlight using the Feathering slider. Select the blend and the highlight shape and Arrange > Create Bitmap Copy.... Leave all the settings as they are and press Create. Reduce the size of the bitmap to 30%. We will work with the bitmap so you can delete or move the other objects to one side.
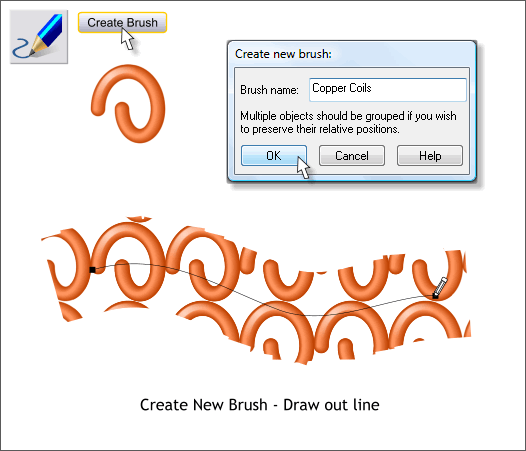
Select the bitmap, then select the Freehand and Brush Tool (F3 or N). Press Create Brush, name your brush, and press OK. Draw a line with your new brush. Sheesh, that doesn't look right! Not to worry, we'll fix that next.
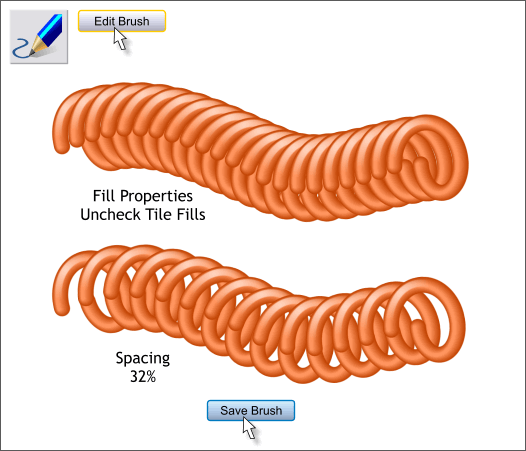
Click Edit Brush on the Freehand and Brush Tool Infobar and make these changes. In the Fill Properties tabbed section, remove the check from the Tile Fills check box. Now that looks better! In the Spacing tabbed section, key in 32 in the Spacing: text entry box and press Enter. Press Save Brush. This places a copy of the new brush in the Line Gallery > New Brush Strokes folder. You can apply this brush from that folder but only if the brush exists in the XAR file. TIP: You can store your custom brushes (saved as a XAR document) in the C: Program Files > Xara > Xtreme 4.0 > Templates > Default Templates > Brushes. This will make your brushes permanently available in the Line Gallery > New brush Strokes folder. You can have as many brushes as you wish in one XAR document. All will show up.
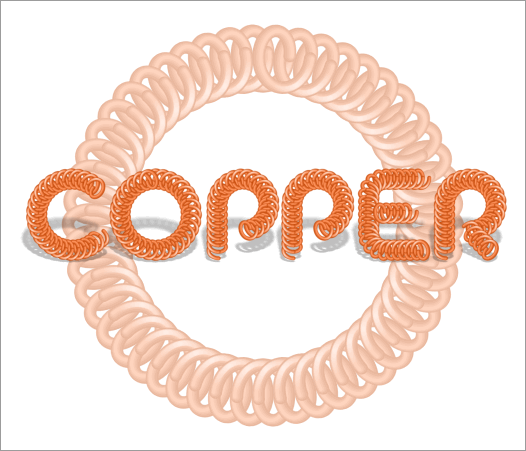
And here is today's Copper Coil Brush Serving Suggestion (serving suggestions are those tasty, mouth watering food photos that you see on food packages. The small print says "Serving Suggestion" because the red ripe strawberries, and small perfect blueberries with a splash of cream are not really included in that box of corn flakes—I say serving suggestion because I don't include the steps—you have to figure those out for yourself). I applied the brush to a circle. A white rectangle placed in front of the circle and with Flat, 40% Mix transparency ghosts the circular image back. I also created the letters COPPER as lines to which I applied the brush stroke. The outline Width was reduced to 24pix. And that's it. Fun. And easy. Did I already say that? Any questions? Comments? Suggestions? Use the e-mail link below to forward your thought to me. This is not optional, by the way. It is mandatory and I WILL know if you read through the Workbook without sending me your comments. I can do that. I'm a doctor. Or at least I play one whenever I can find a young lady. But we'll save that story for another day. Gary W. Priester
|
||||||
|
|
