|
|
|
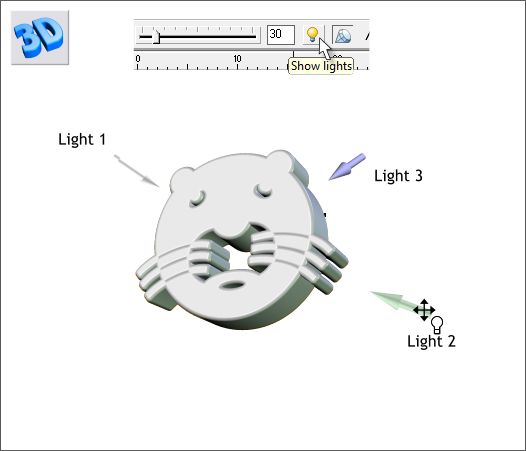
The new Extrude Tool (e) has many cool capabilities including Lighting, which we will cover here. All Extrusions have three light sources which can be edited in several ways. When you click the Show Lights yellow light bulb icon on the Extrude Tool Infobar, three 3D arrows appear, these represent the three light sources. By default they are white, pale purple and pale green. These colors as well as the position of the light sources can all be edited as you shall see.
Each of the three lights has a corresponding number.
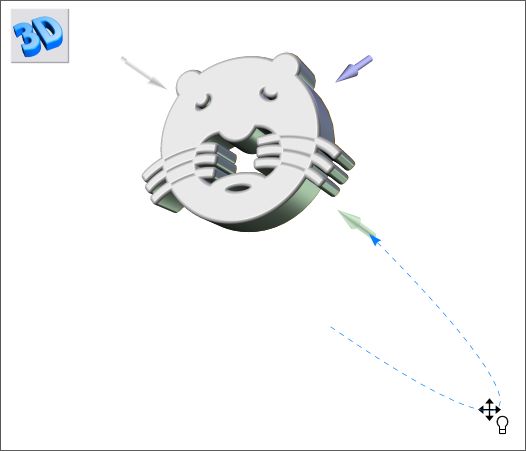
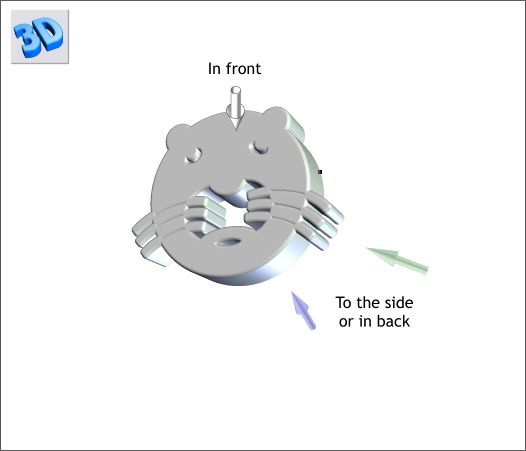
You can drag any or all of the three light sources to change the placement of the light. The lights rotate around the extruded object in an orbit. In the above example I dragged the pale green light down and to the right causing it to go slightly to the rear of the extruded shape. The green light now appears on the edge of the shape.
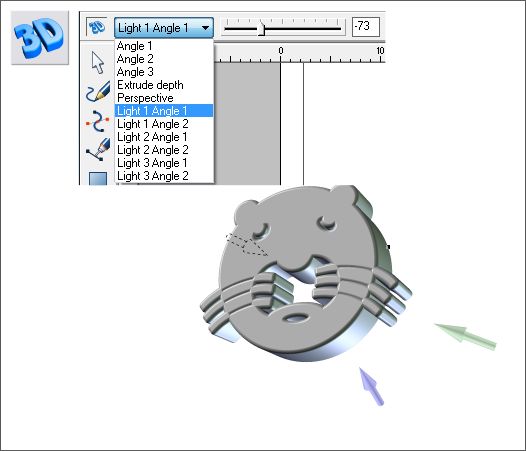
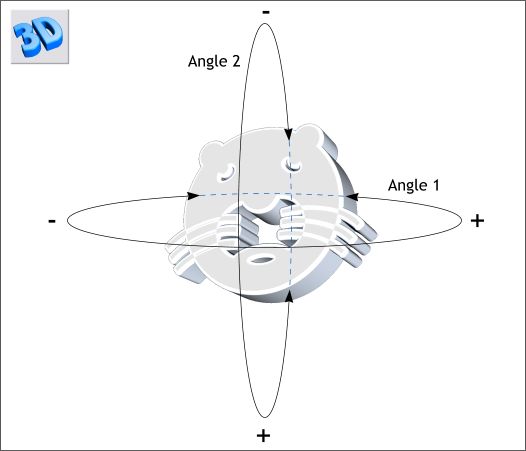
You can sometimes drag a light behind the object in which case the light arrow is no longer visible. This can be very frustrating. But, fortunately you can also rotate the light sources with a slider. The light source sliders are accessed via the Extrusion Parameter drop down list. Each light source has two settings. Each orbit is at a right angle to the other. So if you loose a light source, or if you prefer to do this manually, you can use the sliders.
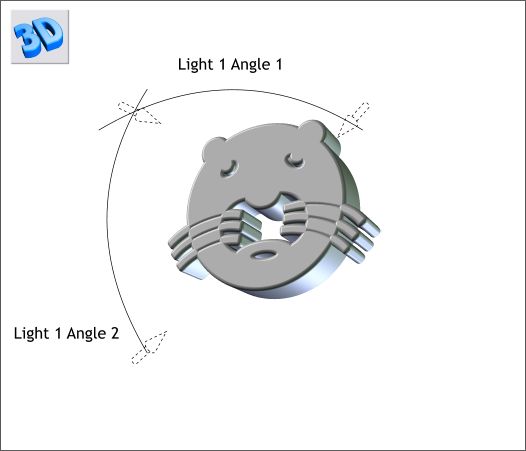
This shows the two orbits for Light 1. These orbits apply to the last position of the light source. If you drag the light to a new position, then the orbits change as well. Experiment and you will see what I mean.
The 3D nature of the light source arrows provides an idea of whether the light is in front, to the side, or in back of the object.
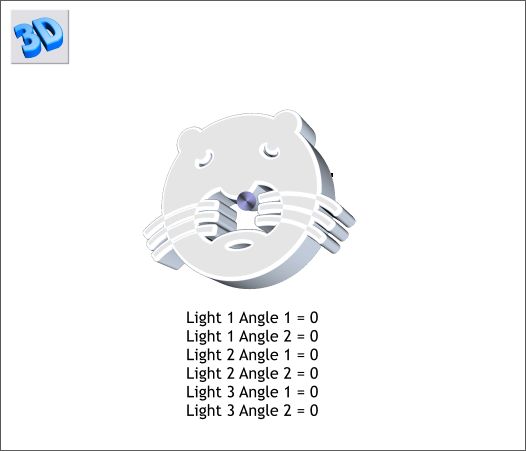
The origin point for each light source is in the center of the extruded shape. If you set all 6 settings to 0 all three light sources will be directly in the center of the object and overlapping which creates a lot of light and washes out the object.
If you use the Light Angle sliders positive numbers go to the right on the horizontal orbits and downwards on the vertical orbits. Negative numbers rotate the light in the opposite direction. Makes sense.
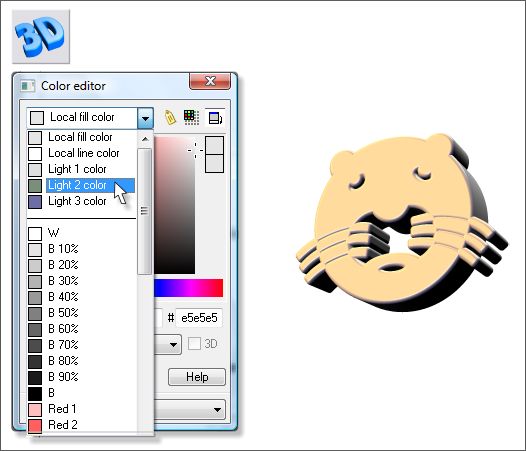
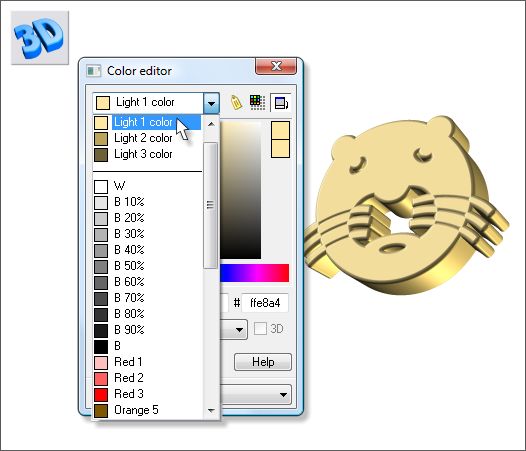
You can change the color of the extruded object by modifying the color of the lights. To do this double click on any of the light source arrows to open the Color Editor . As you change the light color the change will be reflected on the object. If you plan to color your object with colored lights then make your object light and neutral in color (my object is 10% Black). Otherwise you will be mixing colors in a very unwieldy manner.
By modifying all three light colors, I was able to create a golden effect. TIP: You can also drag a color onto the extruded edge of an object in the same way as you can do with beveled objects.
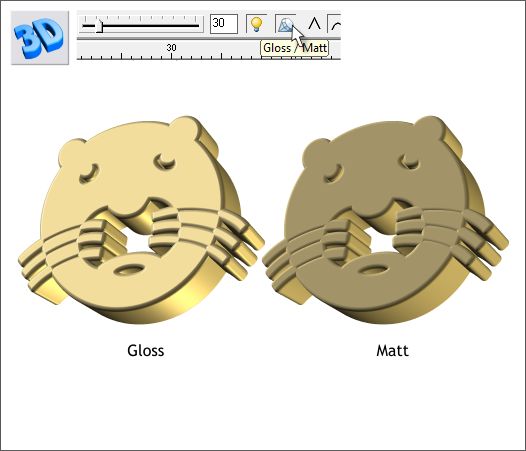
Finally there is another factor, Gloss / Matt. This determines how the light is reflected or absorbed on the surface of the extruded object. The side by side example above demonstrates the difference. The Gloss option creates more pronounced highlights and shadows. The Matt option produces softer more diffused lighting. The best way to see how all these settings work is to experiment. You can't break anything and if you loose a light source or two along the way use the Light Angle sliders to retrieve it.
|
||||||
|
|
