|
|
|
One of Xtreme's most powerful capabilities is the creation of complex brushes which can be applied to outlines and paths. In this next mini-tutorial, we'll create a brush and then create a circular basket with an assist from a free utility created by Dmitry Malutin, called Spirals EPS.
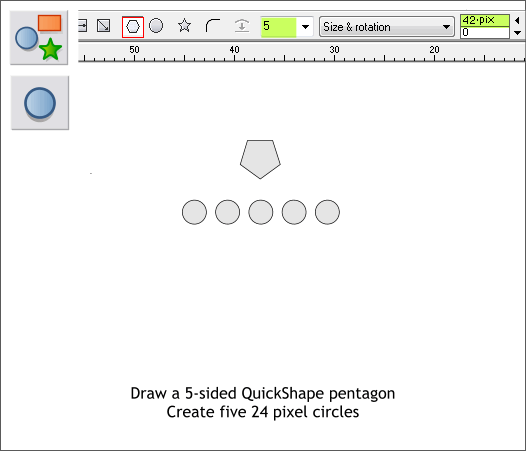
Select the QuickShape Tool (Ctrl F2). Click the Create Polygons hexagonal icon and from the Number of Sides drop down list, select 5. Drag a small pentagon. In the Size text entry box, change the number to 42 and press Enter. Select the Ellipse Tool (Ctrl F4 or press L). Hold down the Ctrl key to constrain the ellipse to a circle and drag a small circle. On the Infobar change the width to 24pix and press Enter to apply the change. Drag the circle to the right holding down the RIGHT mouse button. Release the right mouse button to drop a duplicate. Repeat this three more times. TIP: Right drag and drop is a relatively new feature. Users of older versions can drag with the left mouse button down and click the right mouse button to drop a duplicate. Or drag the circle and press the + key on your keyboards keypad to drop duplicates. This works really well if you're left handed.
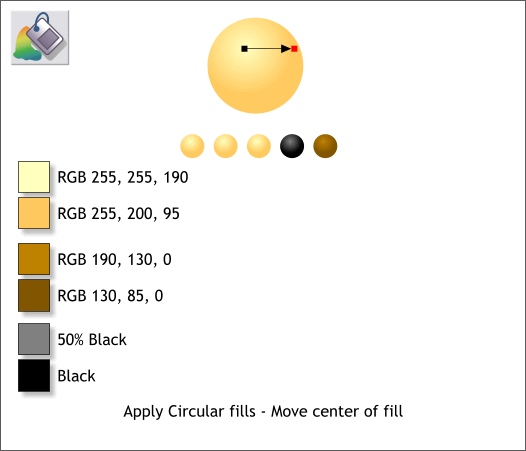
Select one of the circles with the Fill Tool (F5). From the drop down list of Fill Types select Circular. Drag the center of the fill up and to the left with the Fill Tool cursor as shown in the enlarged circle. Use the first two yellow colors. Copy the fill (Ctrl c) then select the other four circles and Edit > Paste Attributes to copy the fill to the other circles. Edit the colors for the black and brown circles.
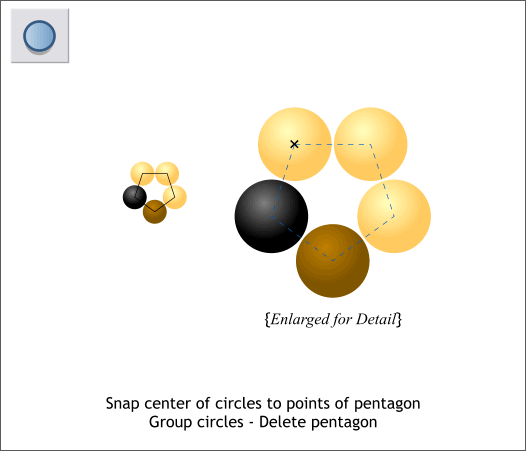
Make sure Snap to Objects is enabled (the orange magnet icon on the Infobar should be in the down position). Select the Ellipse Tool and click on any of the circles. A small X will appear in the center of the circle. Drag this X and snap the circle onto one of the points of the pentagon. Hold down the Shift key and click the next circle to keep the pentagon selected. Repeat this step and snap the other circles to the pentagon as shown. Delete the pentagon. Group the five circles.
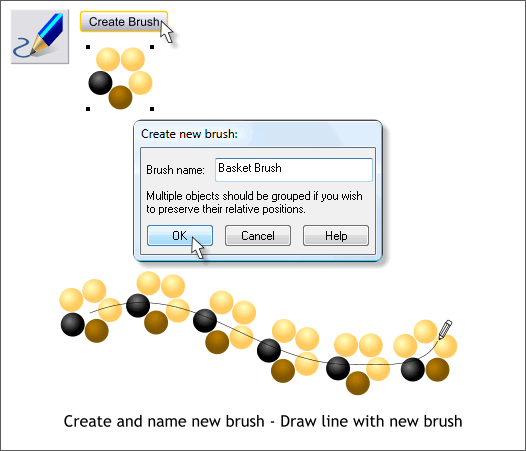
Select the grouped circles then select the Freehand and Brush Tool (F3 or N). Click the Create Brush button on the Infobar. Name your brush and press OK. Using the Freehand and Brush Tool, drag out a line. The new brush stoke will be applied.
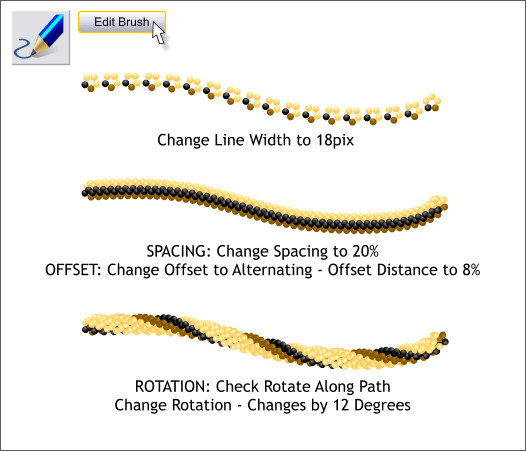
With the stroked line selected, select 18pix from the Width drop down list on the Infobar. Switch to the Freehand and Brush Tool (F3 or N). Click Edit Brush on the Infobar and make the following changes in the Edit Brush dialog. In the Spacing tabbed section, change the slider setting to 20%. In the Offset tabbed section, select Alternating from the drop down list and change the Offset Distance to 8%. Finally, in the Rotation tabbed section, change the Rotation Changes By: to 12 degrees. If you key any of these amounts in the text entry boxes be sure to press Enter to apply the changes. If you adjust the amount with the sliders the change is applied automatically.
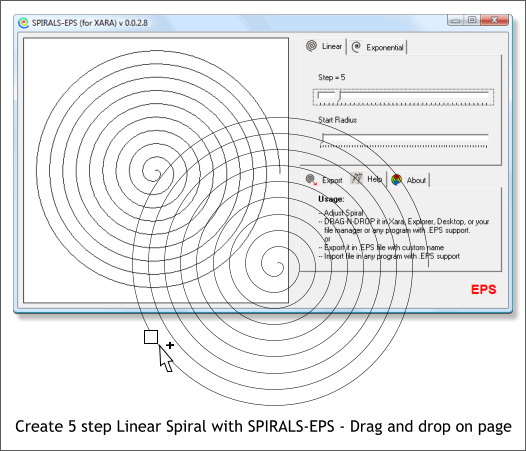
For this next step, we will use Dmitry Malutin's Spirals EPS utility which you can download for free from the Shareware Page. Look for SPX Spiral Generator at the bottom of the Shareware Page. Open Spirals EPS, click on the Linear tab, and set the Steps to 5. Drag and drop the spiral onto your Xtreme page.
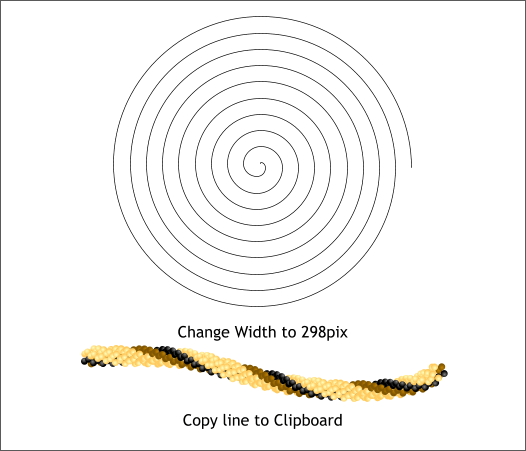
Change the width of the spiral to 298pix on the Infobar (in the W text entry box). Copy the modified brushed line to the clipboard (Ctrl c).
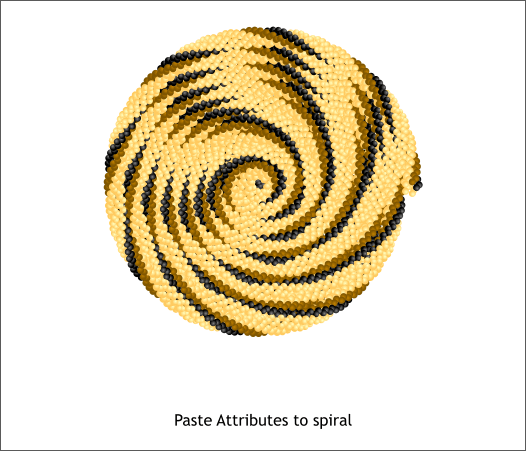
Select the spiral and Edit > Paste Attributes or press Shift Ctrl a. You can experiment and make subtle changes to the basket by increasing or decreasing the line Width and by editing the brush in the Freehand and Brush Tool > Edit Brush dialog.
|
||||||
|
|


