|
|
|
Everyone likes things that are fun and easy. In this mini-tutorial well create a star within a fuzzy star. It's fun. And easy. Well it was for me at any rate.
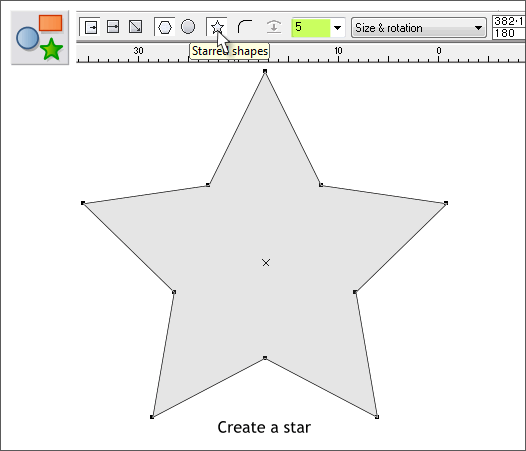
Select the QuickShape Tool (Ctrl F2). On the Infobar, click the Starred Shapes icon and set the Number of Sides to 5. Hold down the Ctrl key, and drag straight upward to create a star about the size shown. The Ctrl key should ensure that the point of the star goes straight up.
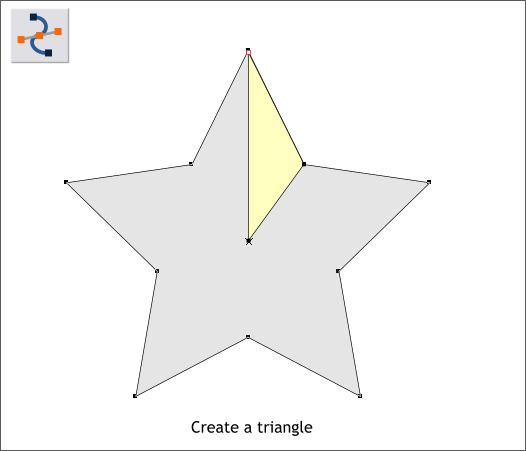
Make sure Snap To Objects is enabled. Press the orange magnet icon on the Infobar (down is enabled) or select Snap to Objects from the Window menu. With the star selected, select the Shape Editor Tool (F4). The control points as well as the X in the center of the star should be visible. Click on the center X then click to the right, then the top and then back on top of the first control point to create a closed (filled) shape.
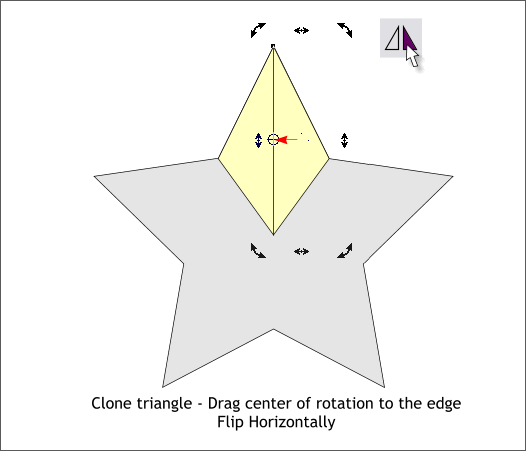
Click twice on the new shape to enable rotate/skew mode. Drag the Center of Rotation bulls eye to the left side of the shape as shown above. Clone the shape (Ctrl k) and then press the Flip Horizontally icon on the Infobar. If your flipped shape does not align in the center then either your star was not drawn straight up or you may not have snapped your points precisely. Start over if you need to and zoom in close when creating your new shape.
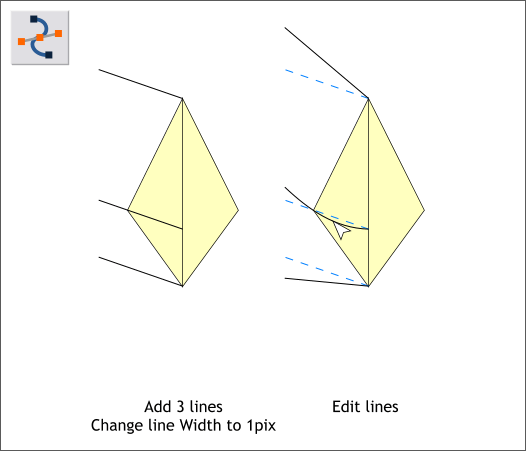
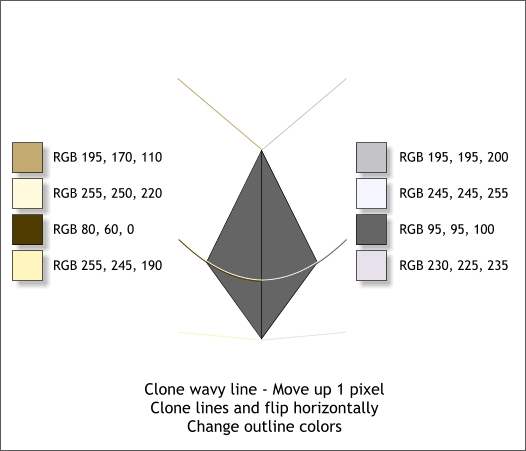
Select the Shape Editor Tool (F4) and click two points to create a diagonal line from the left edge outward. Clone the line twice and move the lines as shown above left. Select the middle line, then switch to the Shape Editor Tool and drag the center of the line downwards to add a gentle curve. The line should pass through the left outward point of the shape as shown above right. The inside should slope downwards.
Clone the curved line (Ctrl k) and move the cloned line upwards 1 pixel. Clone all four lines and flip them horizontally using the technique used to flip the shape. Change the outline colors as shown. I have made the two shapes darker so you can see the lines. TIP: In Xtreme 4 (and 3.2 also I believe), you can also hold down the Ctrl key and drag the left center bounding box handle with the RIGHT mouse button. The Ctrl key will cause the lines to flop to the right as you drag and the right mouse button will automatically create the duplicate.
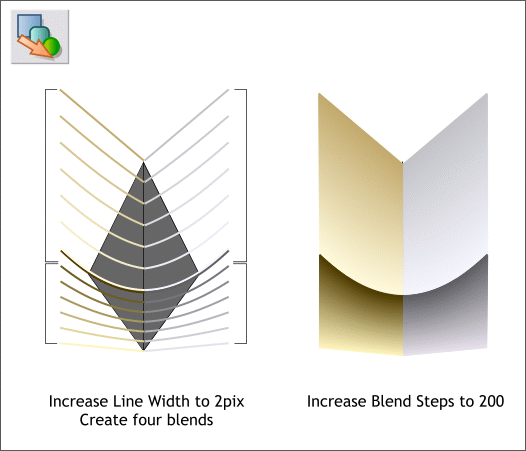
Change all the line Widths to 2pix. Select the Blend Tool (F7 or W). Set the line Widths on the two shapes to None. Create a blend of the bottom two lines on the left side, then create a blend of the top two lines on the left. Repeat this step to create two blends on the right side. Select all four blends and increase the Number of Blend Steps to 200. Press Enter (or Return) to apply the change. You should now have four very smooth blends.
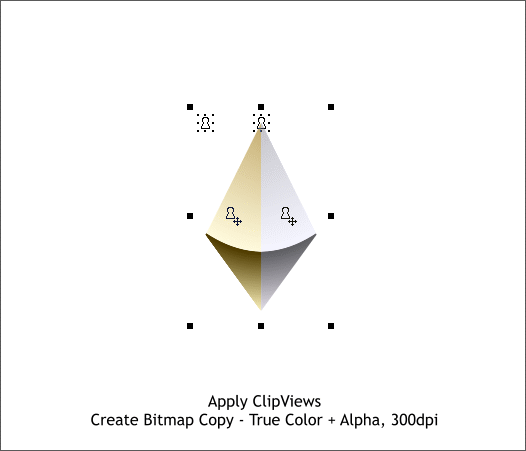
Using the Selector Tool (the arrow pointer F2), drag a selection rectangle around the left hand blends and the shape behind. Press Q or Arrange > Apply ClipView to mask the blends inside the shape. Repeat this step on the right. Select the two ClipView shapes and Arrange > Create Bitmap Copy. Change the Bitmap Resolution: to 300dpi, leave the Color Depth: at True Color + Alpha, and press Create . We will work with the bitmap copy. You can delete the two ClipView shapes or set them to one side. And we are also finished with the star. It can go away.
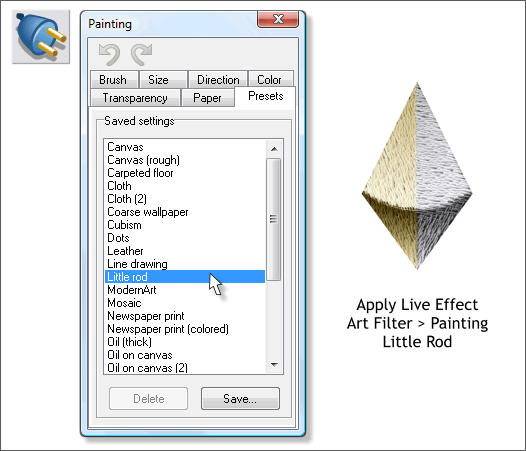
Select the Live Effects Tool (Ctrl F5). Click New > on the left side of the Infobar and from the drop down list select Art Filter. From the Presets tabbed section, select Little Rod . Close the dialog. This applies a kind od furry look to the bitmap.
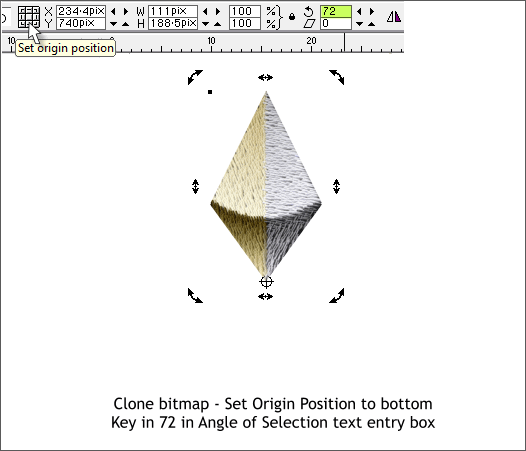
Double click on the bitmap to enable Rotate/Skew mode (the square bounding box handles will change to arrows). Click the bottom center square in the Set Origin Position icon on the Infobar. The Center of Rotation bulls eye will automatically move to the bottom center of the bitmap. Clone the shape (Ctrl k). In the Angle of Selection text entry box, key in 72 and press Enter. (360 divided by 5 is 72). This rotates the shape 1/5 of 360 degrees around the rotation point.
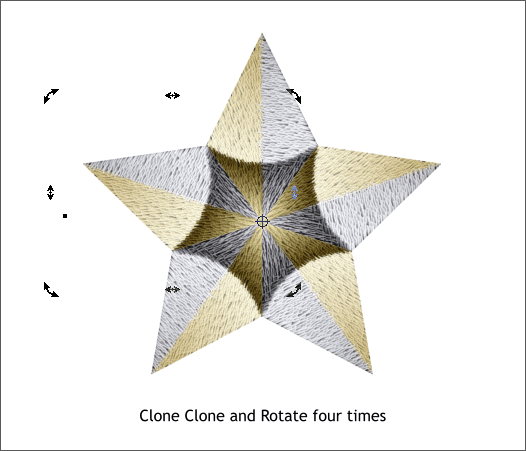
Repeat the clone and rotate step until you have a star which has a star inside.
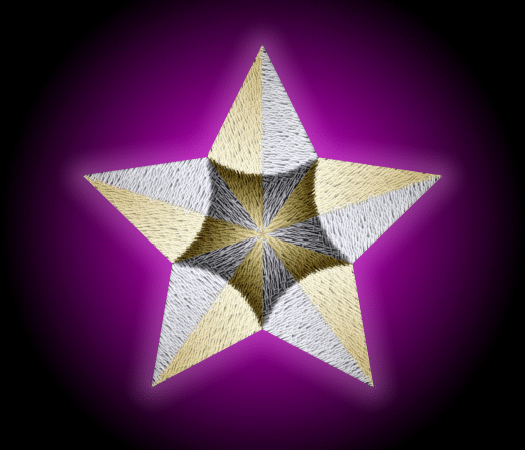
And here is a "Serving Suggestion". I added a black rectangle with a Circular fill. The center of the Circular fill is magenta. I also added a Glow Shadow with the Shadow Tool (Ctrl F2 ). I dragged and dropped a pale pink from the screen palette onto the shadow to change the glow color. I dragged out the width of the glow some and changed the Shadow Blur slider setting to 30pix. Fun. And easy.
|
||||||
|
|
||||||


