|
|
|
I'm not sure if my solution would work with this technology-challenged printing person but here's how I would do it. For my example, we'll create a business card that uses 3 Pantone solid spot colors and then create a PDF file with each color on a separate page. The printing person, if she or he is not living in the stone age (I suspect he or she is however), can open each page in Adobe Illustrator and create her or his pre-press materials.
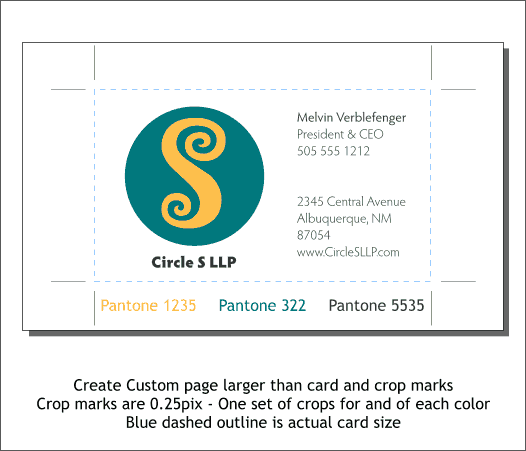
Create a custom page larger than the card and large enough to accommodate crop marks. The crop marks should be offset from the card's edges by about 10 pixels. Make all 8 crop marks, set the width to 0.25pix, and then group all 8 marks. The card should not have any outline. I have shown a blue dashed outline only for you to see the actual card size. Add text and logo. Only use 3 colors, even for the crop marks. You can actually use as few or as many colors as you wish. But for this tutorial we'll only use three. You can use Pantone Solid Matte spot colors (Color Gallery - F9) if you have Xtreme Pro 3.2. If you have Xtreme 3.2 you can create a color and in the Color Gallery (Ctrl e ), designate the color a Spot Color. You'll need to make the color a Named color when prompted.
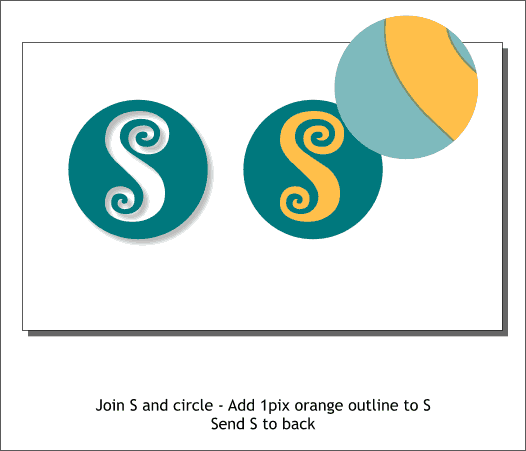
We need to "knock out" the S shape. Because the printer is going to print the yellow S on top of the green, or vice versa, the yellow will show some of the green and the color will not be correct. Make a clone of the S (Ctrl k). Select the clone and the circle and Arrange > Combine Shapes > Subtract Shapes or press Ctrl 2. This removes the S from the circle as shown above top left. The shadow is only to show the S is missing from the circle. Next we need to create a bit of "trap". If the printing does not align perfectly there may appear a small white line where the printing surface shows through. Just add a 1 pixel outline to the yellow S the same color yellow. The example in the enlargement shown top right and to which I have applied some transparency to the green, shows this slight overlap (the trap). And actually, with this printer, you may want to increase the outline to 1.5pix.
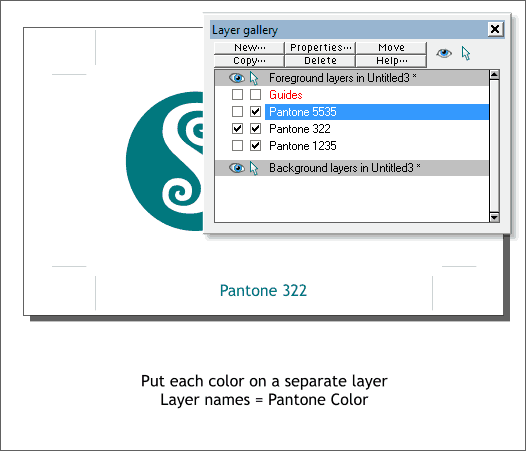
Open the Layer Gallery (F10). Press New... two times to create two new layers. Name each of the three layers for the three spot colors. Cut all the objects, text and crop marks, for each color and paste these into the appropriate layer. In the example above I have made the yellow and gray layers invisible so we see only the teal green objects. NOTE: The crop marks need to go on each color layer. But change the outline color for the crops to the color for that layer. In the example above, the crops on the Pantone 322 layer are Pantone 322. It is important for these marks to appear in the same place for each color.
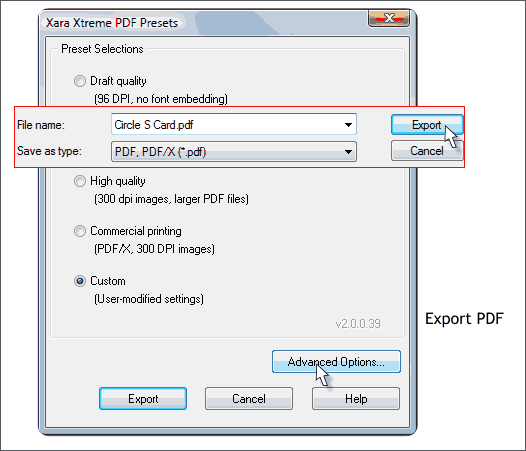
Make sure that the only objects on the page are in the three spot colors. From the File menu, select Export. Name your file and from the Save as Type: drop down list, select PDF, PDF/X (*.pdf). In the PDF Presets dialog, check Custom and press Advanced Options...
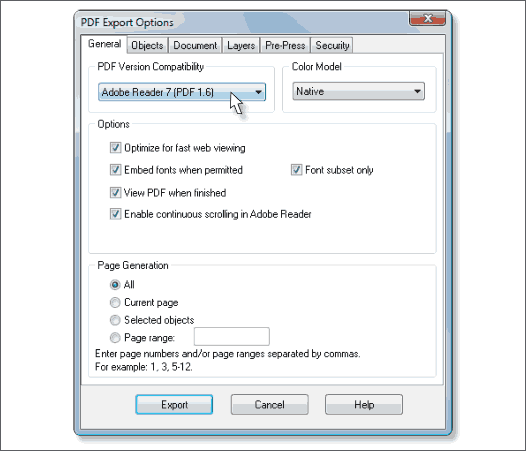
From the PDF Version Compatibility drop down list, select Acrobat Reader 7. Make sure the color model is set to Native. Don't press Export yet.
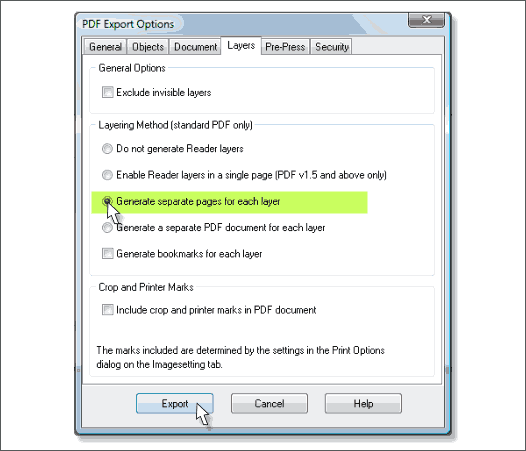
Click on the Layers tab and check Generate Separate Pages for Each Layer. Now you can press Export.
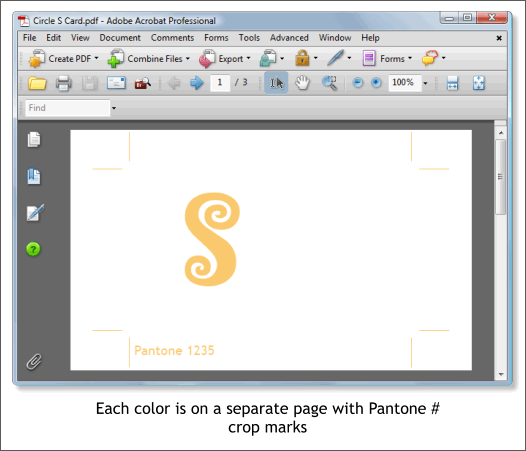
Here is screen shot of Acrobat showing page 1, the yellow page. Not surprisingly, the other two pages contain the objects using the other two colors. The actual PDF file is about 500K so I will not attach it. But you are welcome to see the very modest-sized XAR file. Click here.
And that wraps up Workbook 66 and wraps up the Xara Xone for 2007. I'm happy to announce that the Xara Xone will be back in 2008. Check back on 1 January 2008 to see the new look. And as always, your comments, questions, and encouragement are always welcome. Please use the Send e-mail link at the bottom of the page to send me your comments. See you next year! Gary W. Priester |
|||||||
|
|||||||
|
|
|||||||


