|
|
|
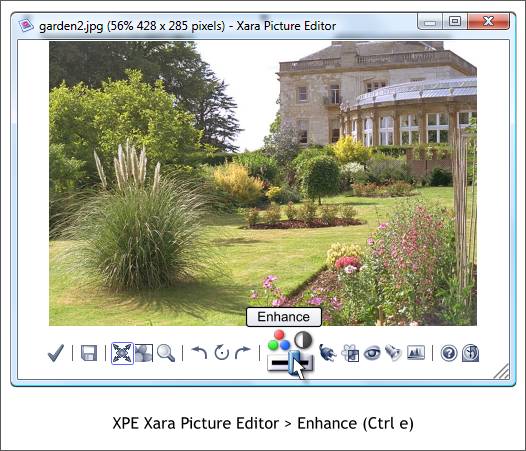
The fastest way to access XPE is to double click on a bitmap image. With version 3.2 you can now even double click on a bitmap filled object. XPE opens as shown above with the image to be edited, and a row of tools and functions across the bottom. To open the Enhance dialog, click the icon shown above, or use the keyboard shortcut Ctrl e. (Ctrl e only works when XPE is open. Otherwise you get the Color Editor.
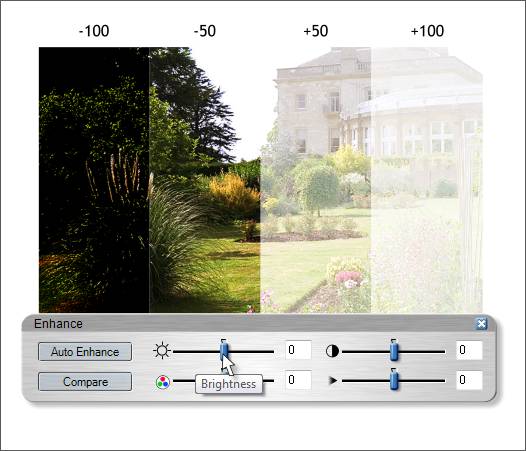
Using the previous image as a starting point, I'll cover the four functions of the Enhance menu. The top left slider is the Brightness slider. As you might have guessed, it controls the lightness and darkness of the image. You can slide it all the way to one side or the other from -50 to +50 Brightness. You can also key in a value of from -100 to +100 for additional control. The example above shows four settings with -100 being darkest and +100 being the brightest. NOTE: Xara assumes that we all are psychic and that we automatically know what the four sliders are without the sliders having silly space consuming text identifiers for each slider. But for those of us who are not psychically enhanced individuals, if we let the cursor hover over any of the sliders for a moment, a tool tip will magically appear with the name of the slider function. This is also true of just about every tool, icon and text entry box in Xara.
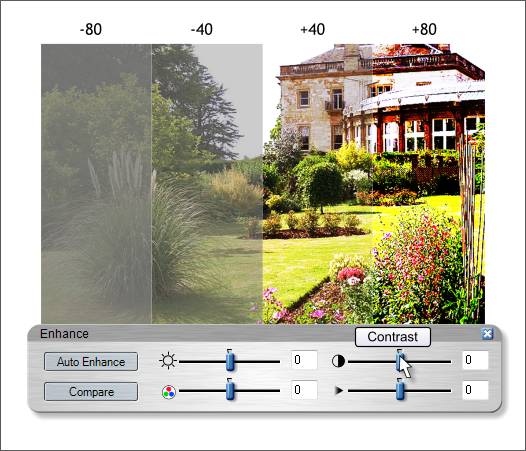
The top right slider is the Contrast slider. Here again the slider range is plus or minus 50 and if you key in the text, plus or minus 100. With Contrast however, a little goes a long way. Increasing the Contrast slider makes the darks darker and the lights lighter. At plus or minus 100% the image is basically gray or white with no image so for this example I have used plus and minus 80% for the extreme settings.
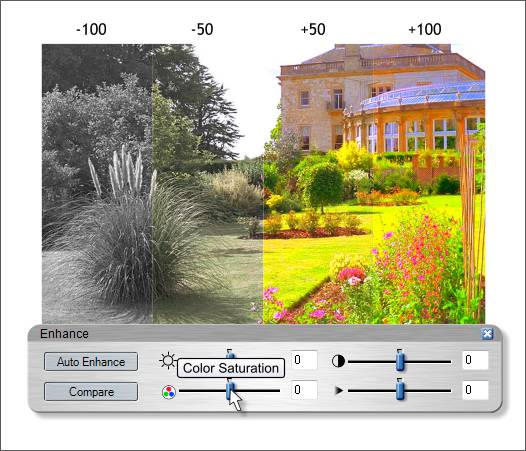
The bottom left slider is the Color Saturation control. And this brings me to the solution for the grayscale bitmap question. At -100 which equals 0% saturation (saturation being the amount of or lack of color), at 0% saturation you have a grayscale image. The colors are all shades of black, white and the 254 in-between shades of gray. As the slider setting goes up in the positive numbers, even with a small amount added, the images become garish, almost posterized. So unless you are creating a grayscale image, a small amount plus or minus is more than sufficient. NOTE: Did you know you can use the Enhance menu functions for vector art as well? Well you can. Select the object or objects, or an entire image then select the Live Effect Tool (Ctrl F5). Click New > at the top of the page and select Enhance from the fly out menu. If you want to give it a try, go right ahead. We'll wait for you.
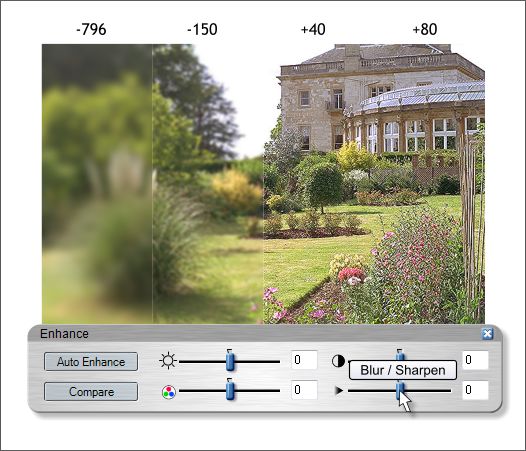
The final slider is Blur / Sharpen. And as you may have guessed, this slider controls the sharpness or lack of sharpness for the selected bitmap image. These settings work differently depending on the resolution of the bitmap. The image above is 96dpi. As the resolution increases, higher or lower settings are required to get the same effect. The Blur setting is very similar to a Gaussian Blur filter.
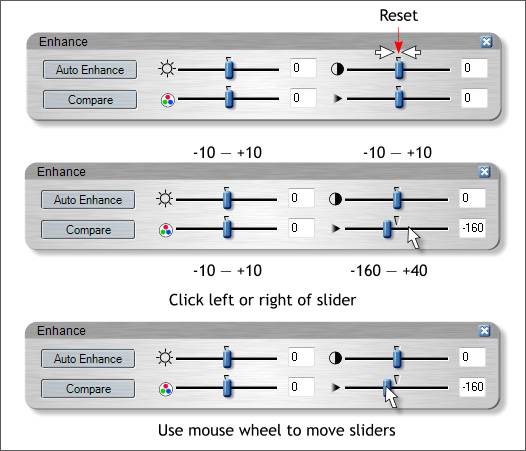
While we are here let's look at some other items of interest. For example, click in the center of the slider settings where the indented triangle is, and any settings are reset to 0. You can also click Compare which resets all the sliders to 0. Unlike clicking the triangle to reset one slider, the Compare button when clicked once more, returns to your previous settings. So you can compare your changes to the original image. If you click to the left or the right of the slider button the setting increases or decreases by the amounts shown in the second example. All increase in increments of plus or minus 10 except the Blur / Sharpen slider. As with almost all of Xara's sliders, if you have a wheel mouse, you can hover the cursor over the slider button and roll the wheel up and down to increase and decrease the slider setting. Go ahead and try it. It's OK. We don't mind waiting for you. Really.
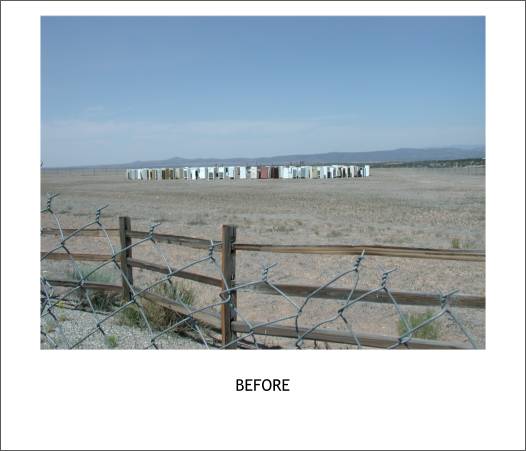
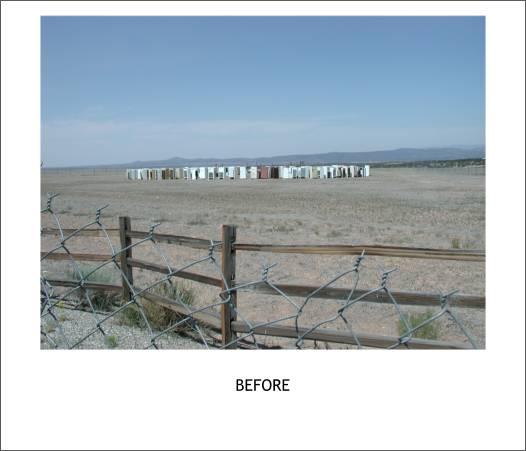
There is also an Auto Enhance button which when pressed, makes an educated guess at how the image should really look. It looks at all four of the available options (brightness, contrast, etc.), and then applies these settings. The image above is an art installation in Santa Fe called "Fridgehenge". It is a circle of discarded refrigerators arranged in the manner of Stonehenge. Since this photo was taken, some horizontal refrigerators have been added to complete the effect. But I am getting off the subject. This typical digital photo is pale and washed out. The sky and earth colors are all dull. Only the artwork is colorful, and even then, not very.
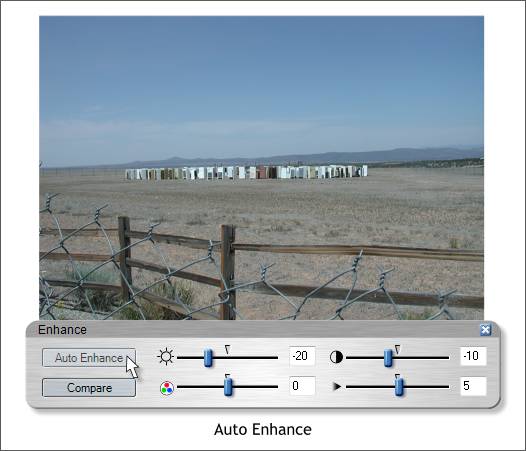
Here is the same image after I pressed Auto Enhance. Slightly improved. But I think we can do better.
Again, here is before.
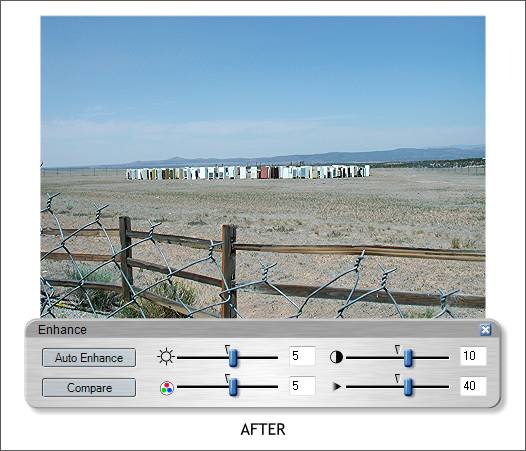
And here is what I came up with. Increasing the Contrast setting to 10 makes the colors a little richer. I added a small amount of Color to overcome the dullness and increased the Sharpness slider to 40. As a rule of thumb, most digital photos when reduced to smaller size such as the image I have used here, go soft and fuzzy (not sharp). This is most apparent if you Create a Bitmap Copy at 96dpi . Adding a small amount of Contrast brightens up the colors and adding 20-40% Sharpness brings out the detail. If it looks too sharp, and the image above is just about at that point, back the slider setting off until it looks sharp without looking grainy. So this was a very roundabout way of showing you how to create a grayscale photo image. But also a quick look at one of the reasons I don't spend too much time in Photoshop these days.
|
||||||
|
|


