|
|
|
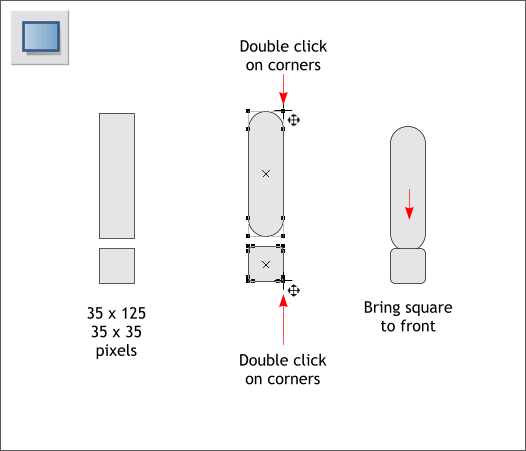
Using the Rectangle Tool (M) create a rectangle and a square to the sizes shown above left. Hold down the Ctrl key to constrain the rectangle to a square. Double click on a corner of the rectangle and a corner of the square with the Rectangle Tool to create Curved Corners. Select the square and press Ctrl f to bring it to the front (if it is not already to the front) and move the square over the rectangle as shown on the right above.
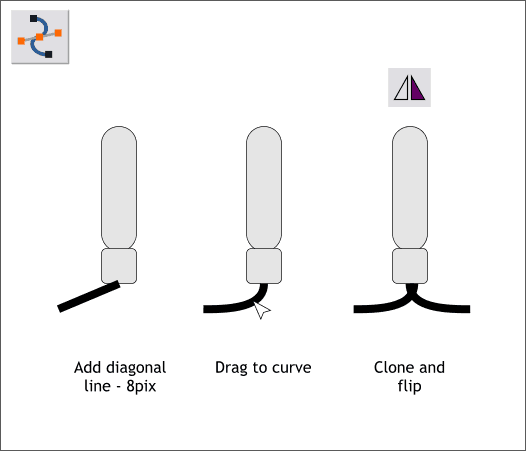
With the Shape Editor Tool (F4) draw a diagonal line. Change the line's width to 8pix by selecting 8pix from the Width drop down list on the Infobar. Drag down on the diagonal line with the Shape Editor Tool to create a graceful curve. I will let you be the judge as to whether or not your curve is graceful. In Xara you can create a line, or a series of connected lines, and curve it this way without switching to a different tool. Yea Xara! Clone the curved line (Ctrl k) and press the Flip Horizontally icon on the Infobar. With the cloned line selected, use the right arrow key on your keyboard to "nudge" the line to the right as shown above.
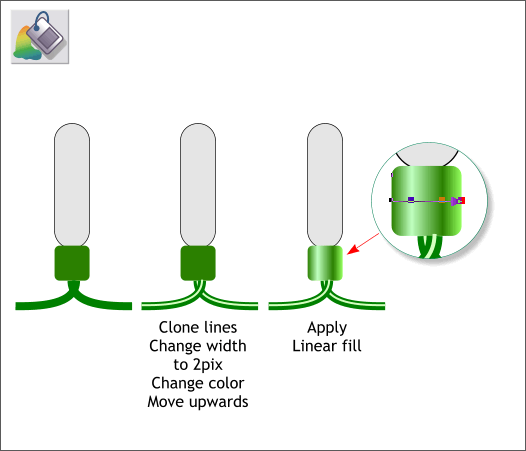
Apply a medium green outline color to the lines and the same color fill for the square. Clone the two lines, Ctrl k, change the outline Width to 2pix, and select a pale green outline color. Nudge the thinner lines up about 1 pixel. TIP: With Xtreme and Xtreme Pro versions 3.2 you can left click on any color on the screen palette to apply an outline color. Right clicking on a screen palette color is the old way and still works just fine. Select the Fill Tool (F5) then click on the square to select it. Click on the left side of the square, hold down the Ctrl key (to constrain the direction) and drag horizontally to the right edge of the square. Zoom in close. Double click on the fill path arrow to add a new color and double click again to add a second color. Use darker and lighter shades of green as shown in the enlargement.
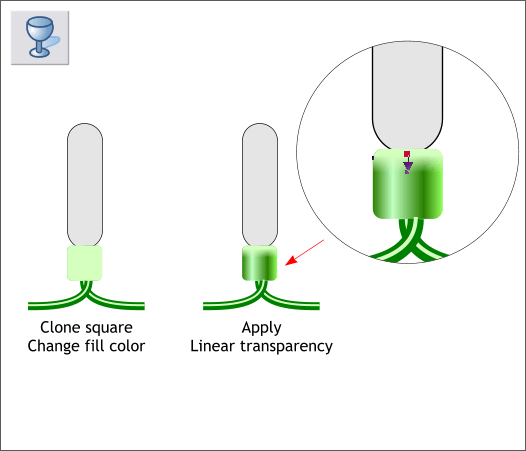
Clone the square (Ctrl k). Change the fill to Flat and the fill color to pale green (Select Flat from the Fill Type drop down list on the Infobar). Select the Transparency Tool (F6). Click on the cloned square to select it. Hold down the Ctrl key and drag downward a short distance as shown.
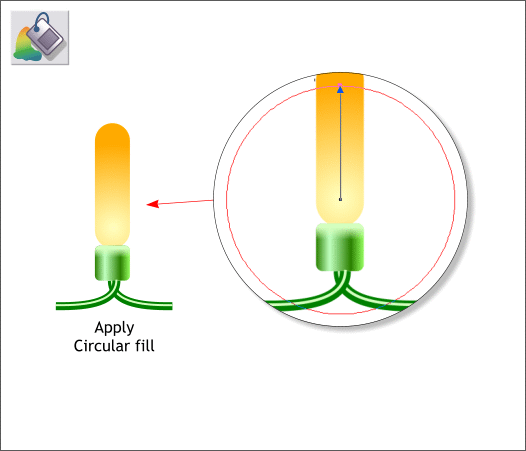
Select the Fill Tool (F5) then select the rounded rectangle. Apply a Circular fill. Drag the center of the fill down as shown in the enlarged detail above. Use pale orange for the center of the fill and bright orange for the outside.
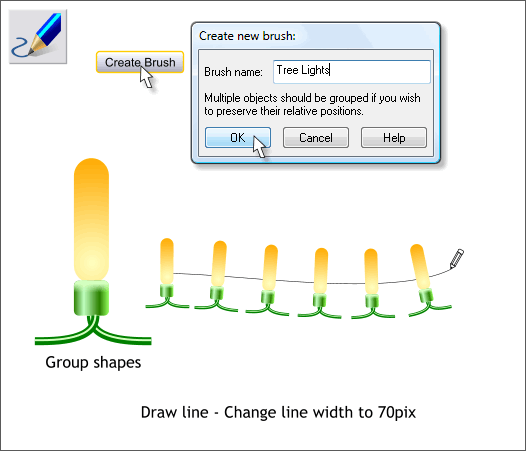
Select all the objects by dragging a selection rectangle (a Marquee) around them with the Selector Tool (the arrow pointer) and then group the selection (Ctrl g or Arrange > Group). With the group selected, switch to the Freehand and Brush Tool (F3). Click the Create Brush button on the Infobar. Name your brush and press OK. Draw a line to the right with the new brush. Change the Width on the Infobar to about 70 pixels. Increasing and decreasing the line Width makes the brush elements larger or smaller.
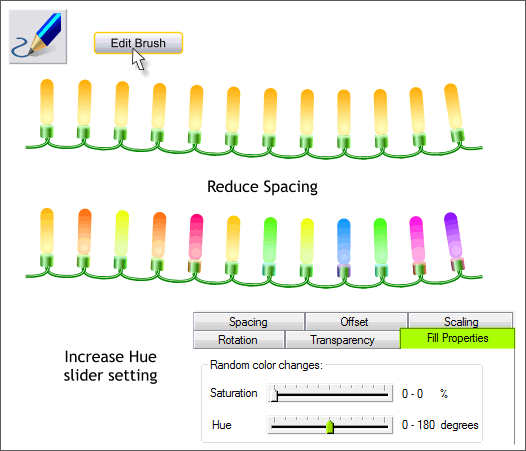
Press the Edit Brush button. In the Spacing tabbed section, move the Spacing slider to the left until the lights appear to be stringed together. In the Fill Properties tabbed section, move the Hue slider towards the center to about 0-180 degrees. This creates a rainbow of colors.
You can create a circle and apply the brush to the circle as shown above. This just might make the perfect holiday card design for those of you who have been putting off doing your holiday cards for lack of inspiration. Create your circle and set the fill to none. Open the Line Gallery (F12) then open the New Brush Strokes folder. Select the brush stroke and set a Width (72pix is a good place to start), and press Apply. You may need to play around with the outline Width and Edit Brush > Spacing settings until the effect is just right. Oh, I was afraid someone would ask. How did I get the rainbow glow? Add a Glow shadow to your typeface and message of choice (Ctrl F2 for the Shadow Tool and then press the Glow icon on the Infobar). Hold down the Ctrl key and click on the glow to select just the glow. Switch to the Fill Tool (F5). From the drop down list of Fill Types, select Conical (not comical). Make the start and end colors red. From the Fill Effect drop down list, select Alt Rainbow. You can drag the glow out more using the Shadow Tool. Use the Shadow Bur and Shadow Transparency sliders on the Infobar to soften the edge of the glow and make the colors brighter. Experiment. You can't break anything.
|
||||||
|
|
