|
|
|
Xara's scale, rotate, and skew functions are pretty basic, if you are familiar with vector drawing programs. But for you new users who find this all a bit confusing, I'll attempt to cover the basics.
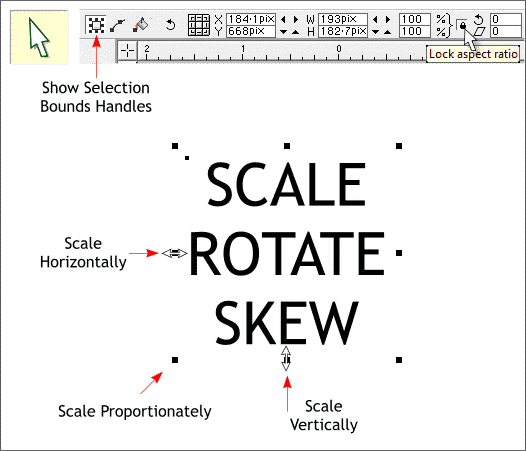
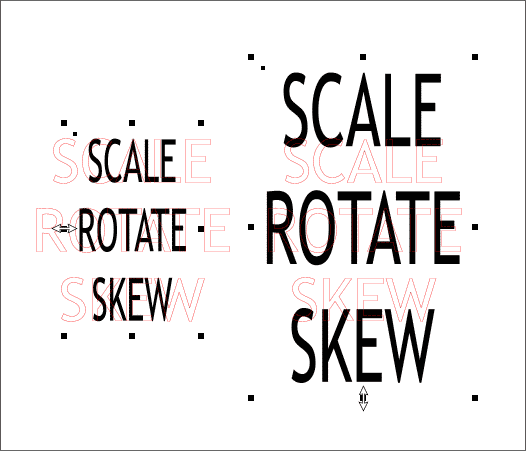
To select an object, click it with the Selector Tool (the arrow pointer). If you want to select several objects, hold down the Shift key and click on each object. You can also drag a selection rectangle (a marquee) around the objects using the Selector Tool. NOTE: Unlike Adobe Illustrator however, the selection rectangle must go around the entire object or series of objects, not just go through it. When an object is selected, a set of 8 small black squares (a bounding box) appear around the selection as shown above. When the Lock Aspect Ratio icon (the black padlock icon on the Infobar at the top of the screen) is in the down (enabled) position, you can drag any of the corner black squares (called control handles) to scale the selection proportionately. If the Lock Aspect Ratio icon is disabled (in the up position), then you resize the height and width in one operation. In either mode you can scale just the width or just the height of the selection by dragging the middle control handles as shown above. TIP: You can resize an object from the center by holding down the Shift key as you drag. Every new user, and many of us older users too, at some time or other clicks the Show Selection Bounds Handles icon (shown above). When you disable this icon, the bounding box handles do not show when you select an object. I'm not sure why on earth how you would use this option, but if you can think of a reason why you would not want to see the bounding box handles, this is how you do it.
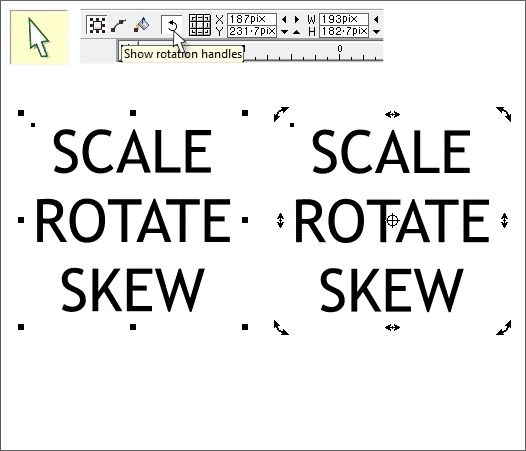
If you click on a selection twice, the bounding box squares change to Rotation/Skew arrows as shown above on the right. Drag any of the corner rounded arrows to free rotate the selection. Drag the middle arrows to skew the selection. You can also enable the Rotate/Skew handles by clicking the Show Rotation Handles icon though for the life of me, I cannot think why you would do that when it is such a no-brainer to just click twice to enter Rotate/Skew mode. Plus with Xtreme 3.2 and Xtreme Pro 3.2 there is an even easier way to rotate and skew a selection. I'll demonstrate.
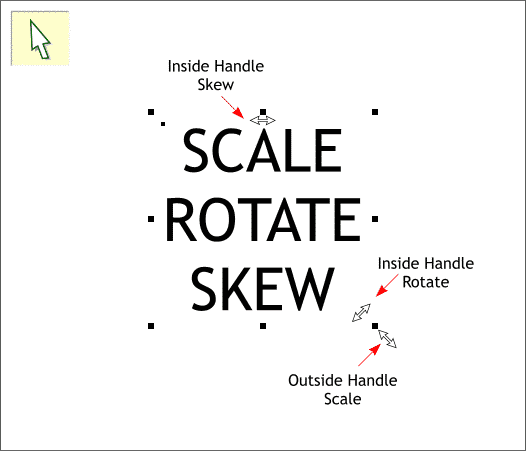
Xtreme and Xtreme Pro 3.2 have made it even easier to rotate and skew a selection. Just place the cursor inside the bounding box squares and the resizing arrow cursor changes as shown in the somewhat confusing illustration above. In the lower right hand corner of the illustration you can see the difference. When the resizing cursor is outside the bounding box, the arrow points toward the center of the selection. When the resizing cursor is inside the handle, the arrow rotates 90 degrees to indicate rotation mode. The same thing happens with the horizontal and vertical resizing handles. The resizing cursor rotates 90 degrees to indicate skew mode.
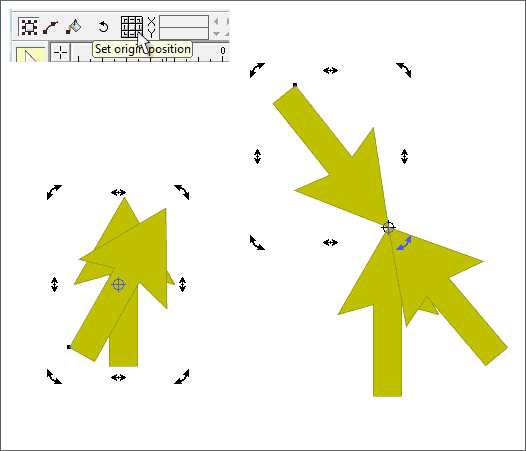
So, the more curious among you may ask, why do we need the double click option? Class? OK, here's the answer. When you click twice, or press the Show Rotation Handles icon, a small Center of Rotation bulls eye appears in the center of the selection. Drag this bulls eye to change the point around which the selection rotates. In the example above left the arrow rotates from the center. The Center of Rotation was dragged to the tip of the arrow in the example on the right and the arrow now rotates around the point. In addition to all this, you can click the small calculator-looking icon, Set Origin Position, to change the center of rotation. It's all very intuitive and I won't bother explaining the obvious. TIP: If you change the center of rotation for a selection and rotate that selection, and then select another object, click again to rotate it, the center of rotation is still where it was with the last object. This is not a bug, it is a feature. Honest. There may be a perfectly logical reason for this. and perhaps I just don't see it. But here's the tip, you can reset the center of rotation by clicking the center button in the Set Origin Position icon.
This example illustrates the effects of vertical or horizontal resizing.
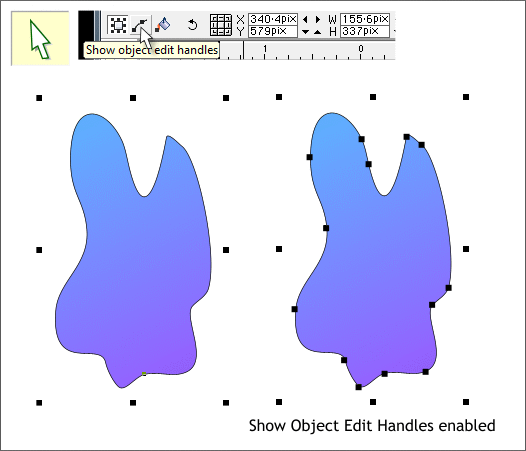
When you select an object other than text, if you click the Show Object Edit Handles icon, the control points of the object appear as shown above right. Again I question the need for this as there is nothing you can do with these edit handles except to know they are there. To edit these points, you have to use the Shape Editor Tool. See what I mean?
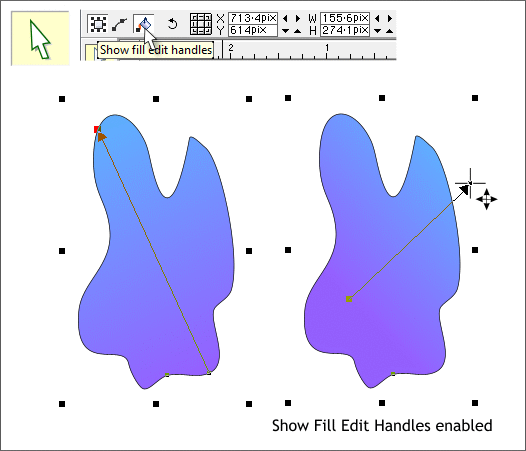
If the selected object has a gradient fill, such as the Linear-filled blob shown above left, you can click the Show Fill Edit Handles icon to show the fill path arrow or arrows. But unlike the seemingly useless Show Object Edit Handles, with Show Fill Edit Handles enabled, you can actually modify the fill as shown above right where the fill path arrow has been moved to the right.
|
||||||
|
|


