|
|
|
There are several Workbook tutorials that use the Bevel Tool, but it has been a long time since your editor (that's me), covered all the features. Even if you think you know all there is to know about the Bevel Tool , read through this exploration. You might pick up a new trick or two.
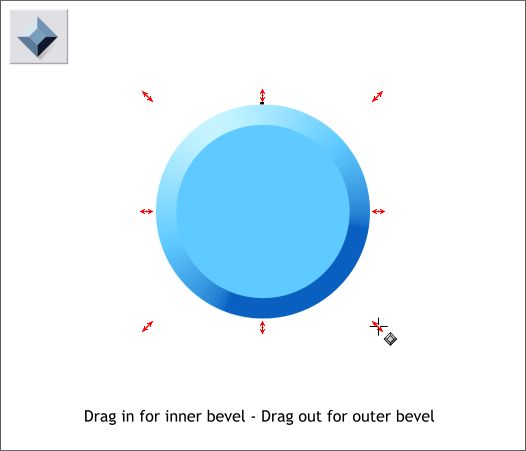
To apply a bevel, select an object, or group of objects, or even a selection of several objects. Switch to the Bevel Tool (Ctrl F3) and drag any of the red arrow control handles toward the center or away from the center. The farther you drag the larger the bevel. Bevels are "live effects." This means that you can reedit the bevel settings at any time. Even 20 years from now, maybe even 200 years from now. The only way to turn off a live effect is to Convert to Editable Shapes (Arrange menu). Whenever I tell you to Convert to Editable Shapes , this is to remove the live effect so that it can be edited with other tools.
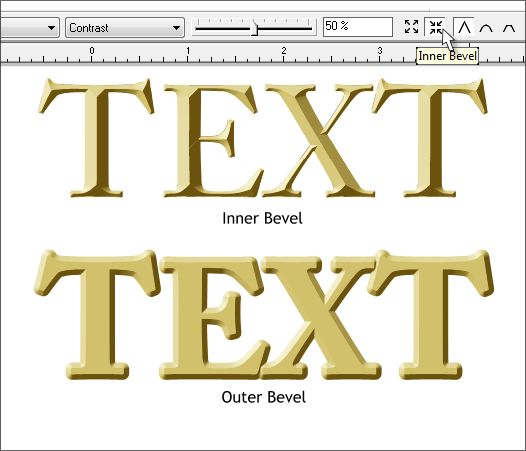
The example above shows text to which an Inner and Outer bevel has been applied. You can also click the Inner or Outer Bevel icons on the Infobar (shown above) to toggle between these two bevel modes as shown in the screen capture at the top of the example.
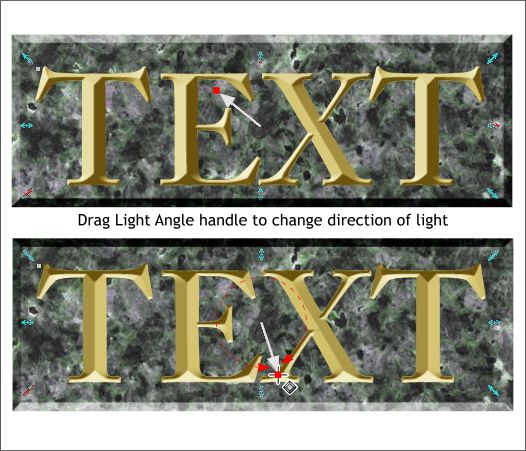
When you apply a bevel, in addition to the arrow control handles, there is an arrow with a small red square in the center of the selected object. This is the Light Angle control. Drag/rotate the red square to change the light angle. To make text or any beveled object appear to recede instead of pop out, drag the Light Angle handle down as shown in the second example above. You can also enter a numerical value by selecting Light Angle from the drop down list on the Infobar and using the Light Angle Slider or entering a number.
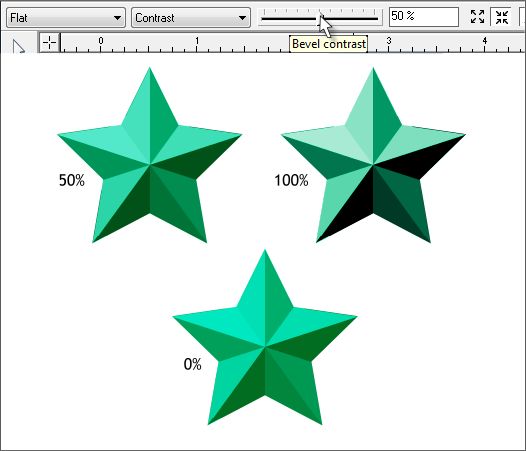
The default slider for the Bevel Tool is Contrast. The example above shows the results of different settings. The other controls found in the drop down list include: Light Angle, Size, and Light Elevation.
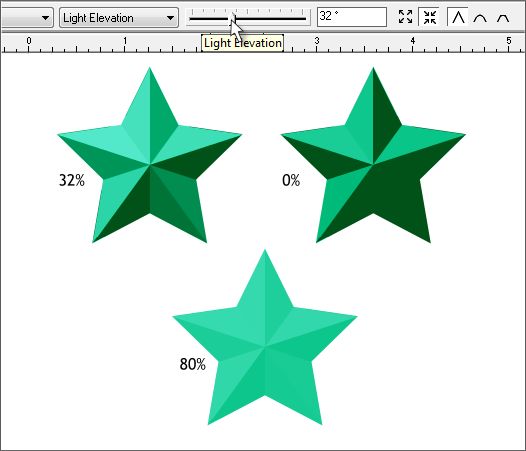
This example shows the Light Elevation slider settings. At 100% the bevel becomes invisible as if a light source were right on top of the object. At 0% the distinction between the shades is reduced to 2 shades. 32% is normally the default setting and produces the highest number of values.
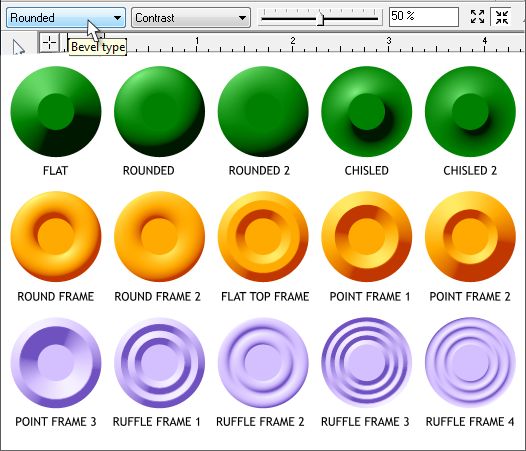
Shown above is a circle with a different bevel applied to each. Each bevel is an Inner bevel and each bevel is about 24 pixels wide. As the Size of the bevel changes the appearance of the bevel changes as well.
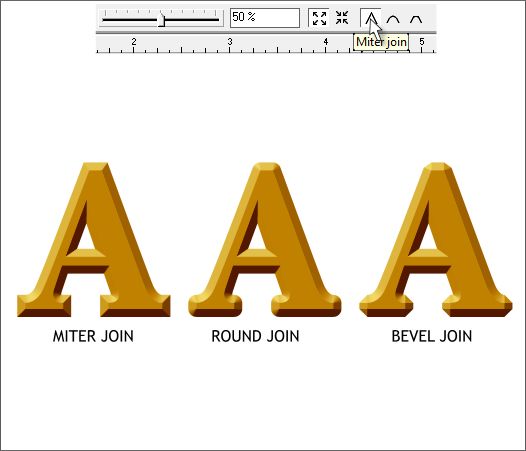
There are three Join options on the Bevel Tool Infobar: Miter, Round and Beveled. These are the same join options found in the Line Gallery. In most cases you will not see a change when you select a different Bevel Join option. However the most noticeable difference is with large text as you can see in the above example. Generally speaking, the Miter join produces the sharpest bevel but there are times when very sharp angles produce a beveled edge that is too pointed. In this case a Round or Bevel Join is better.
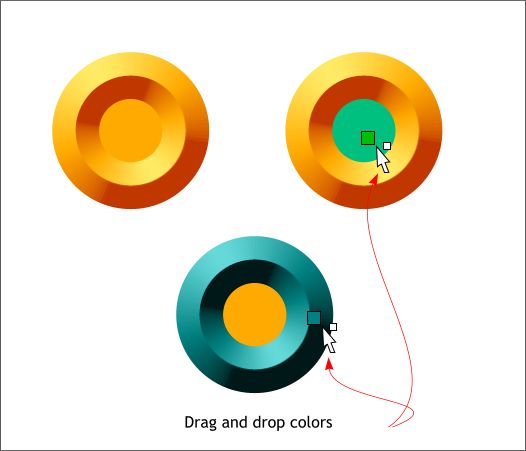
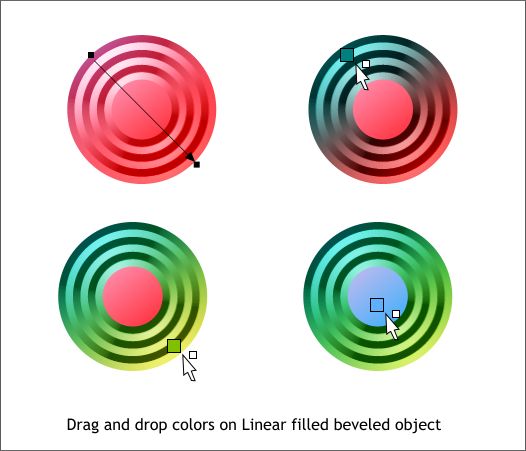
A beveled object is really two objects, the original object and the bevel. You can drag and drop colors from the screen palette onto a bevel or the original object as shown in the illustration above.
If you apply a bevel to an object with a Linear fill, as with the circle shown top left above, then you can drag and drop two colors onto the bevel to change one or both of the Linear fill colors.
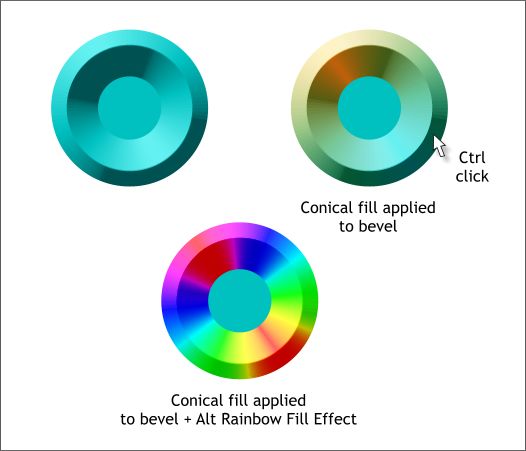
You can apply any of Xara's Fill Types to a bevel. Hold down the Ctrl key and click on the bevel to select just the bevel. The Status Bar in the lower left corner of the screen should indicate 1 Bevel. Then switch to the Fill Tool (F5) and select a Fill Type from the drop down list. In the example shown above, a Conical fill was applied to just the bevel. In the bottom example, a Conical fill with Red as the starting and ending color was applied along and an Alt Rainbow Fill Effect select from the Fill Effects drop down list.
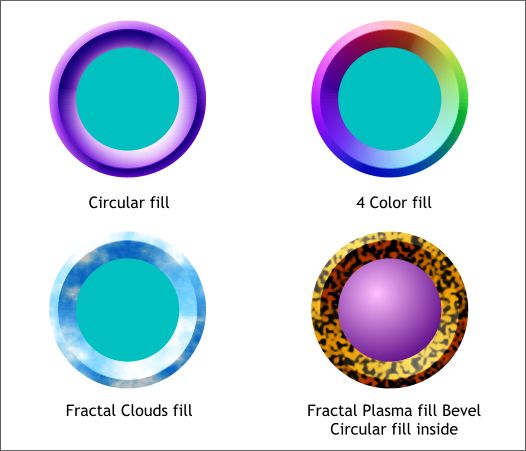
This example shows four different fill types applied to the bevels as well as a separate Circular fill applied to the center of the lower right example.
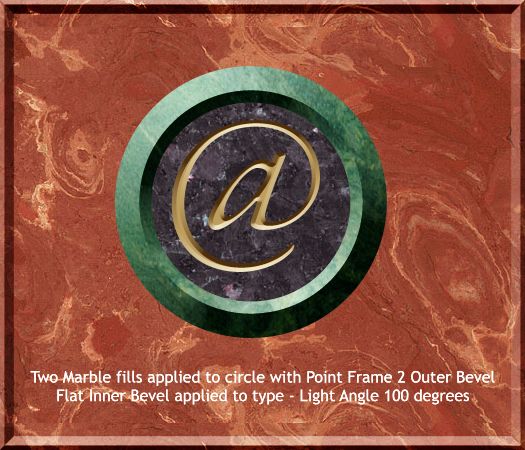
Here is an example of several different bevels applied to several different objects.
|
||||||
|
|
||||||


