|
|
|
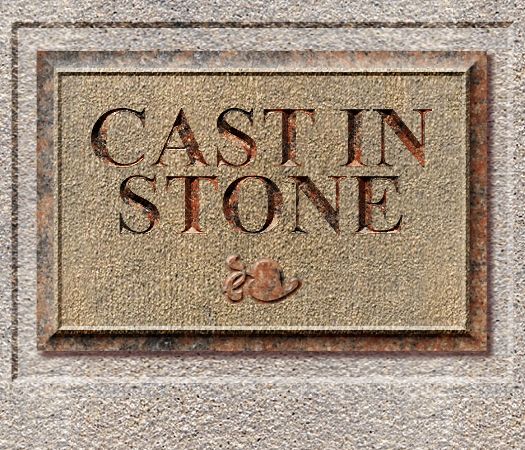
Ask yourself. Can you ever have enough carved stone effects. If you said yes, you are cynical and are excused from this next mini-tutorial. If you said, no, you can never have enough carved stone effects, you get a gold star and may continue.
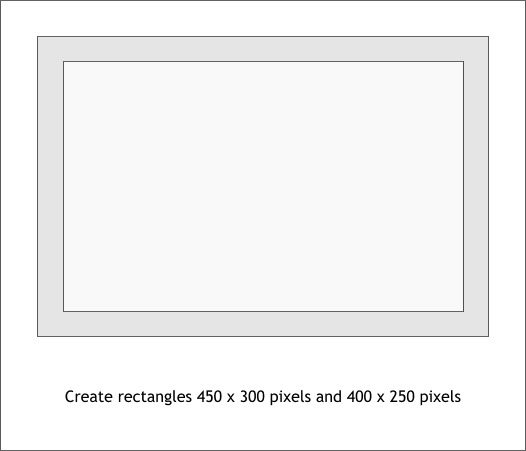
Here's the easy part. Create two rectangles to the sizes shown above. TIP: Draw any size rectangle, then enter the desired width and height amounts in the Width and Height text entry boxes. Press Enter to apply
the changes. The rectangle will be resized to the exact dimensions. No fuss. No muss.
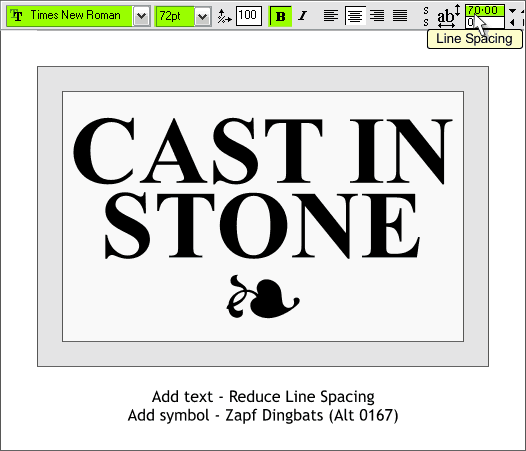
Add some text and a dingbat. The text above is Times New Roman Bold, 72pt. The Line Spacing has been reduced by first dragging the Text Tool (F8) cursor across both lines of text, to highlight the text, then reducing the Line Spacing amount (shown above top right). In this case to 70% but this may vary depending upon which font you edit. To create the heart shaped dingbat. Click the text cursor on the page. With the Num Lock key enabled on your numeric keypad, hold down the Alt key and on the numeric keypad, key in 0 1 6 7 . Now highlight the character and change the font to Zapf Dingbats. Change the size to 72pt.
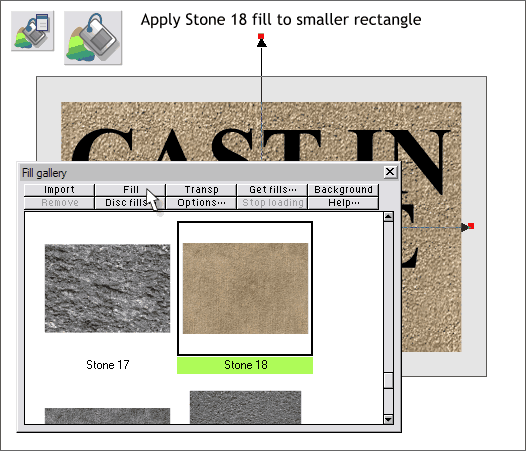
Select the smaller rectangle. With the Xara CD in your CD drive, open the Fill Gallery (Shift F11). From the Stone Fills folder, select Stone 18 and press Fill . Make the fill size smaller by selecting the fill with the Fill Tool (F5), selecting one of the outside fill handles (the small squares) and pressing the left arrow key on your keyboard until the width of the fill is about the same as the width of the rectangle as shown.
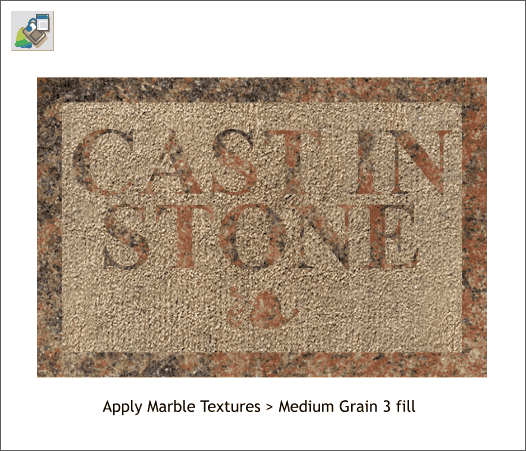
Hold down the Shift key and click on the larger rectangle, the text and the dingbat heart. Shift click is how you select multiple objects. From the Marble Fills folder in the Fill Gallery (Shift F11), select Medium Grain 3 and press Fill. Reduce the size of the fill to fit the larger rectangle. This gives us the effect of polished marble with a rough chiseled area. What's missing, however, is depth. That is the next step.
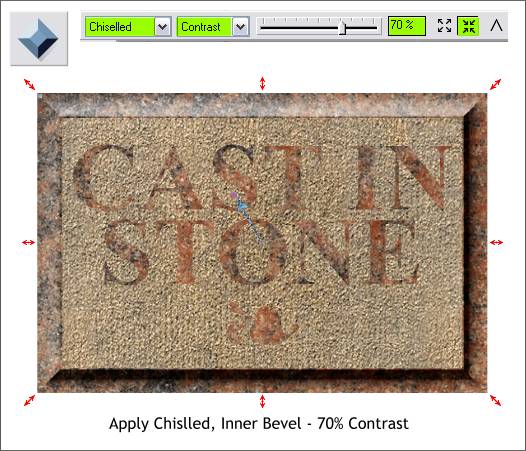
Select the large rectangle with the Bevel Tool (Ctrl F3). Drag any of the red arrow control handles towards the center to apply an Inner Bevel and stop when the bevel outline reaches the edge of the smaller rectangle as shown above. From the Bevel Type drop down list, select Chiseled. Increase the Contrast slider to 70% to make the lights a bit lighter and the darks a bit darker.
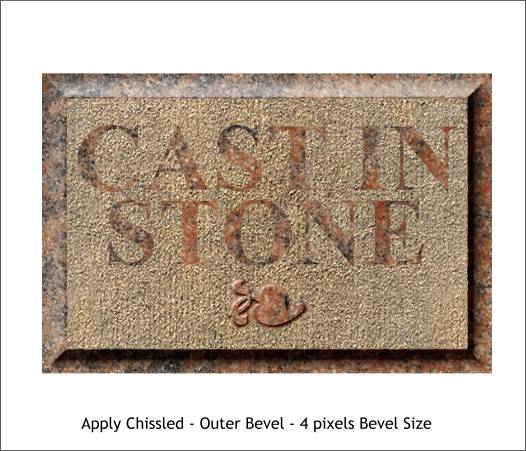
Select the dingbat with the Bevel Tool. Select Chiseled from the drop down list of Bevel Types. This automatically applies an Outer Bevel. From the Slider Type drop down list, select Size (the default is Contrast). Change the Size setting to 4pix. Press Enter to apply the change.
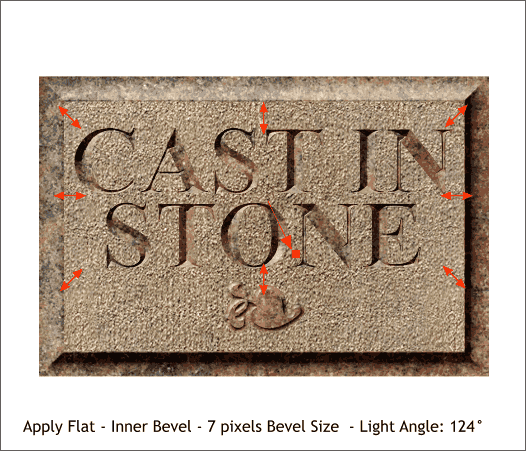
Select the text with the Bevel Tool and drag to the center to apply a Flat, Inner Bevel. Select the arrow in the center of the bevel with the Bevel Tool and drag it 180 degrees to the bottom right or about to the 5 o'clock position. You can also select Bevel Angle from the Slider Type drop down list and change the angle to 124 degrees. From the Slider Type drop down list, select Size and change the Bevel Size to 7pix. Press Enter to apply the change. NOTE: If you enter an amount in any text entry box you need to press Enter to apply the change. But if you use the slider, you do not have to press Enter. The change is applied in real time.
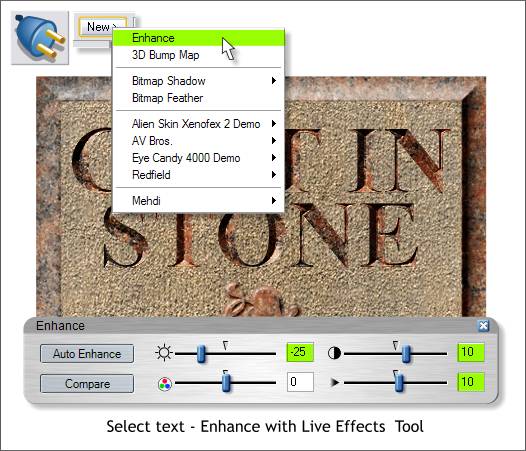
With the beveled text selected, select the Live Effects Tool (Ctrl F5). From the New > drop down list, select Enhance. The opens the same Enhance dialog that you find in the Xara Picture Editor except this enhance can be used on vector or bitmap objects. Change the slider settings as shown above. The Enhance dialog gives us much more control versus just using the Bevel Tool Contrast slider. Press the blue X icon to close the Enhance dialog.
And here is what they call in food package photography a "serving suggestion". I have added a very small Point Frame 1 Outer Bevel to the smaller rectangle to add a raised edge. And I created a wall with an indentation on which to mount the marble plaque. I also added a very small wall shadow to optically move the plaque away from the wall. Comments, questions, complaints, suggestions? Please use the feedback form on the next page to send me your thoughts. Even if you just say, Hello, Thanks. It is always nice to receive your response to these workbook tutorials and it lets me know that there are one or two of you out there whom I am hopeful are benefitting from all this work. And do let me know if you figured out the secret for capturing the Paste Special dialog. Gary W. Priester
|
||||||
|
|


