|
|
|
I was recently asked to create a set of texture images that would tile (repeat over and over again) seamlessly. After much trial and error, this is the technique your Editor (still me) came up with. It is a little involved so pay close attention.
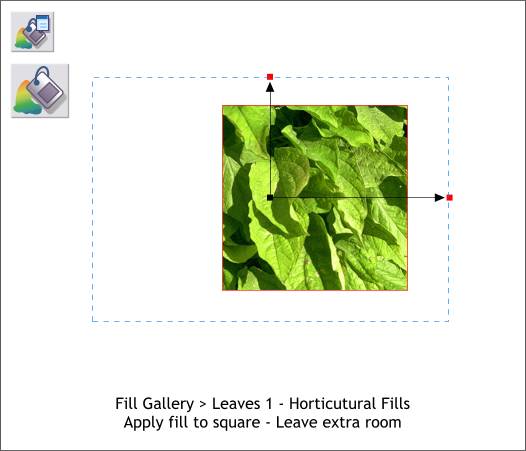
You can use a square or rectangle. It really makes no difference. Apply a bitmap fill and allow yourself some extra room as shown above. Patterns that have a random arrangement of objects, such as the leaves shown in this example, work best. I have applied a Leaves 1 fill to a square from the Horticultural Fills folder in the Fill Gallery (Shift F11). NOTE: Unless you have copied all the fills to your hard drive, you will need to have the Xara CD in your CD drive. Select the bitmap filled square with the Fill Tool (F5). The fill path arrows that appear represent the center and one quarter of the bitmap (shown above in blue dashed outline is the entire image). As you can see there is additional image around the square. This is important.
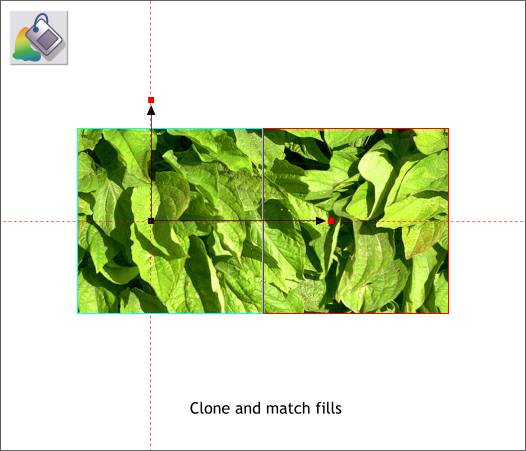
Drag guidelines from the screen rulers (Ctrl L to display rulers), through the center of the fill there the two fill path arrows come together. Clone the square, move it to the right and align with the right side of the image. I've added green and red outlines to make it easier to see the two squares. Select the clone with the Fill Tool (F5) and drag the center of the fill to the intersection of the two guidelines. Now both fills have the same center and the fill aligns perfectly. So far, so good.
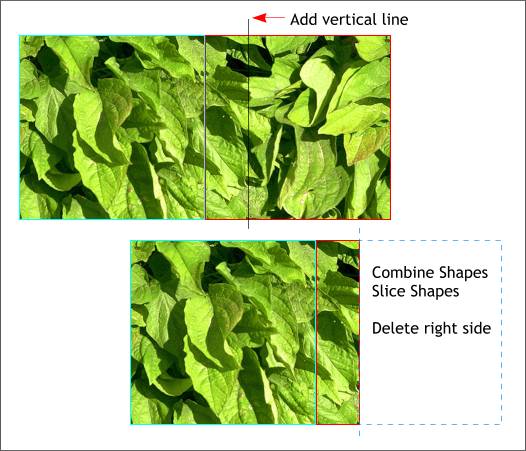
Group (Ctrl g). the two right shapes, Add a vertical line about 40 pixels to the right of the left side of the cloned square using the Shape Editor Tool (F4). TIP: To draw a vertical or horizontal line with the Shape Editor Tool, click the tool on the page, hold down the Ctrl key and drag up or to the side. Hold down the Shift key (to multiple select) and select the line and the cloned square. From the Arrange menu select Combine Shapes > Slice Shapes or use the keyboard shortcut Ctrl 4 . Delete the right section of the square indicated above in blue dashed outline.
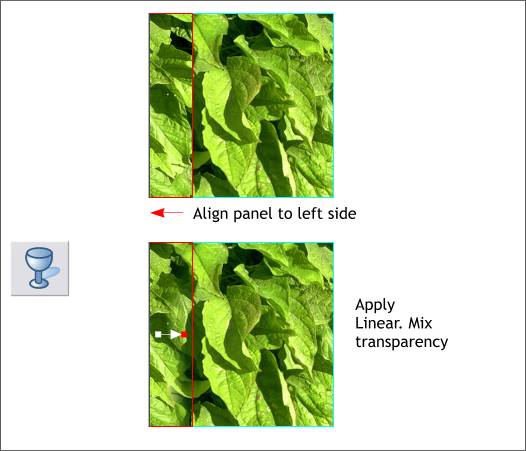
Align the sliced rectangle to the left side of the original square. Select the Transparency Tool (F6). Click and drag from the left to the right to apply a Linear transparency. Start in a short distance from the left and end before you reach the right side of the rectangle. This blends the rectangle into the square but leaves a continuation of the right edge on the left so the two edges with join seamlessly.
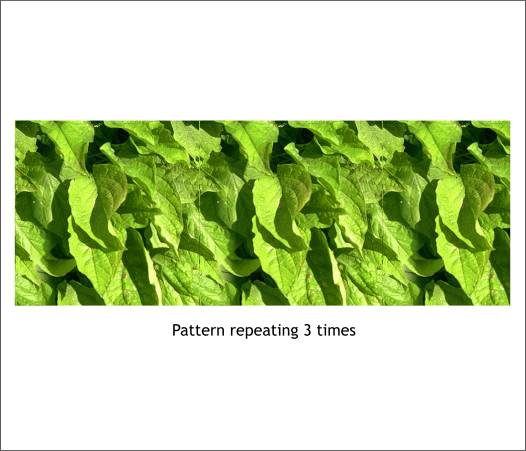
The example above shows the square repeated three times. Next we'll repeat these steps to create a vertical seamless edge.
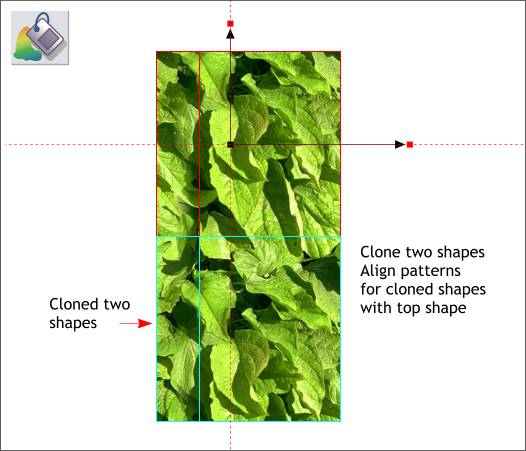
Clone the two shapes and align the clone to the bottom of the square as shown above. Select the top shape with the Fill Tool (F5) and reposition the two guidelines through the center of the fill. Select the two bottom shapes with the Fill Tool and drag the center of their fills to the intersection of the two guidelines. The pattern for the top and bottom squares should now match as shown above.
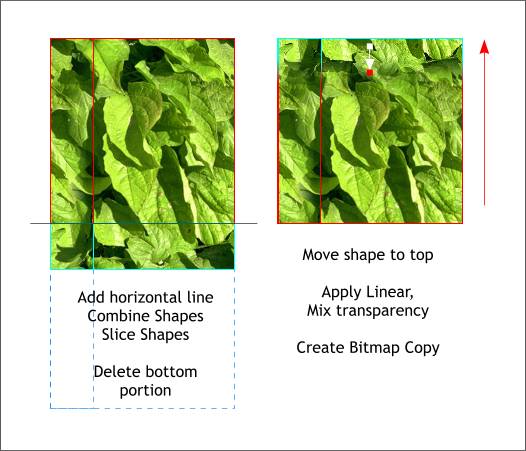
Group the two bottom shapes. Add a horizontal line about 40-50 pixels up from the bottom. Arrange > Combine Shapes > Slice Shapes. Delete the top portion of the sliced shape. Move the sliced rectangle to the top of the square. Apply a Linear transparency to the rectangle starting in a short distance and ending before the end of the rectangle. Select all for shapes and Arrange > Create Bitmap Copy... and select the True Color color depth option. Chose an appropriate resolution if desired. The seamless tile is now created. Next I'll show you how to apply it as a seamless fill.
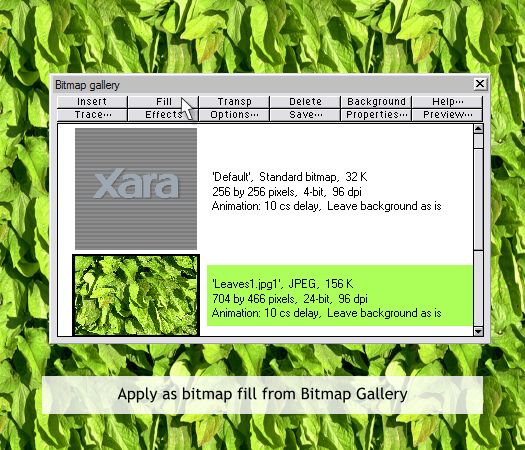
To apply the seamless pattern, select an object, open the Bitmap Gallery (F11). Select the tile bitmap and press Fill. That was easy, no? To make the fill pattern larger or smaller, select the filled object with the Fill Tool (F5) and lengthen or shorten the fill path arrows. If you hold down the Shift and Ctrl keys and drag the fill path arrow, the fill will scale proportionately. TIP: Select either of the small squares at the end of the fill path arrows then press the left or right arrow keys on your keyboard to scale the tiling image proportionately.
|
||||||
|
|


