|
|
|
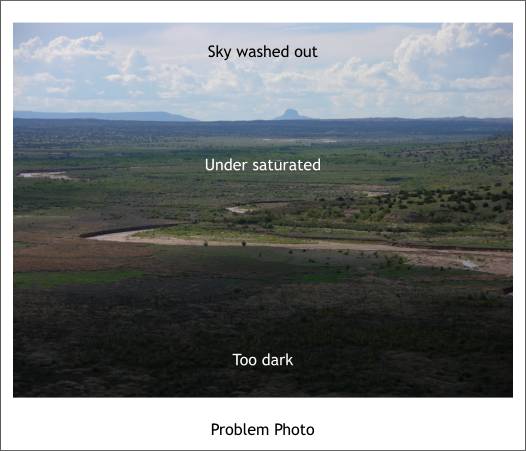
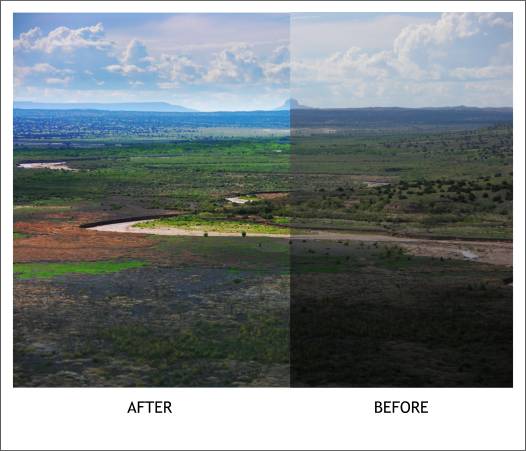
Digital cameras are terrific. One of the downsides to digital photography, however, is unless you know how to override the default settings, you can wind up with a photo like the one I took below. My camera did not know where focus (so to speak) and as a result the sky is washed out, the middle ground is dark and under-saturated, and the foreground which was in the shadow of a passing cloud is too dark. Can this photo be saved?
Here is the photo. My camera's exposure meter did not know what area to focus on and as a result it has 3 areas that all need help. With a little assistance from XPE (Xara Picture Editor) this photo can be saved. Click here to download the photo to use in this tutorial. NOTE: If the photo appears in your browser, right click on the photo and select Save Photo As... and save the photo where you can find it.
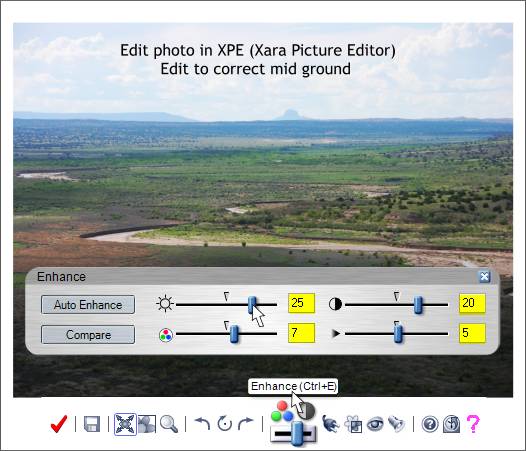
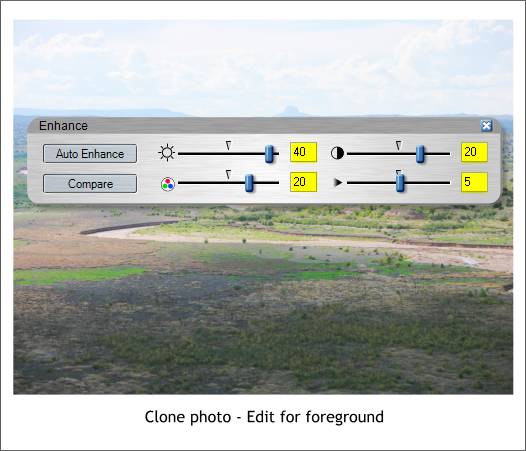
Double click on the photo to open Xara Picture Editor. Press Ctrl e to open the Enhance dialog. First we will try to improve the middle area of the photograph. Increase the Brightness setting to 25. Increase the Contrast to 20. Increase the Color Saturation to 7. And increase the Sharpness to 5. Press the red check icon to accept and apply these changes.
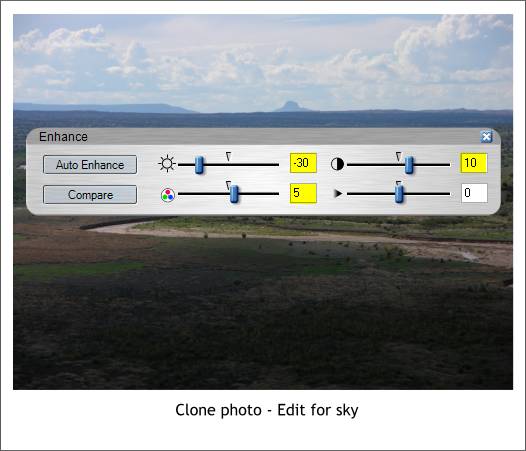
Clone the photo (Ctrl k). Double click on the clone to open XPE. Change the settings to the changes shown above. NOTE: These changes are made to the photo but Xara retains all of the original settings. You can press the Compare button to toggle back and forth from the original to the edited image. The original settings are saved if you save the modified bitmap in a Xara XAR file.
Clone the photo again (Ctrl k). Double click on the clone to open XPE. Make the changes shown above to open up the very dark shadow area in the foreground.
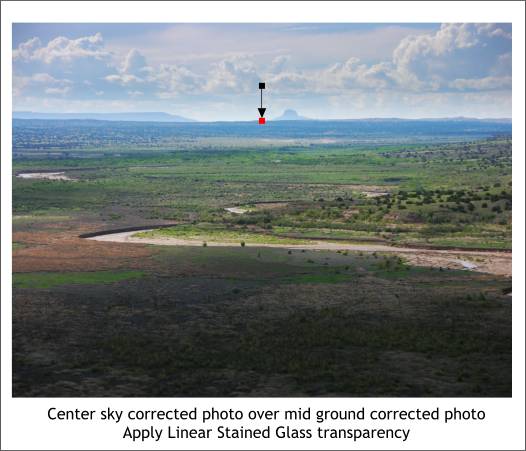
Center the photo with the corrected sky over the photo with the corrected middle ground. Using the Transparency Tool (F6) create a vertical, Linear, Stained Glass transparency. Adjust the fill path arrow as shown in the example above. TIP: Hold down the Ctrl key when you drag to constrain the direction of the fill path to vertical. The top of the fill path Transparency slider setting is 100% and the bottom is 0%.
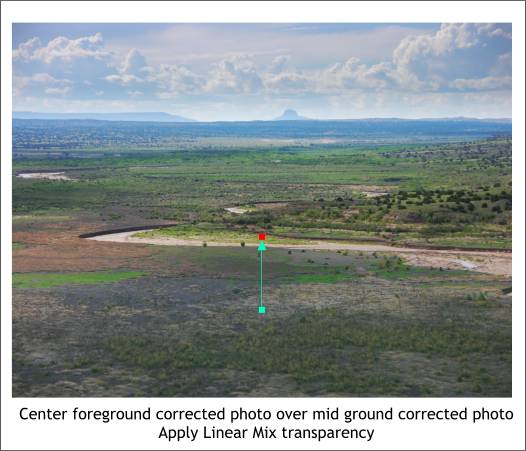
Center the photo with the foreground corrected over the other 2 photos and apply a Linear, Mix transparency. With the top Transparency slider setting at 100% and the bottom at 0%. NOTE: Since we cloned all the photos, they will be stacked one atop the other. To get to the next photo down hold down the Alt key and click twice on the top photo to "drill down" to the next photo. Alt click again to drill down to the 3rd photo, etc. Press Ctrl F to bring a selection to the top. Press Shift Ctrl F to bring a selection up one layer at a time.
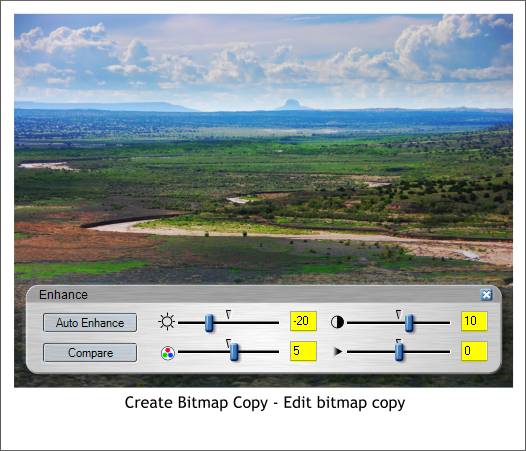
Select all 3 photos and Arrange > Create Bitmap Copy... Use the True Color Color Depth setting. Press Create. Double click on the new photo to open XPE and make the above corrections.
Here's a side-by-side comparison. Now if your editor (that's me) could figure out how to use his built in exposure meters and shutter settings, there would be no need to go through this drill. But it's good to know XPE can help make an amateur photographer like myself, look like he knows what he is doing.
Your comments, questions, and suggestions are always welcome and greatly appreciated. Please use the feedback form on the next page to let me know how useful, or not, this Workbook was. Gary W. Priester
|
||
|
|
