|
|
|
New users are always asking for simple easy-to-do tutorials. So your editor (that's me) hopes you new users will find this tutorial illuminating and that it will shed some light on how Xara works. For this tutorial, as with all my tutorials, we will use Pixels for our Units and 0-255 for our Color Units. Click here if you need help setting up your units and color units.
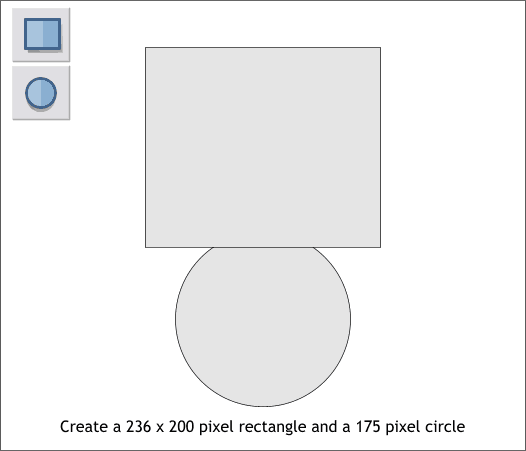
Select the Rectangle Tool (keyboard shortcut Shift F3) and draw a rectangle 236 pixels wide by 200 pixels tall. Select the Ellipse Tool (Shift F4), hold down the Ctrl key, to constrain the ellipse to a circle, and draw a 175 pixel circle
TIP: The easiest way to create a circle or rectangle to an exact size is to create a small rectangle or ellipse on the page, then key in the exact dimensions in the Width and Height text entry boxes (see above). Enter the width first. When you click in the Height text entry box the shape will automatically expand to the width. After you enter the height, press Enter to apply the second change. Bring the rectangle to the front (Ctrl f or Arrange > Bring to Front.
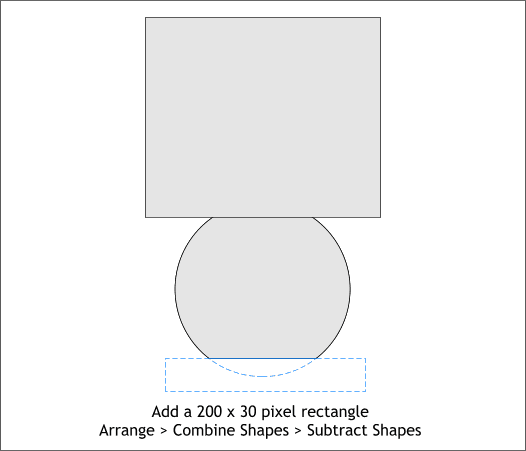
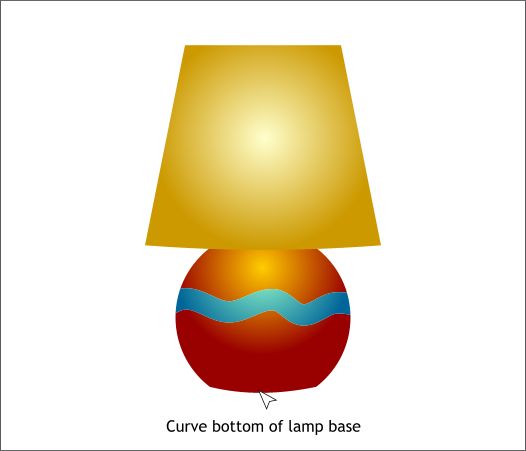
Create a new rectangle about 200 pixels by 30 pixels. Position the rectangle over the bottom area of the circle as shown above. Select the rectangle and the circle (hold down the Shift key and click on each shape). From the Arrange menu, select Combine Shapes > Subtract Shapes (or keyboard shortcut Ctrl 2). The rectangle disappears along with the bottom of the circle as indicated above in blue dashed outline.
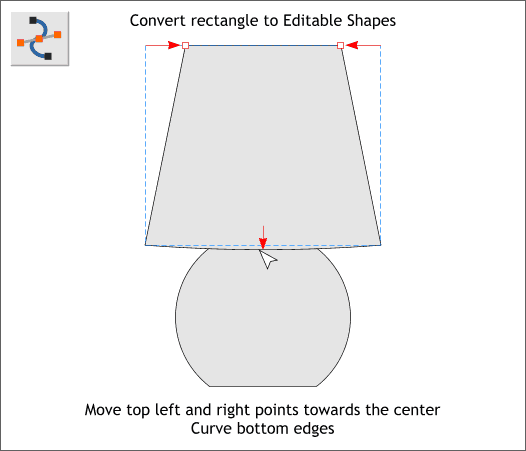
Select the big rectangle and Arrange > Convert to Editable Shapes. Switch to the Shape Editor Tool (F4). Select and move each of the top control points towards the center about 40 pixels. Drag the middle of the bottom edge of the rectangle downward a small distance.
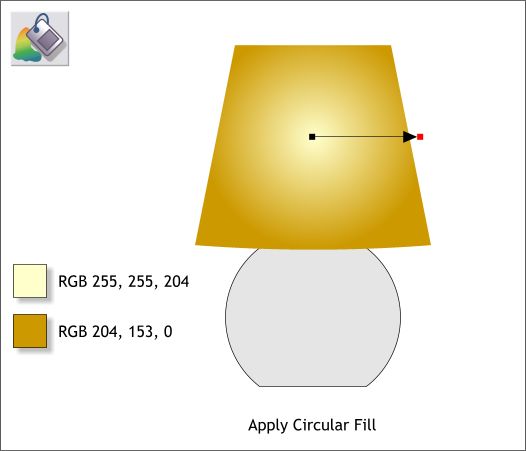
Select the shade with the Fill Tool (F5). From the drop down list of Fill Types on top left area of the Infobar, select Circular. Click in the center of the fill, then find a pale yellow color on the screen palette. TIP: If you let your cursor rest for a second over any of the colors on the screen palette, a tool tip will appear with the color name or RGB values for the color. Click on the outside control handle (the tiny square at the end of the arrow) and then click on a dark yellow color on the screen palette. You can also edit colors in the Color Editor (Ctrl e) > RGB Color Model.
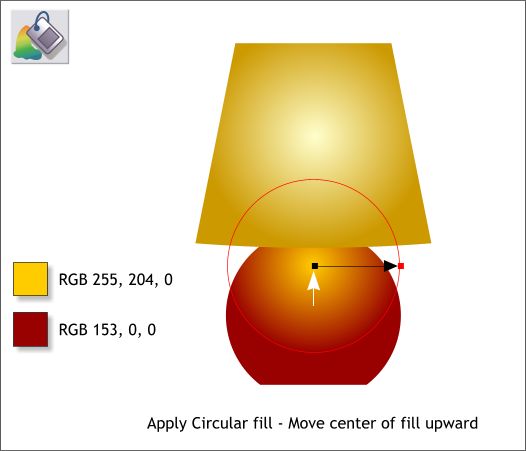
Select the lamp base (the modified circle). Apply a Circular fill using the 2 colors shown. Drag the center of the fill up as shown above.
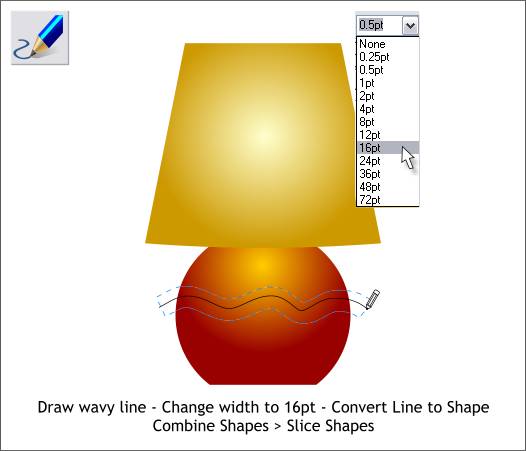
Select the Freehand and Brush Tool (F3). Draw a wavy line though the center of the lamp base. The line should start and end a little distance outside the lamp base as shown. Change the outline Width to 16pt. From the Arrange menu, select Convert Line to Shape. Select the wavy line shape and the lamp base (hold down the Shift key to select multiple objects). From the Arrange menu, select Combine Shapes > Slice Shapes (or press Ctrl 4 ). The wavy line shape will disappear and the sliced shape will now be a separate object in the middle of the lamp base.
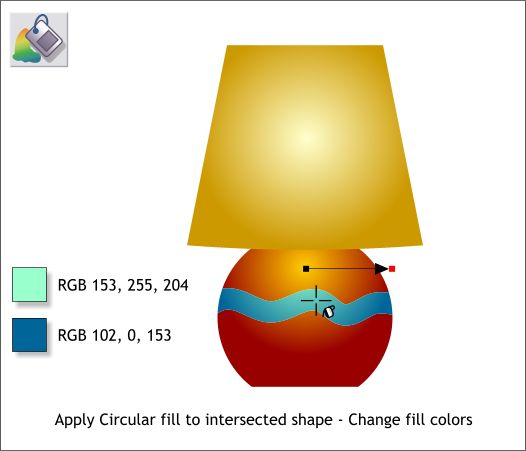
Select the center sliced shape with the Fill Tool (F5). Change the 2 fill colors as shown above. Xara maintains the same fill position even though we sliced the shape and so the 2 fills match exactly.
Select the bottom of the lamp base with the Selector Tool (the arrow pointer), then switch to the Shape Editor Tool (F4). Drag the bottom of the base down just a small amount. Did you finish? Was that too hard or too easy? You can send me a question or comment using the feedback form on page 6.
|
||
|
|
