|
|
|
I've covered this before, but since this subject comes up frequently in the Xara Conferences, I thought I would cover it again. Many times your client gives you a bitmap logo and says he wants to put it in an ad or brochure. The logo is low resolution and/or too small and she needs it to be larger, and in its current size, it will not look good in an ad. So how can you make a scalable vector version of the bitmap logo? There are 2 ways to convert a bitmap logo into a vector logo. You can use Xara's Bitmap Tracer, or you can use Xara's excellent drawing tools to create a vector version that can be made as small or large as you want without losing any of the detail.
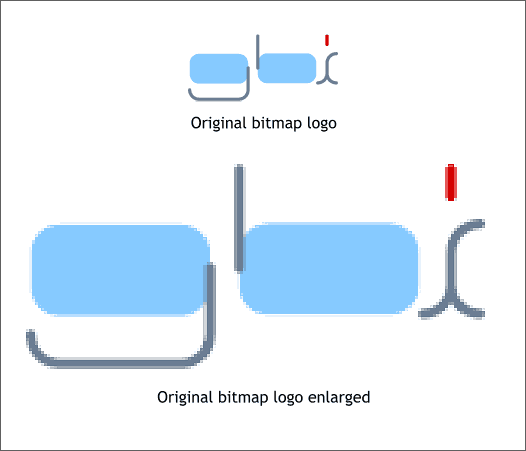
This is a logo design I did for an importer of German eyewear. At this size and at screen resolution, it looks OK bit if we reduce it to about 30% we could use it for print. But if we have a vector version, we can use the logo at any size.
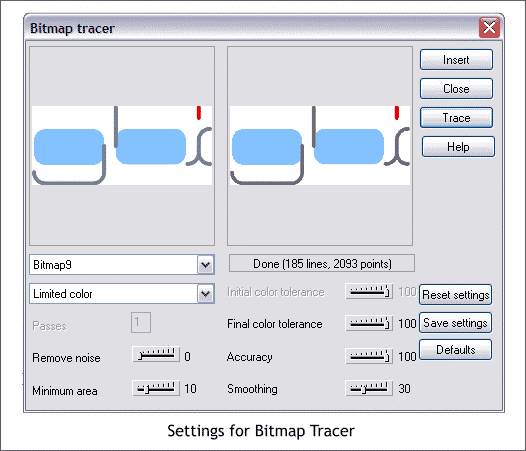
If you are lucky and have a large, high resolution version of the logo you can use Xara's Bitmap Tracer (Utilities menu). You can use the settings shown above or experiment until you produce a trace you are happy with. Modify your settings then press Trace and a preview will appear in the right preview window. When you think the preview looks as good as you can get, press Insert to place the vector trace on the page. For more information on bitmap tracing see Guest Tutorial 62 and Guest Tutorial 53.
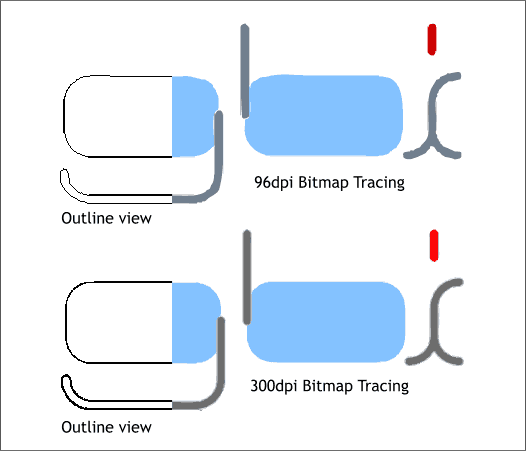
The 2 examples above were traced from a 96dpi (top) and a 300dpi logo (bottom). On the left of each is an outline view of the trace. While the 300dpi logo produced a better trace, neither is good enough for print work unless you reduce the logo and make it very small. The best way to convert the bitmap to vectors is using Xara's drawing tools.
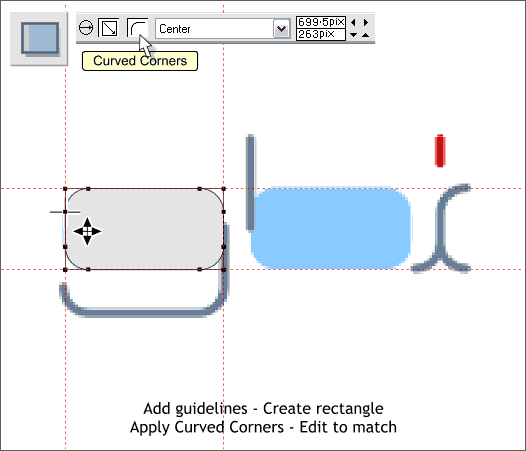
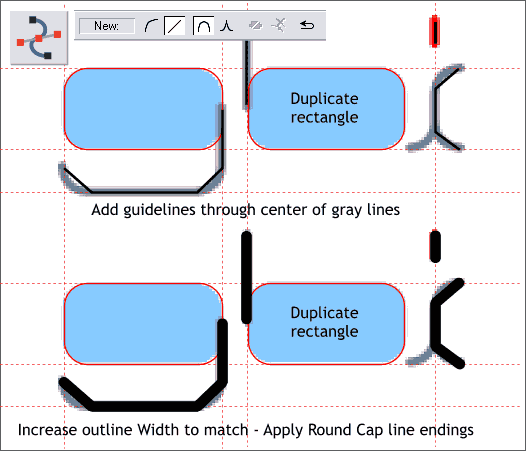
The blue lenses are essentially rectangles with rounded corners. Drag guidelines from the screen rulers (Ctrl L to show rulers) and position them on all 4 sides of the rounded rectangle. Select the Rectangle Tool (Shift F3) and drag/snap a rectangle to the 4 guidelines. Press the Curved Corners icon on the Infobar (shown above). Drag any of the inside (but not the corner) control handles with the Rectangle Tool until the corner roundness matches the blue lens.
Duplicate the lens shape and place it over the right lens. Using the Shape Editor Tool, and with the Infobar set to Make Line (\), click a series of line segments as shown above top. Place your control points at the start and end of each curved section. Change the line Width to 8pt. Open the Line Gallery (F12) and from the two drop down lists, set the Join Type to Rounded and the Line Cap to Round.
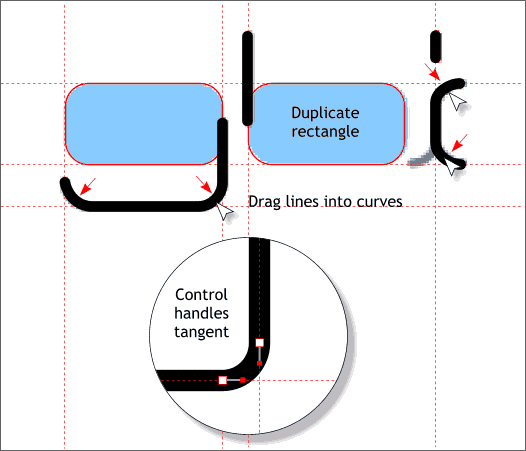
With a line selected, switch to the Shape Editor Tool. Drag the corner line segments into curves. Click on the control point and adjust the Bezier curve handles so that each handle is tangent to the line on which it appears (see inset image).
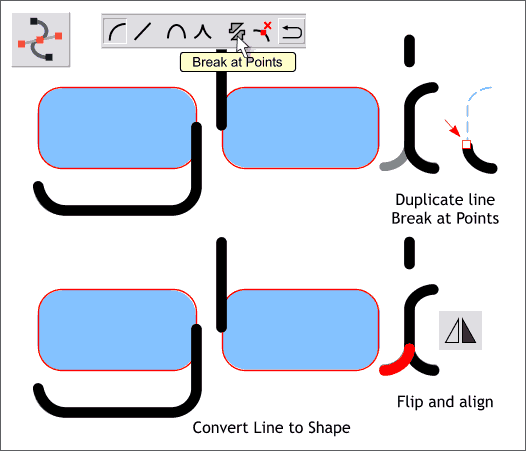
Clone the C-shaped line (Ctrl k). With the clone selected, use the Shape Editor Tool to select the bottom, side control point (indicated above top by the red outlined square. Press the Break at Points icon on the Infobar (shown above). Delete the top portion of the line. Select the bottom portion of the line and press the Flip Horizontally icon (the facing triangles). Position this shape on the left as shown above bottom in red. Select all the new lines (but not the lens shapes) and Arrange > Convert Line to Shape.
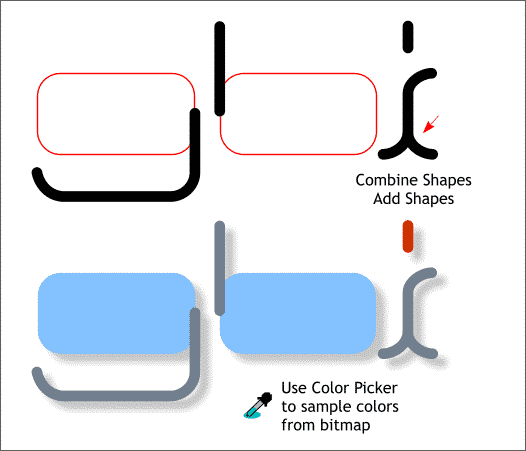
Select the bottom 2 objects for the i and Combine Shapes > Add Shapes (Ctrl 1). Move the bitmap away from the vector shapes. Open the Color Editor (Ctrl e). Select the 2 lens shapes, then drag the eyedropper tool (the Color Picker) from the Color Editor over the blue portion of the bitmap logo to copy the color. Select the converted line shapes and sample these colors. Group the objects when you are done. Each logo is obviously going to be different and not all will be as simple and as easy as this one. But using Xara's tools, and with a little practice, you should be able to make a very excellent vector version.
|
||
|
|


