|
|
|
Many, many years ago, I created a chrome pretzel using a 999-step blend of two Linear filled circles to demonstrate the strength of Xara's Anti-aliasing engine compared to the competition (CorelDRAW). Not only was Xara's blend smootherthere was no comparison, but Xara completed the task in a fraction of the time it took the competition. It was a classic example of the tortoise and the hare! I thought it might be fun to revisit the chrome pretzel tutorial and this time use a custom Brush stroke instead of a blend. This is a long one so if you have not had dinner, you might want to save this for afters.
A 999-step blend along a pretzel-shaped path.
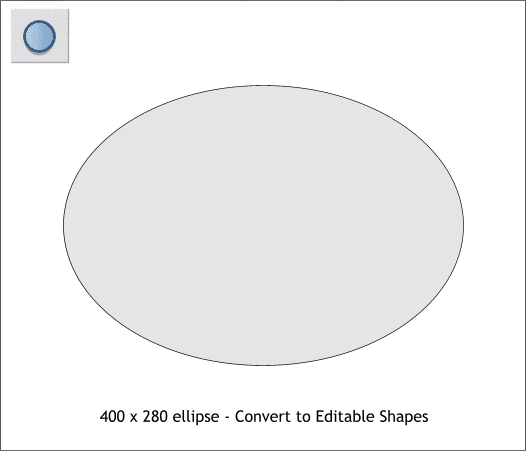
Start by creating an ellipse to the size shown above. Convert the ellipse to editable shapes (Arrange menu).
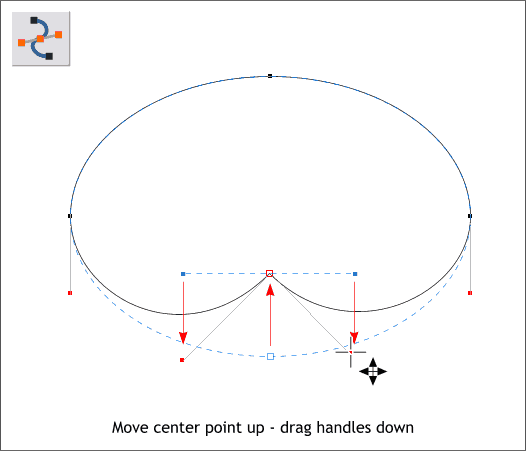
With the ellipse selected, switch to the Shape Editor Tool (F4). Drag the bottom control point upward about 1/3 the height of the ellipse. Drag the ends of the Bezier control handles downward as shown above.
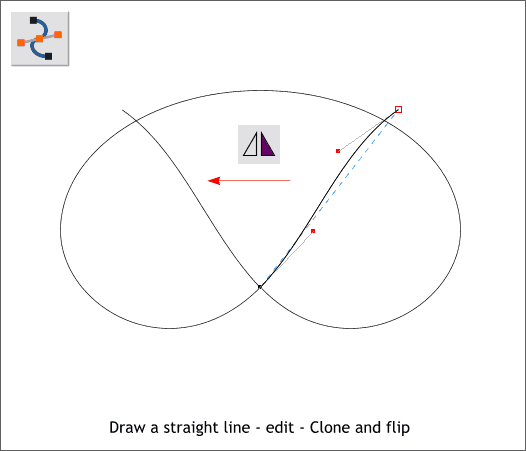
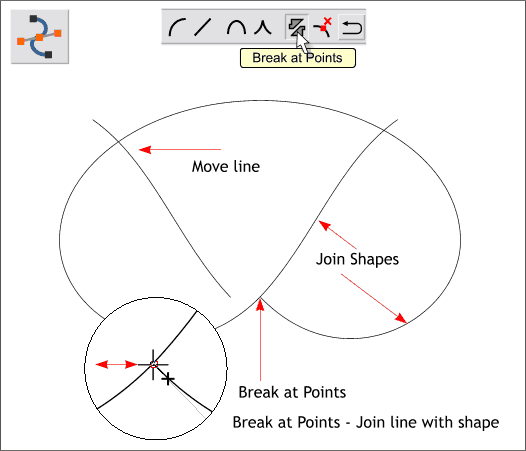
Deselect the shape. Draw a straight line from the pointy part of the ellipse shape and off to the right using the Shape Editor Tool. Drag on the line lightly to make a very gentle S-curve. Clone the line (Ctrl k ), flip it horizontally, and align the bottom with the bottom of the other line,
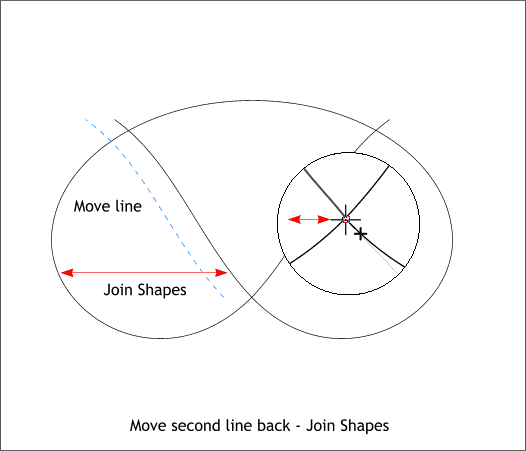
Move the cloned line to the left. Select the ellipse and switch to the Shape Editor Tool. Select the bottom control point (the pointy part of the shape) and press the Break at Points icon on the Infobar. This disconnects that portion of the shape. Select the right line and the ellipse and Arrange > Join Shapes. NOTE: When you Join Shapes with 2 paths it's more like an engagement than a marriage. To marry the lines and make the join "legal" you need to perform the ceremony outlined in the next paragraph. Zoom in close to where the 2 paths are joined using the Zoom Tool (Shift F7). With the path selected, switch to the Shape Editor Tool. Drag the control point where the line and the ellipse joined together to the left a short distance and then back. The cursor will display a + to indicate that now the 2 paths are now legally joined.
Move the left line back and perform the Join Shapes operation. Make a copy of this pretzel shape and set it to one side for now.
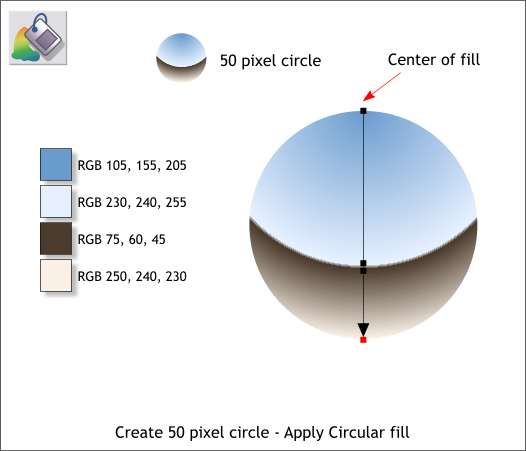
Create a 50 pixel circle. Select the Fill Tool (F5), then select Circular from the drop down list of Fill Types on the Infobar. Drag the center of the fill to the top of the circle and extend the fill path arrow to the bottom of the circle as shown above. Double click on the fill path arrow with the Fill Tool to add 2 additional colors and create the fill shown above using the Color Editor (Ctrl e) to create the RGB colors. (The large circle is only to make it easier to see the fill). NOTE: The 2 added colors should be close to one another.
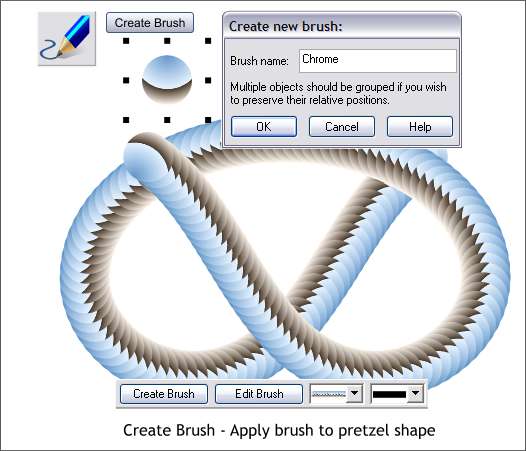
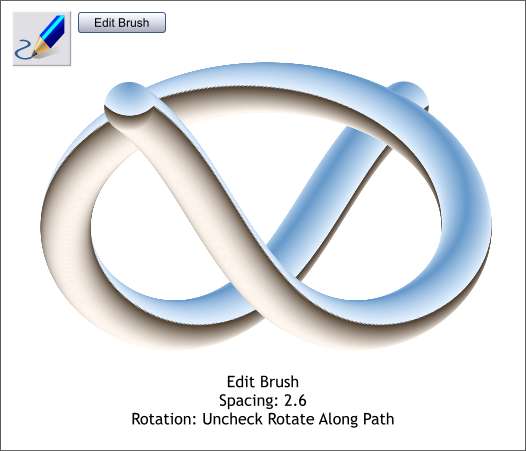
Select the filled circle with the Freehand and Brush Tool (F3). Press Create Brush. Enter Chrome for the name for the brush and press OK. Select the pretzel-shaped path with the Freehand and Brush Tool and then open the Select an Existing Brush drop down list to the right of the Edit Brush button and select the Chrome brush strike (it should be the second brush). The pretzel should now look like the example above.
Press the Edit Brush button. In the Chrome brush options dialog, open the Rotation tabbed section and uncheck Rotate Along Path. Open the Spacing tabbed section and slide the Spacing slider as far to the left as it will go to about 2.6. The chrome should now be very smooth as shown here.
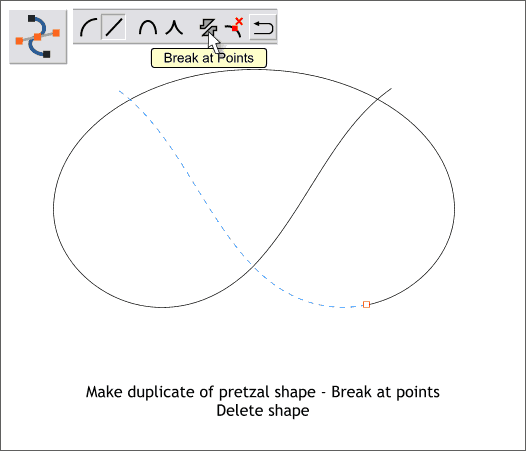
It would be really cool to give the pretzel an over and under effect. Here's how you can do this. Select the duplicate pretzel shape then switch to the Shape Editor Tool. Click on the area of the path shown above to add a control point, then press the Break at Points icon on the Infobar. Delete the section shown above in blue dashed outline.
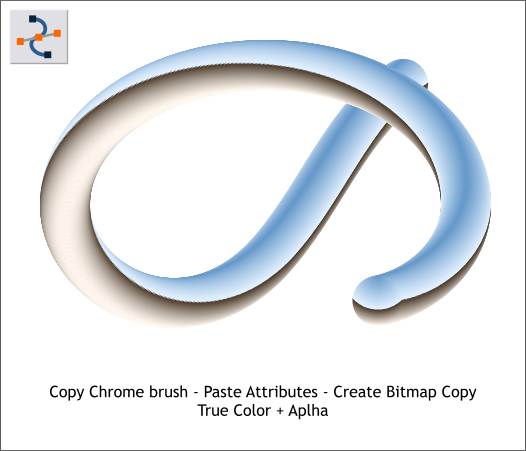
Select the chrome pretzel and copy it to the clipboard (Ctrl c). Select the new modified pretzel shape and Paste Attributes (Edit > Paste Attributes or press Shift Ctrl a. With the partial pretzel selected, Arrange > Create Bitmap Copy... Use the True Color + Alpha Color Depth option (transparent background). You can delete the non-bitmap version.
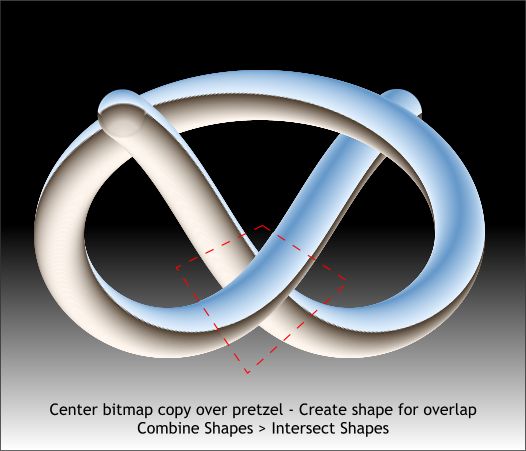
Align the bitmap over the complete pretzel. Using the Shape Editor Tool, create a closed shape (shown above in red dashed outline) that covers the overlapping portion. Select the shape and the bitmap and Arrange > Combine Shapes... Intersect Shapes or use the keyboard shortcut Ctrl 3. This matches the shape perfectly and give the impression that the chrome shape is going over and then under. Final TIP: In putting together Xhris's excellent Guest Tutorial this month I learned something new. You can save a small section of the chrome brush stroke, for example as Chrome.xar, and save it in the Xara Xtreme > Templates > Brush folder and it will always be available in the Freehand and Brush Tool Infobar Select an Existing Brush drop down list. And that's it for Workbook #44. Your feedback is always welcome. I'd really like to hear what you think of the new minimalist Xara Xone design. You can use the feedback form on the next page to send me your comments, questions , and miscellaneous remarks. Gary W. Priester
|
||
|
|
