|
|
|
Frequently when I do the monthly tutorials I instruct you to align certain objects to other objects. But rare is the time I actually go beyond that obscure instruction. So, this month, I'll make up for lost time and explain the Object Alignment menu, how it works, and how you can use intuitive shortcuts to speed up the alignment and distribution process.
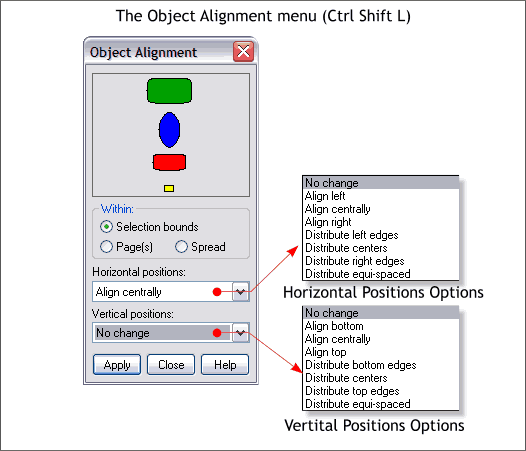
The Object Alignment menu is found in the Arrange menu. The keyboard shortcut is Ctrl Shift L. Shown above is the the Object Alignment menu and the contents of the Horizontal and Vertical Positions drop down lists. In the top center portion of the menu are 4 colored objects. These present a visual representation of the selected alignment such as Align Centrally.
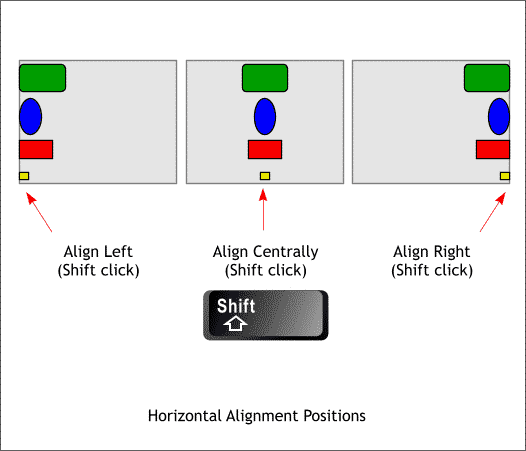
The 3 alignment options in the Horizontal Positions drop down list are shown above. If 2 or more objects are selected, the alignment will be as illustrated. TIP: Here's the first of the intuitive shortcuts I mentioned. To left, center, or right align a selection without using the drop down list, hold down the Shift key and click in the left, center or right side of the preview window. Then press Apply.
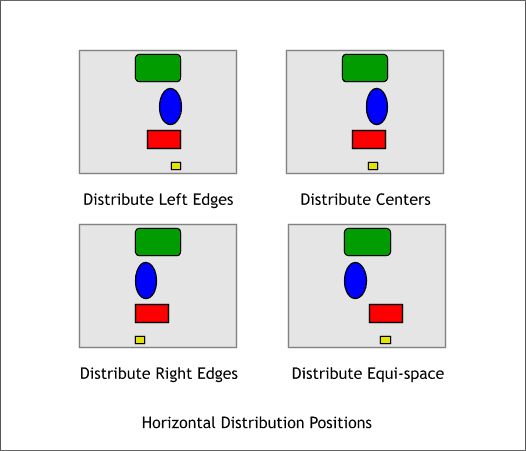
The other options in the Horizontal Positions drop down list are the Distribute options and the effect of these operations is shown above.
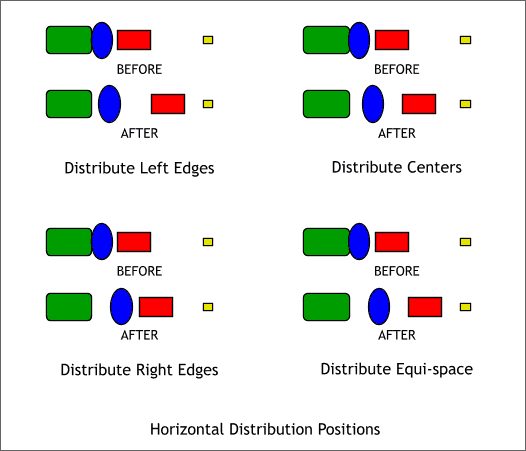
This illustration might be a bit clearer in describing the horizontal distribution operations. To be honest, the only one of these operations that I use all the time is the last, Distribute Equi-space which evenly spaces the selected objects. The Help menu will provide a detailed explanation of the other distribute operations.
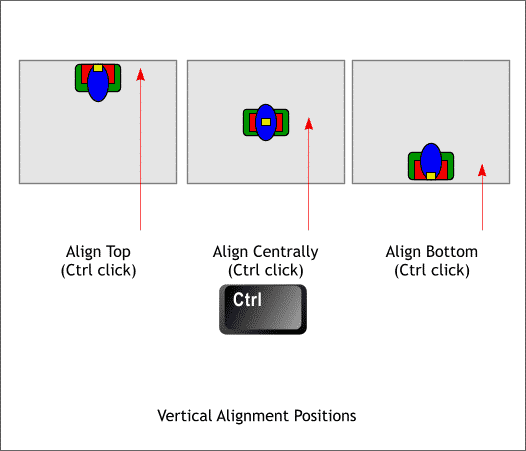
Here are the 3 basic Vertical Alignment positions, top, center and bottom. TIP: Hold down the Ctrl key and click at the top, center, or bottom of the preview window to intuitively align object vertically as shown above.
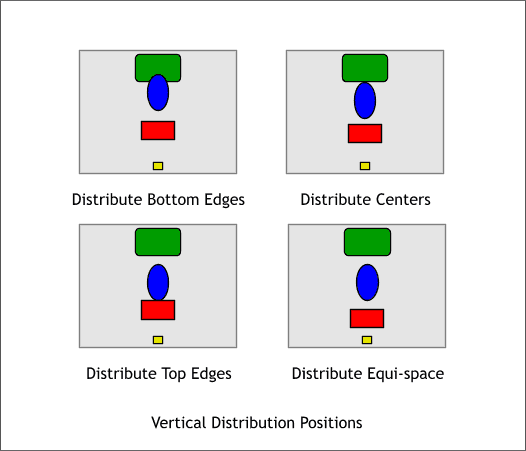
Shown here are the Vertical Distribution positions. Again, the only one of these I use frequently is Distribute Equi-space but I am confident one of you clever readers will let me know how you use the other variations.
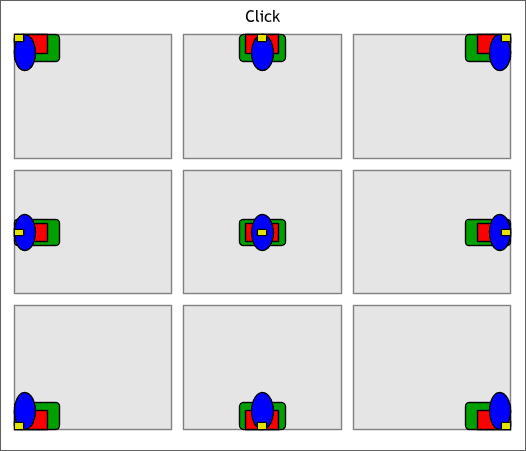
Here are 9 quick ways to align objects in the positions shown. Just click in any of the 9 areas shown above and press Apply. Quick. Easy. Intuitive. Yes?
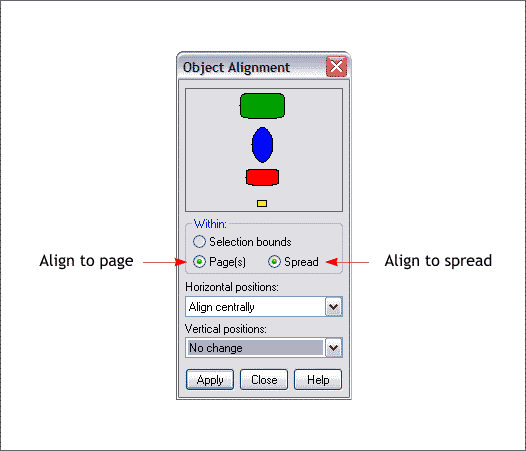
Finally, there are 3 Within: options. The normal option is Selection Bounds and aligns the selected objects within the selection area. Smaller objects are centered within the bounds of the largest object. Page aligns the selected objects in relation to the page size. This is a good way to center a selection in the center of the page or in any other portion of the entire page. Spread works in much the same way except takes into account the dimensions of a 2-page spread. TIP: You can reset the selections before you Close the menu, The next time you open the menu, your last selections will be saved.
|
||
|
|


