|
|
|
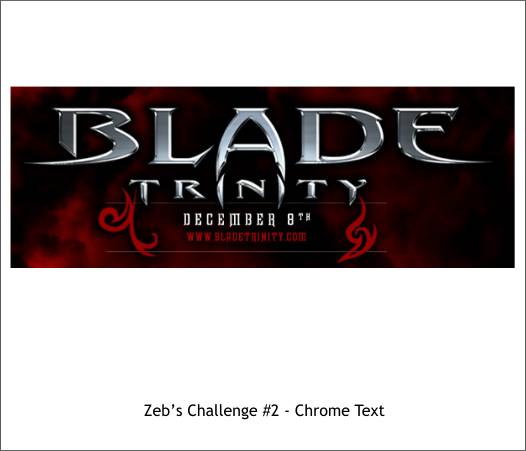
This is Zeb's 2nd type challenge. This challenge was to recreate the type treatment and fill effect used for the movie title, Blade.
The image shown above is the second that Zeb sent to me. Having no font on my computer that was even close, I did a search on the DaFont website and low and behold I found the font on the Famous Fonts > Movie > Page 2.
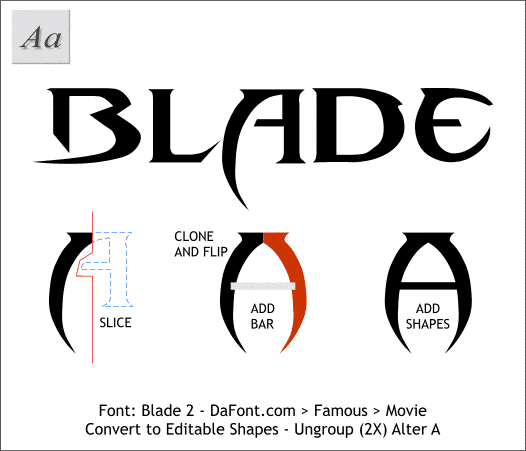
Here is the font Blade 2. It is not quite the same as the on the movie poster, the A and E characters are very different. But we can fix the A fairly easily. Select the type and Convert to Editable Shapes (Arrange menu) then Arrange > Ungroup (or Ctrl u) twice. Draw a vertical line (shown above in red) that jogs around the cross bar portion of the A. Select the line and the A and Arrange > Combine Shapes... Slice Shapes . Delete the right side. Clone the remaining portion (Ctrl k) and flip it horizontally and align it with the left side. Add a thin rectangle in the middle. Select all three shapes and Arrange > Combine Shapes... Add Shapes. Select all the characters and Arrange > Join Shapes.
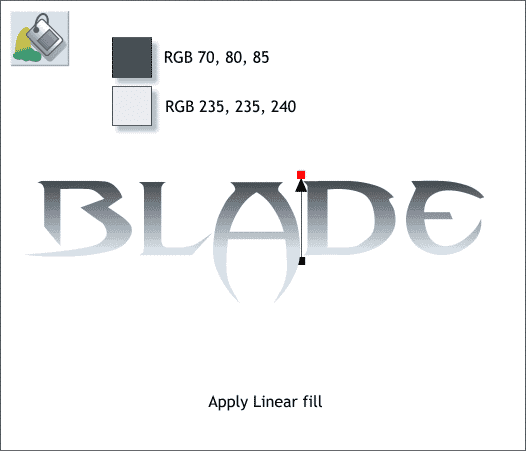
Select the characters with the Text Tool (F8). From the drop down list of Fill Types on the Infobar at the top of the screen, select Linear. Drag the ends of the fill path arrow into a vertical direction as shown above. Apply the 2 colors shown above. TIP: You can also click on any object with the Text Tool and then drag to apply an interactive Linear fill. Hold down the Ctrl key to constrain the direction of the fill.
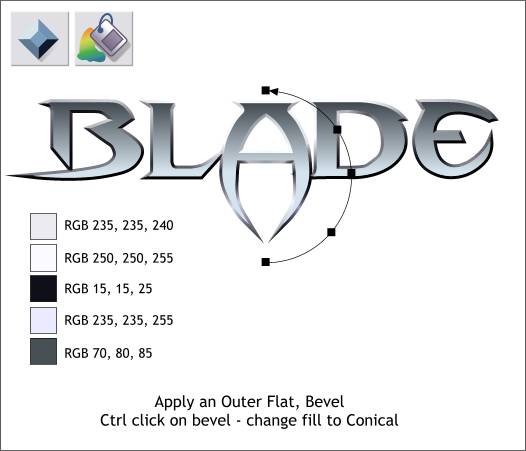
Using the Bevel Tool, apply an Outer, Flat bevel. The width of the bevel should be around 3 pixels. If the bevel is much larger, the the pointed ends of the characters get too large. Hold down the Ctrl key and click on the bevel (the Status Bar in the lower left of the screen should read I Bevel on Layer 1). Switch to the Fill Tool and from the drop down list of Fill Types, select Conical. Use the colors shown above. To add additional colors to the conical fill path, double click the Fill Tool on the path where you want to add the next color. Use the Color Editor (Ctrl e ) to edit the RGB colors.
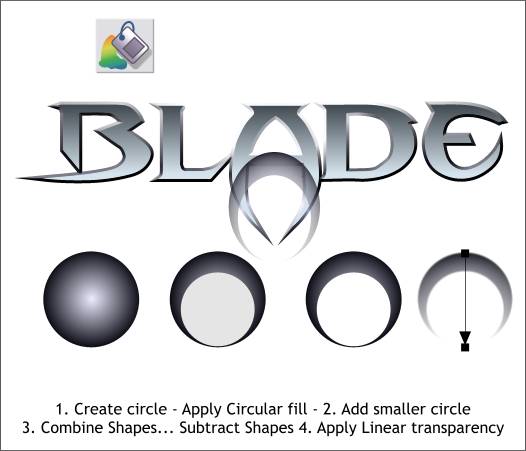
To create the reflection in the A, create a circle and apply a Circular fill using two of the colors used on the text. Make a smaller circle and align it bottom center with the larger circle. Select both circles and Arrange > Combine Shapes... Subtract Shapes. Apply a Linear transparency. Place the resulting crescent shape over the A as shown.
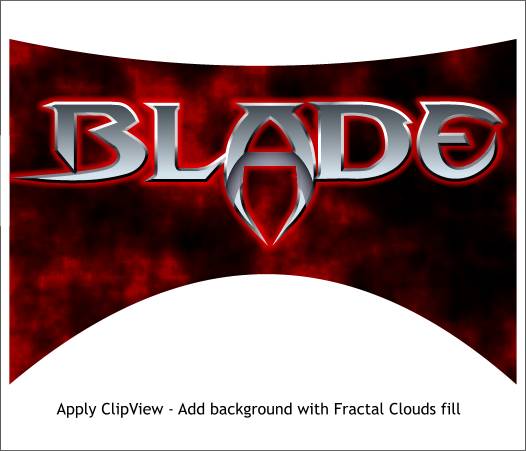
Select the beveled text, and the crescent shape, and Arrange > Apply ClipView. Finally add a background and apply a deep red and black Fractal Cloud fill and using the Shadow Tool (Ctrl F2), add a Glow Shadow to the text. NOTE: I added a few more colors to the bevel's Conical fill and moved the colors around to achieve a better effect against the background. Thanks for the type challenges, Zeb. Your editor (still me) is always looking for suggestions and challenges for these Workbook mini-tutorials.
|
||
|
|
