|
|
|
I covered Image Slicing is some detail back in WebXealot #24. I will give a condensed version of that tutorial here. It will be interesting to see if I can remember the steps.
The example above could be exported for the web as a JPEG or a GIF or 8-bit PNG file. But each format is better for some images than others. As you can see with the JPEG image, the red of the text bleeds and looks blotchy. This is a problem that JPEG images have with solid colors, especially with red. The second example is a 256 color GIF file. The red and black text look clean and crisp, but the apple is not quite as photographic as in the JPEG image. If we export the image in three slices, we can achieve the best of both worlds.
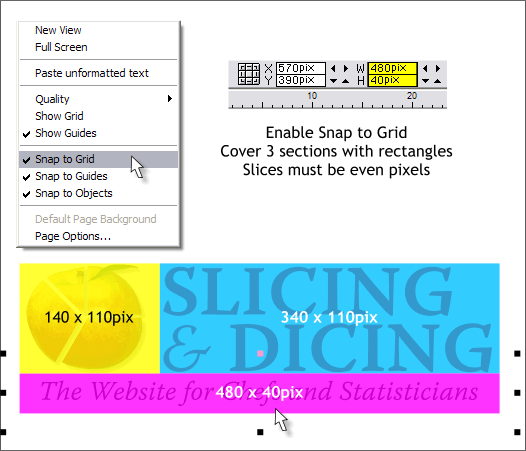
The first step is to define the areas to be sliced. In the example above, Snap to Grid was enabled and 3 rectangles created that cover each of the 3 areas. I color the rectangles then add transparency which makes it easier to distinguish the 3 areas. The two top rectangles are the exact width of the bottom rectangle and the same height as one another. NOTE: The slices must be in even pixel amounts. If a slice is a fractional pixel amount, 479.5pix for example, the results will not be exact or sharp.
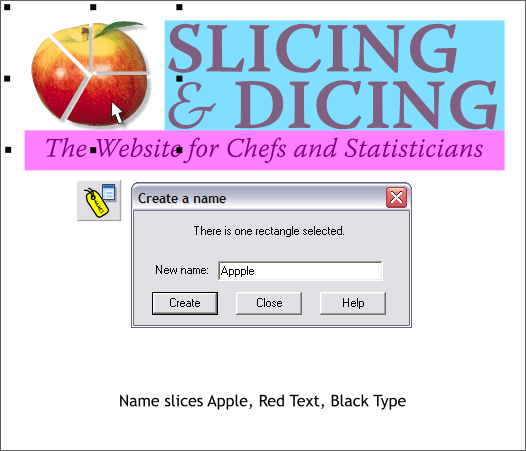
Once you have created the slice shapes, set the transparency on each of the rectangles to 100%. Select each rectangle, open the Name Gallery (Ctrl Shift F9 or click the icon on the Infobar), click New... and give the selection a name. In this case I have named the 3 slices Apple, Red Type and Black Type.
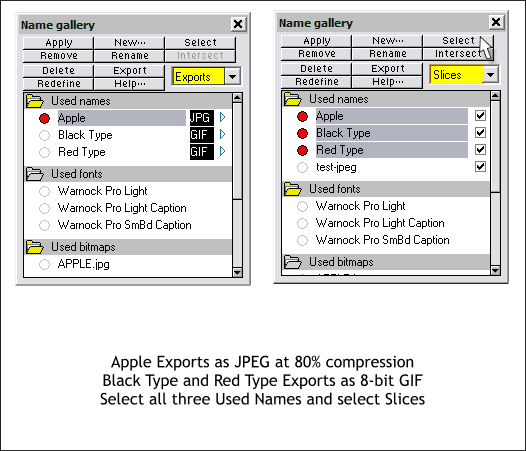
(Left Name Gallery image) Select each of the named selections in the Name Gallery. Make sure Exports is selected in the Change Which Properties Are Shown drop down list. Apple is initially listed as GIF. Click the black highlighted GIF text which opens the Export Bitmap dialog. Change the export type to JPEG and set the JPEG Quality (Options tabbed section) to 80%. Select each of the type selections and change the GIF Color Depth to 16 Colors. (Right Name Gallery image) Ctrl click the 3 title bars for the 3 selections, then press Select. Red dots will appear to the left of each selection. From the drop down list, select Slices . This marks each of the 3 sections for slicing. NOTE: I had a problem when I was exporting my images. I got an error telling me that my slices were overlapping. To avoid this, select the Apple rectangle and apple image and move it up and left 1 pixel in each direction. With the rectangle selected, press Redefine in the Name Gallery. Move the rectangle and the red type up and to the right 1 pixel in each direction and then press Redefine. This should eliminate this problem.
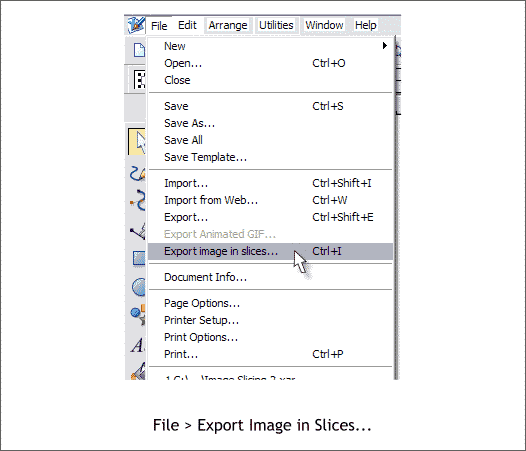
From the File menu, select Export Image in Slices... Name your file and press Save. The Save as Type will display GIF but the 3 images will export in the formats you specified. NOTE: In earlier versions of Xara, you could not designate both a GIF and JPEG image in the Name Gallery without causing a fatal crash. This has been fixed in Xara X1 and is no longer an issue. In the next dialog, GIF Bitmap Export Options press Export. Again, don't worry about the individual settings for the images as we have already defined each slice.
Xara will ask you if you want to view your exported HTML now? Click Yes and Xara will launch your default browser and display the sliced image. Click here to see the actual sliced and reassembled image on a separate page. NOTE: The 3 images need to be in the root director with the HTML file. If the images are in another folder, you either need to move them to the root folder or edit the HTML text to point to the correct folder.
|
||
|
|


