|
|
|
Many of Xara special effects such as soft drop shadows are in fact RGB bitmap images. This is not a problem when creating images for viewing on the screen or on web pages. But when creating a file for commercial printing, this can present a problem as the RGB colors often appear as extra colors. And extra colors cost more money. The solution is to convert the RGB drop shadow into a CMYK bitmap.
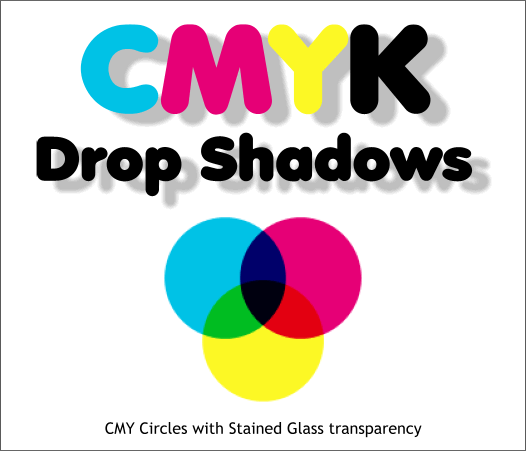
Commercial printing usually uses 4 colors of transparent ink to create millions of colors. In the example above, a Cyan filled circle, a Magenta and a Yellow filled circle have been overlapped and a Flat, Stained Glass 0% transparency applied to simulate how printing inks work. Where the Cyan and Magenta overlap, we get a new color that is somewhere between blue and blue purple. The Cyan and Yellow produce green while the Yellow and Magenta produce Orange. In the center, where all the colors overlap, in theory you get black. In reality you get a deep muddy brown. Hence a fourth color, black is used as a Key color and becomes the K in CMYK. The black also adds depth to the other colors. Another thing to consider is Xara works in RGB color space in which the colors are much brighter than they are in a simulated CMYK color space. In reality, Cyan, Magenta, and Yellow are closer to the somewhat mute colors shown above than the same colors in Xara. You can switch to Xara's simulated CMYK color space by selecting Window > Show Printer Color.
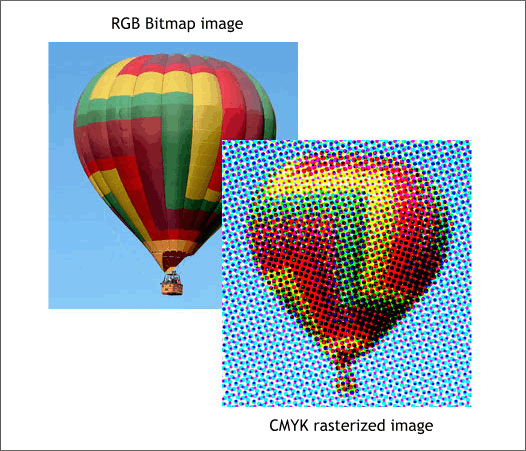
In the two examples above, the image on the left is an RGB bitmap. The image on the right is an exaggerated CMYK printed image in which you can see the CMY and K dots of transparent ink that produce the screened image.
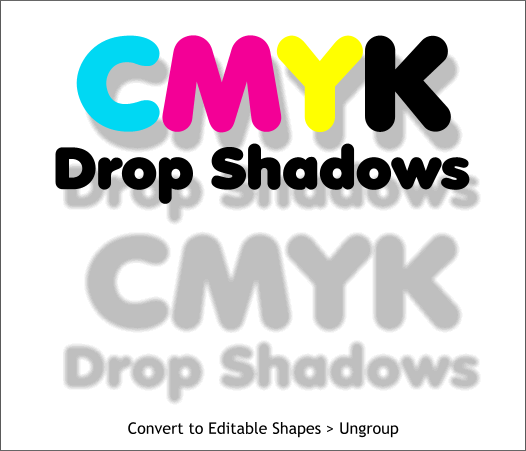
To convert Xara's RGB drop shadow to CMYK, Convert the object and shadow to Editable Shapes (Arrange > Convert to Editable Shapes). Ungroup (Arrange > Ungroup or Ctrl u ) the object from the shadow.
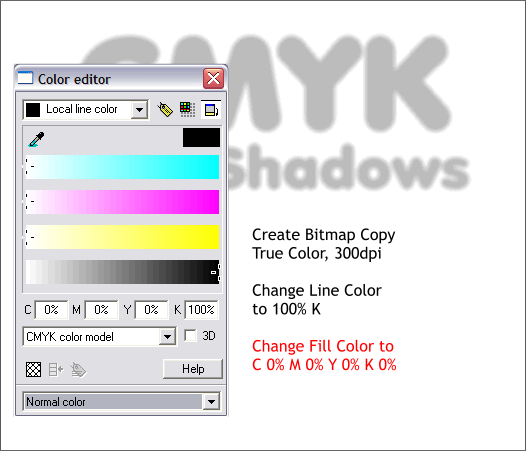
NOTE: When creating images for CMYK your Color Units should be set to Percent. (Utilities > Options... Units) as CMYK is designated in percentages. Select the shadow and Arrange > Create Bitmap Copy.... Select True Color and change the resolution to 300dpi. (This resolution may be higher depending upon the resolution at which your printing professional will be printing. When in doubt, ask your printing professional for the desired resolution. Delete the original shadow we will be working with the bitmap copy. With the new bitmap selected, open the Color Editor (Ctrl e). From the drop down list of Color Models, select CMYK Color Model. Set the Local Line Color to K 100%. This makes the shadow black. From the Choose Color to Edit drop down list at the top of the Color Editor, select Fill Color. Change this color to C 0% M 0% Y 0% and K 0% . This creates a CMYK white. (Xara's normal white is actually an RGB color). TIP: Charles Moir at Xara suggests moving the K slider back and forth from and then back to 100% when you change the Line Color for the shadow. For some reason, not doing this may prevent Xara from treating the line color as K.
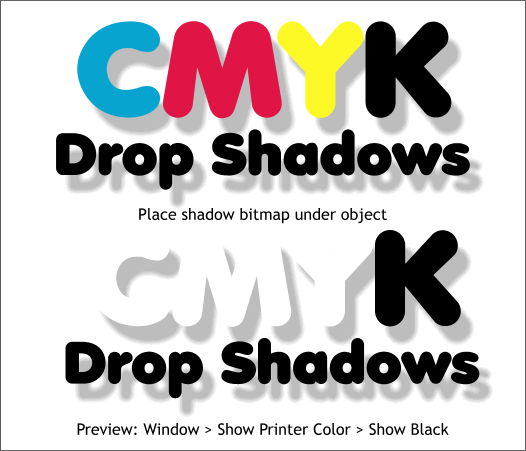
Place the new CMYK shadow under the object. To verify that you have done this correctly, open the Window menu, select Show Printer Color... and then Show Black. As you can see in the second example above the shadow is there as well as the black text object. TIP: I like to add a small percentage of CM and Y to the shadow color to create a denser and richer black. Usually 10-15% is sufficient. You can also apply this to solid black colors to increase the depth of the black and also to help trap the color. Use equal amounts of CM and Y unless you want the shadow to be warmer or cooler. In this case increase the M and Y values slightly for a warmer gray, and increase the C slightly for a cooler gray.
|
||
|
|


