|
|
|
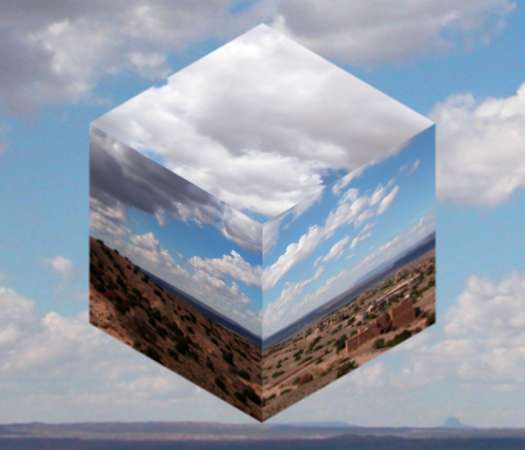
For the final mini-tutorial, we'll wrap a photo around a cube. But first we need to create the cube.
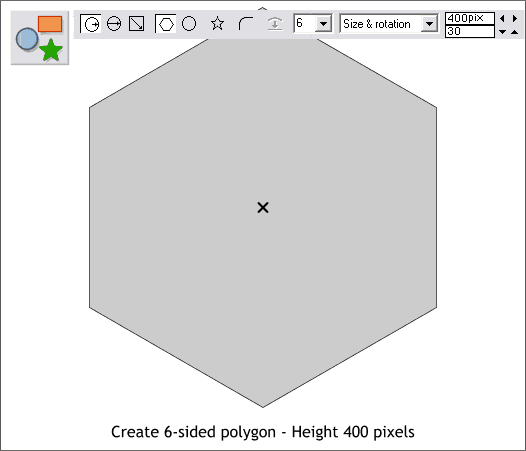
Select the QuickShape Tool. Select 6 from the Number of Sides drop down list. Select the Create Polygons icon (the hexagon) and make sure the Starred Shapes icon is not selected. Hold down the Ctrl key and drag a polygon 400 pixels tall. As you drag, rotate the shape so the points are north and south as shown above.
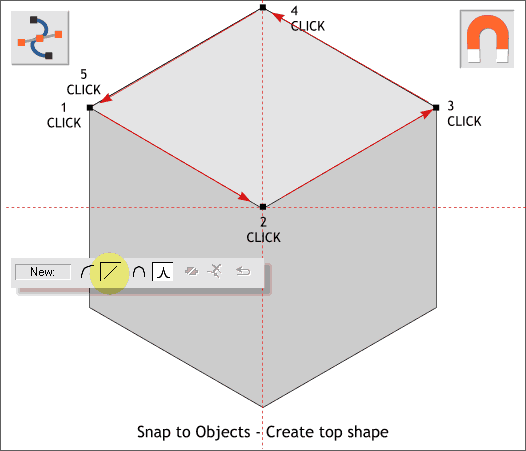
Press the magnet icon on the Infobar to enable Snap To Objects. (You can also right click on the page and select this option). Select the Shape Editor Tool. On the Infobar, Select the diagonal line icon (Make Line). Drag guidelines through the center of the hexagon (Ctrl L to display rulers). TIP: When the hexagon is selected with the QuickShape Tool an X appears in the very center. Drag your guidelines through the X. Click the Shape Editor Tool on the left corner (1) to place the first control point. Following the direction of the arrows, click the second control point at the intersection of the two guidelines. Click the next control point at the number 3 spot and then click 4 and finally click 5 on top of the first control point. This is how you add line segments and create a closed shape in Xara with the Shape Editor Tool.
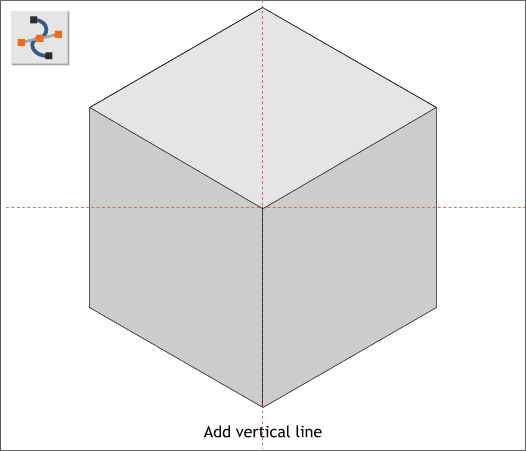
Add a vertical line down the middle from the center to the bottom as shown. We now have the three visible sides of the cube.
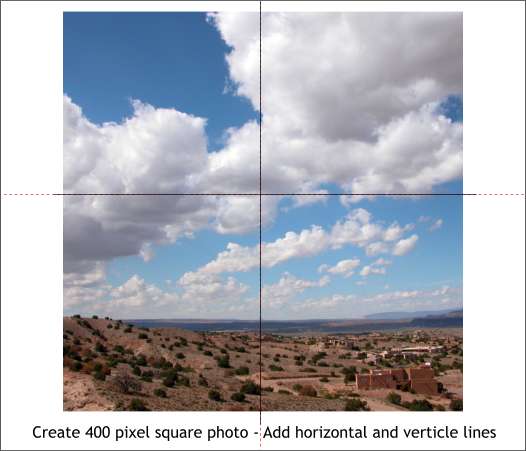
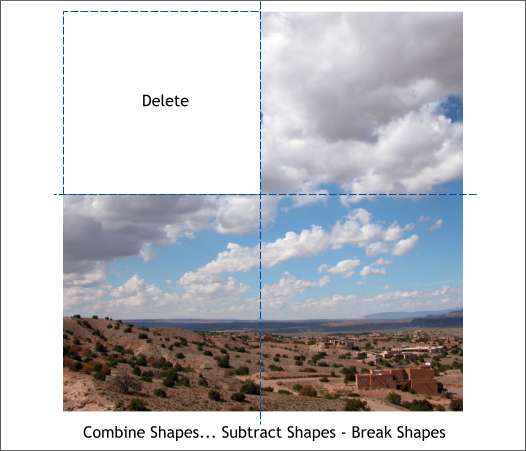
Create a vertical and horizontal line that are centered on the square (Ctrl Shift L to open the Alignment dialog). To create a horizontal or vertical line, click the Shape Editor Tool on the screen to place the first anchor point, hold down the Ctrl key then click and drag up or to the side and the lines will snap to the vertical or horizontal position. The lines should extend beyond the edge of the square a small amount.
Hold down the Shift key and select one of the lines then the square photo. Arrange > Combine Shapes... Subtract Shapes. Select the other line and the photo and repeat, Combine Shapes... Subtract shapes . Select the photo and Arrange > Break Shapes. Select the upper left square and delete it (the Delete key).
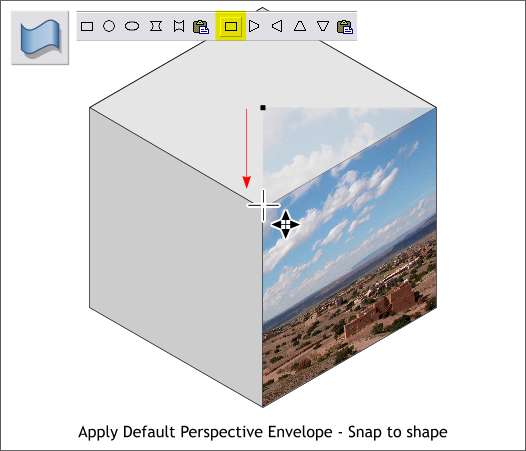
Select the bottom right square. Select the Mould Tool then click the Default Perspective Envelope on the Infobar (highlighted here in yellow) to apply the envelope to the square. Using the Mould Tool cursor, drag the corner control points of the square and snap them to the corresponding right side corners as shown. TIP: Zoom in close to get the most precise snap.
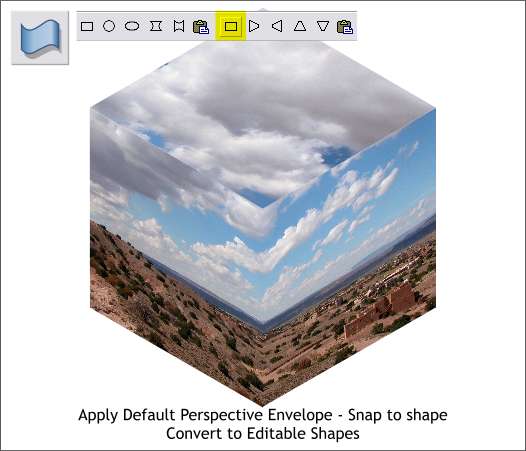
Repeat the last step and snap the remaining two squares to the cube.
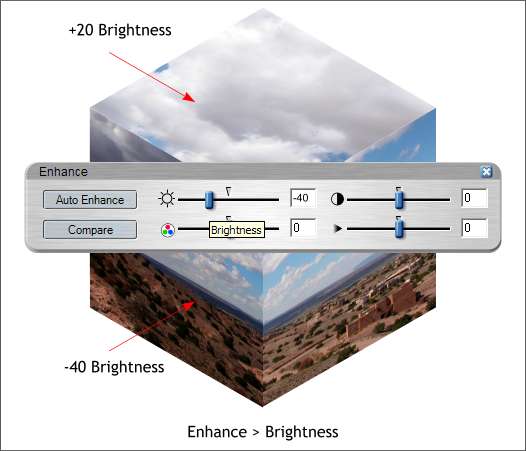
Select the right side. From the Utilities menu, select Xara Picture Editor... In the Enhance dialog, set the Brightness slider to -40. Press the red check icon and then Accept . Change the top setting to +20%.
I added the original photo (New Mexico summer clouds) to the background. I also created a clone, applied a modest amount of blur, and applied a Circular Mix transparency with the center of the transparency at 100% and the outside amount set to 0% to make the center of the cube sharp and in focus and the outside of the cube in softer focus. So, what do you think? Did you learn anything today? Do you agree that the XPE feature is pretty terrific? Remember, the XPE is a work in progress. Xara expects to release a more powerful version of the XPE in a month or so and all registered owners of X1 will receive a free copy. Comments, questions and suggestions are always welcome. In fact I am considering making them mandatory. So use the feedback form on the next page to send me your feedback.
Gary W. Priester
|
|
|
|


