|
|
|
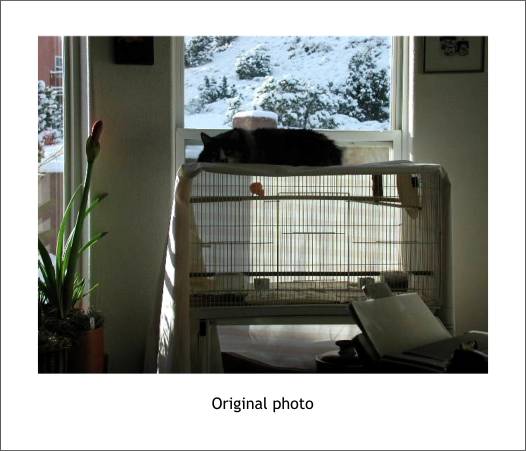
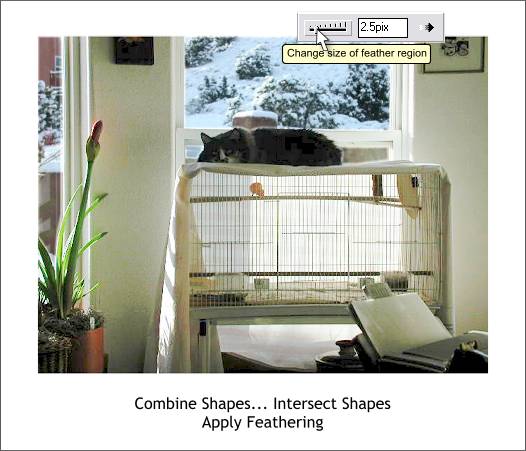
This month, we'll look at some practical and some fun ways to use X1's XPE (Xara Picture Editor). Admittedly not as robust as Photoshop, XPE can still do some pretty heavy duty work as we shall see over the next 5 pages. I looked through some of my digital photos for inspiration. In the photo below (you old timer's may recognize the Mook, our tailless calico cat, having a snooze atop Harry the Canary's cage. Unfortunately the snow on the hillside is exposed correctly but the odd couple are much too dark. I could make the whole picture lighter, but then I would loose the color of the snow. What we really need is the best of both. NOTE: Workbook 25 covers the old Xara and Xara X UI buttons and their new Xara X1 versions, plus highlights of the new features in Xara X1. New users may want to familiarize themselves with this review before reading the rest of this Workbook. ANOTHER NOTE: If you want to recreate the images in this Workbook, download each starting image from your browsers (right click and select Save Image As...).
This photo is too dark, my camera arbitrarily decided to use the snow covered hillside for balance and let everything on the inside go dark. (If you are wondering, the photo was taken in the winter time. Summers in New Mexico are quite hot.)
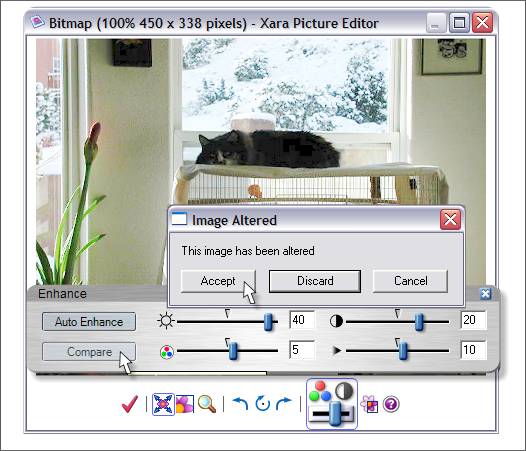
The image was opened in XPE. (Double click the image to open XPE or right click on the image and select Xara Picture Editor from the pop up menu).
After the alterations have been made, you can press the Compare button to see the original image. Press Compare again to return to the current modifications. When you are satisfied with the image press the red check icon. The Image Altered dialog appears and offers the options to Accept, Discard, or Cancel the operation. Press Accept and the changes are applied to the image.
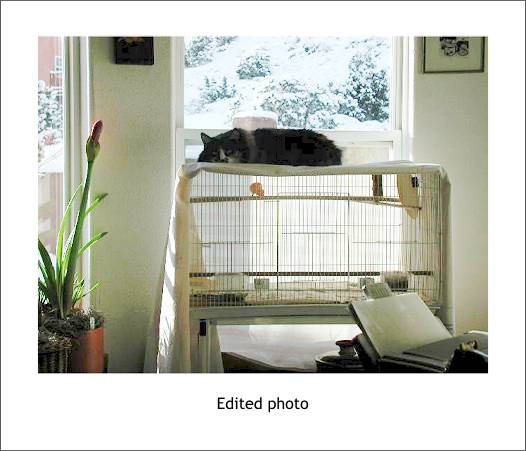
The modified image is much better. We can see Harry's yellow feathers and the sleepy look on the Mook's face. We can even see that the Amaryllis to the left is about to open. But, the snow covered hill outside the window is now bleached out. You may remember from Workbook 25 that any modifications you make to an image with XPE remains with the image and so you can undo any of your changes at any time by reediting the image in XPE. We'll demonstrate this feature next.
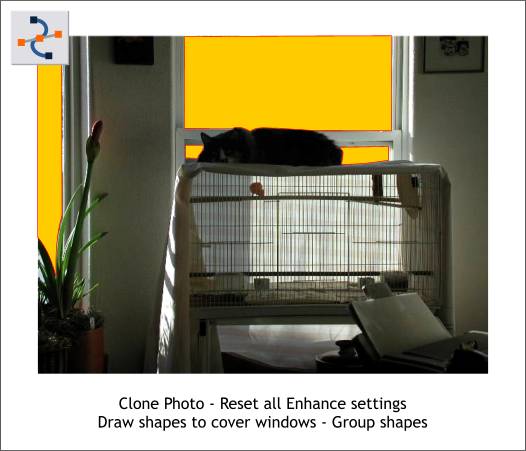
Clone the photo (Ctrl k), open it in XPE an return to the original settings. TIP: To return the unmodified settings quickly, press Compare and then press the red check icon and Accept the changes. Using the Shape Editor Tool, create shapes that cover the window areas. I have made mine yellow orange so you can easily see them. Group the shapes (Ctrl g).
Select the group of shapes covering the windows and then the cloned dark bitmap. From the Arrange menu, select Combine Shapes... Intersect Shapes. The windows will now have the properly exposed hillside and the interior will be lighter. The best of both words. Finally, select the window group and apply a small amount of feathering using the Change Size of Feathering Region slider on the right top area of the Infobar. This removes the too sharp appearance of the object's edges. Now you can make a bitmap copy (Arrange > Make Bitmap Copy...) of the new objects. This is a handy technique for improving interior photos that are too dark while the windows are at the correct exposure. Many professional photographers who specialize in architectural interior photography use a very similar technique. They make two photographs, one for the windows and one for the interior and then combine the two in Photoshop. But with XPE, who needs Photoshop?
|
|
|
|


