|
In this final tutorial, we'll create a child's building block with beveled sides. We'll create a cube shape then use the Default Perspective envelope to attach the graphics to the sides to the cube.
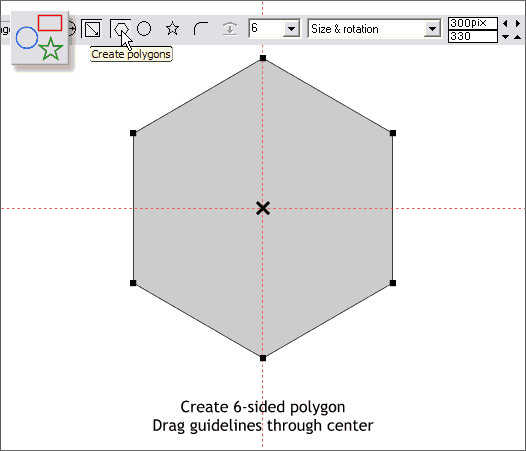
Select the QuickShapes Tool. From the Number of Sides drop down list, select 6. Click the Create Polygons icon and make sure the Starred Shapes star icon is not selected.
Hold down the Ctrl key and drag a hexagon to 300 pixels. Rotate the shape while you are dragging it so the pointed ends are up and down as shown.
Drag guidelines from the screen rulers (Ctrl L to display rulers) through the center of the hexagon.
TIP: To get the exact size, enter 300 in the Size text entry box and press Enter to apply the change.
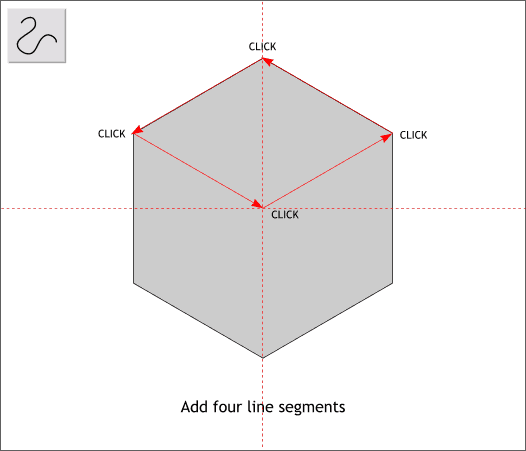
Press the red magnet icon on the Infobar to enable Snap to Objects. Using the Shape Editor Tool, click four line segments by clicking on each of the top
three corners and the intersection of the guidelines. The diamond shape should fill in black. Set the fill to none.
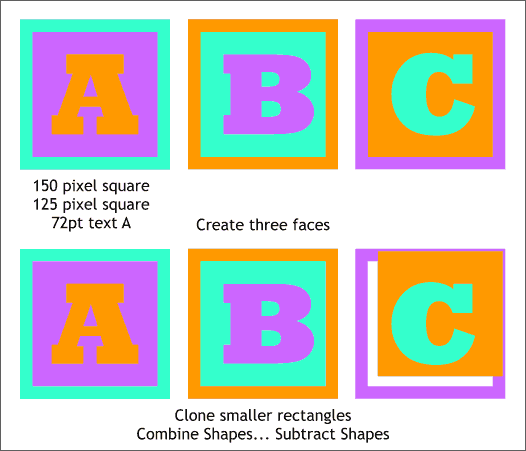
Create two centered squares to the sizes shown above left. Center a capital A in the center and make it a bold font. Make two duplicates and change the colors and the text to ABC as shown.
Clone (Ctrl k) the center square on the A set. Select the cloned square and the large outer square and Arrange > Combine Shapes... Subtract Shapes
to remove the section of the large square directly below the smaller square. Repeat this step for the other two sets. The example on the lower right shows the small square moved to illustrate the subtracted area underneath.
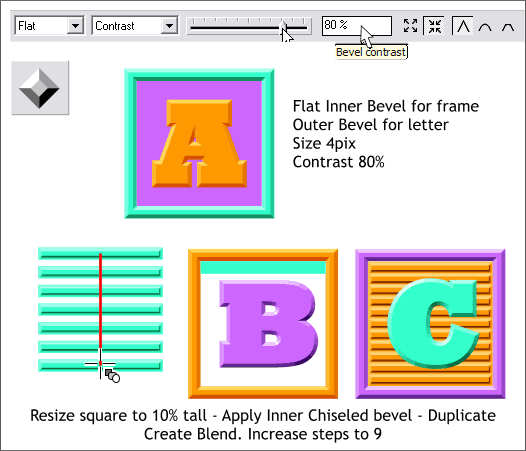
Select the three frame portions of each set. Select the Bevel Tool and apply a Flat bevel. Click the Inner Bevel icon (the inward pointing arrows). Set the Contrast slider setting to 80%
. From the drop down list, select Size and make sure the size amount is 4pix (the default size).
Select the three letters and apply a Flat, Outer bevel. Contrast 80% and Size 4pix.
Select the small square under the A. Click the Lock Aspect Ratio lock icon on the Infobar to disable proportionate scaling. In the Height (H) text entry box, enter 10 and press Enter
to create a wide, short rectangle.
Apply a Chiseled bevel, Inner Bevel, Contrast 80% to the rectangle. Position it at the top of the open area. Duplicate (Ctrl d) the beveled rectangle and center it on the bottom of the open area.
Select the Blend Tool and drag from one beveled rectangle to the other to create a blend. Increase the Blend Steps on the Infobar to 9 and press Enter.
Copy and paste the blended rectangles to the other two sets and change the colors by selecting the entire blend and pressing the appropriate color on the screen palette..
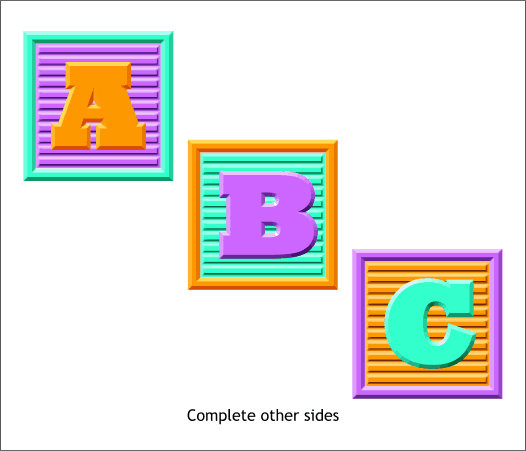
Here is how the three sides should look. Group each set (Ctrl g) (3 groups).
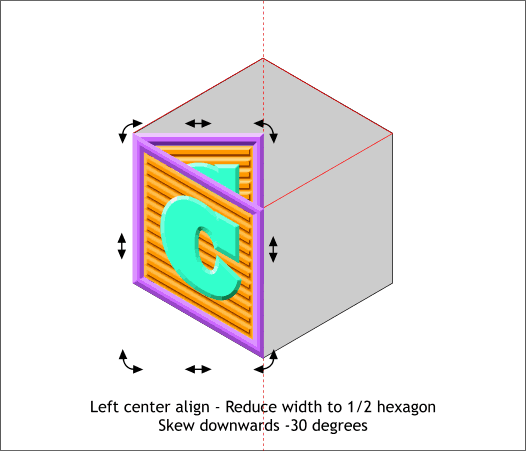
Center the C side to the center left of the hexagon. Drag the middle right bounding box handle to the center guideline to reduce the width of the C side to 1/2 the wide of the hexagon. Click again to enable Rotate/Skew mode and
drag the right middle arrow downward -30 degrees.
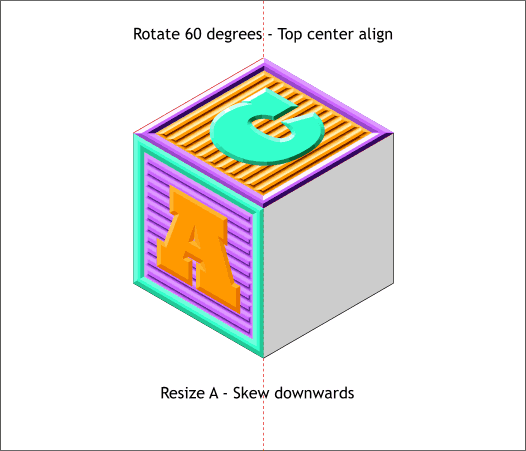
Rotate the C side 60 degrees anti-clockwise and position it as shown.
Center the A side center left on the hexagon. Reduce the width and skew it into place. Repeat this step for the B side but center it on the right first.
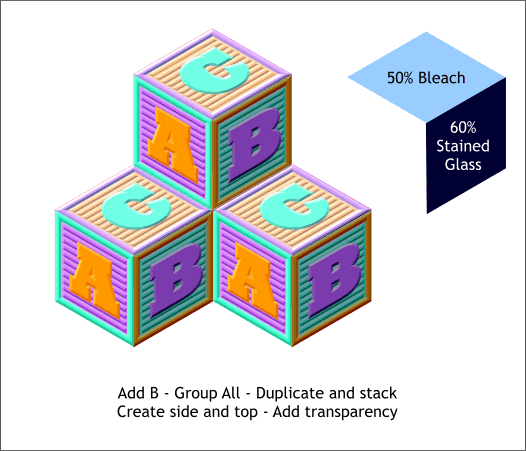
Group the three sides of the cube. Create two shapes the size of the top and right side (use the Shape Editor Tool and snap the points to the corners of
the shape). Fill the top shape medium blue (RGB 153, 204, 255) and the right shape deep blue (RGB 0, 0, 51). Apply a Flat Bleach 50% transparency to the top and a Flat 60% Stained Glass
transparency to the side. Position these over the top and right sides of the cube.
Group all the elements of the cube. In the example above, two duplicates of the building block were made and arranged to look like a stack. If you are ambitious, you can create blocks with different elements. You can also use
this technique to place photographic bitmaps onto a cube.
And that ends another Workbook. I hope you learned a trick or two.
Your feedback is always welcome and lets me know that there really are people out there reading and doing these tutorials. Please use the feedback form on the next page to let me know you're out there.
Gary W. Priester
Host
|
