 |
 |
| H 1 2 3 4 5 6 |
|
|
|
Adding shapes to lines with Xara's stroked line shapes is a cool way to create more natural looking lines. Once you have stroked a line, you can use Arrange > Convert Line to Shape to create a shape with which you can apply any of Xara's multitude of fills. And, as you will see, you can also create an interesting blend.
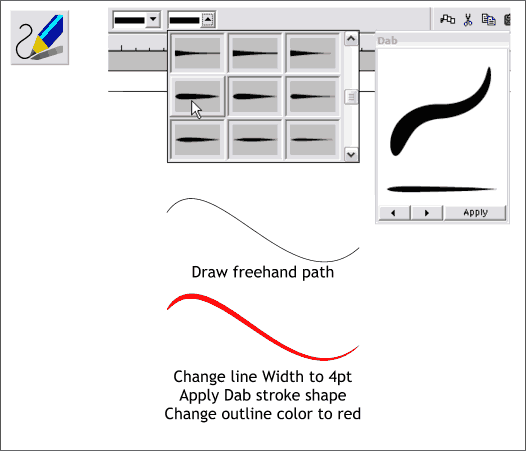
Using the Freehand and Brush Tool, draw an S-shape like the one shown here. Change the Width to 4pt and the outline color to red (right click on the red square on the screen palette to change the line color). With the line and the Freehand and Brush Tool selected, open the Select an Existing Stroke Shape drop down list. Select any of the shapes. I have used Dab which is about 1/2 way down the list of shapes.
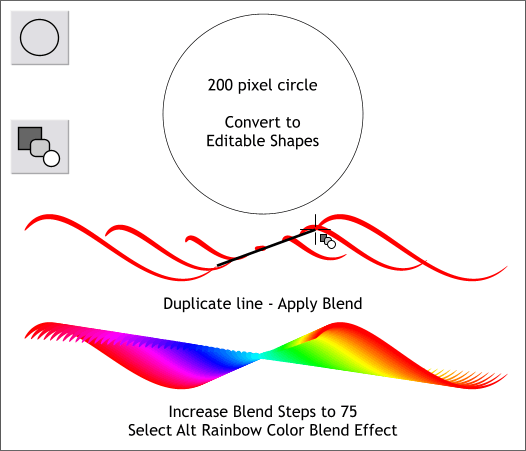
Using the Ellipse Tool, and holding down the Ctrl key to constrain the ellipse to a circle, draw a circle about 200 pixels in diameter. Convert the circle to Editable Shapes (Arrange menu). Duplicate the S-shaped line and drag it to the right. Select both lines, then select the Blend Tool. Drag from the right end of the first line to the left end of the second line. This creates a blend in which the lines get smaller then larger. From the Color Blend Effect drop down (default is Fade) select Alt Rainbow. Change the number of Blend Steps to 75 and press Enter to apply the changes.
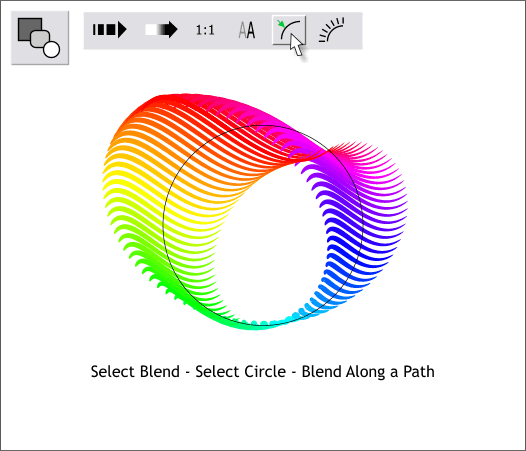
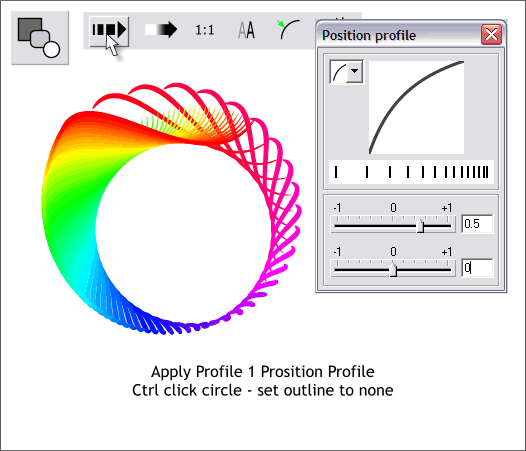
Select the blended lines with the Blend Tool. Hold down the Shift key and click on the circle (you did convert the circle to editable shapes, didn't you?). On the Blend Tool Infobar, press the Blend Along a Path icon. The blend is now distributed around the circle. You can leave it here if you like. Just Ctrl click the circle and set the line Width to none.
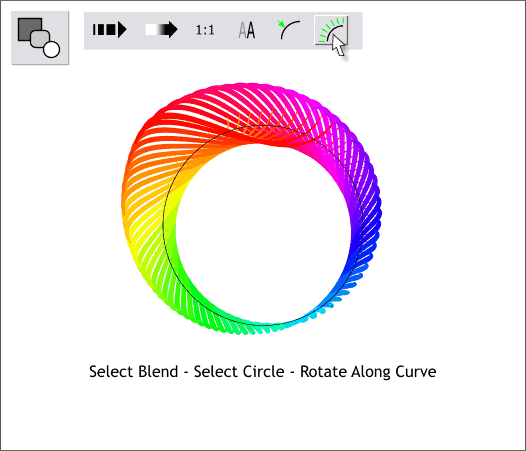
If you want to go on, click the Rotate Along Curve icon. Now all the stroked lines are rotated along the curve of the circle.
Profiles are always fun to try out to see what they might add. With the Blend Tool and the blend still selected, click the Position Profile arrow icon. From the drop down list of presets on the top left, select Profile 1. Just for the fun of it, before you go on to the next step, try all the profile presets to see how each one effects the blend.
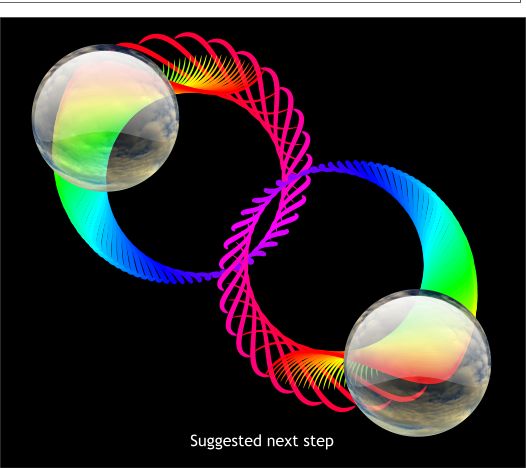
For this last step, I duplicated the blend and flopped it vertically and horizontally. I think I had to reapply the profile to make it match the original. I added some of the spheres from the first tutorial and added a Circular, Mix transparency to achieve the appearance you see here. I reversed the slider settings for the center and outer transparency values so the center was about 90% transparent and the outside was 0% transparent (the reverse of the default setting).
|
|
|
|
|
|
|