|
Mould Tool Envelopes enable us to shape selections. As we modify the shape of the envelope, the enveloped shape changes as well. In this tutorial, we'll envelope some text to illustrate the meaning of the enveloped words.
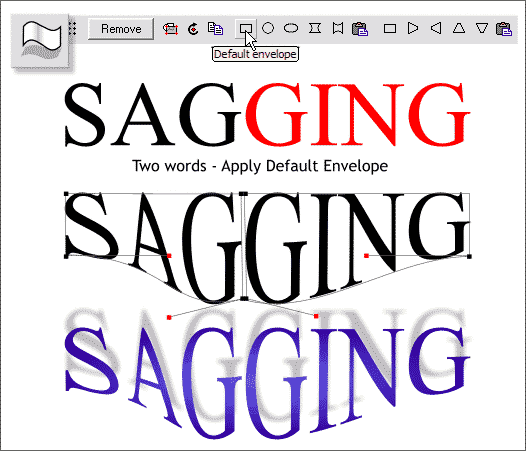
Key in the word SAGGING in two words: SAG and GING as shown above in black and red.
Select the SAG text with the Mould Tool then click the Default Envelope icon. A rectangle will appear around the text which is the envelope. Drag the
bottom right control point down as shown. A Bezier control handle will appear (the line with the red box on the end). Drag the red box (control handle) down
a little. Now click the bottom left control point and drag the control handle to the right. Repeat this to the GING text. Group the two sections and apply a Circular Fill and a Wall Shadow.
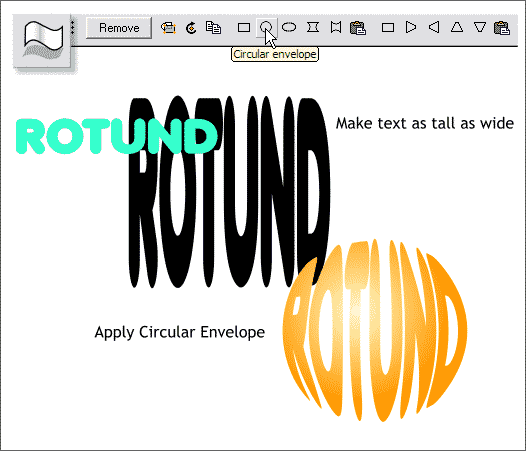
In addition to the Default Envelope and the Default Perspective (the second rectangle icon) envelopes, there are 8 preset envelopes. For this next exercise, we'll apply a Circular envelope to some text. Key in the word
ROTUND in a bold font. Stretch the text so it is as tall as it is wide. Apply a Circular envelope. A Circular fill with make the text look round.
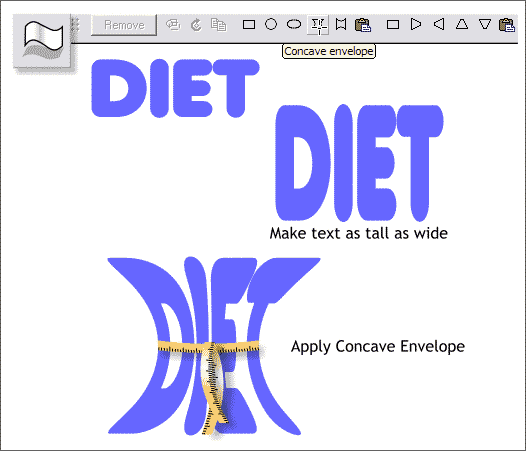
Our rotund text needs to go on a diet. Key in the text DIET (in this case a noun meaning an eating program of selected foods to help one to lose weight). Make the text as tall as it is wide. Apply a Concave envelope. I have added a
small measuring tape to show the effectiveness of the diet.
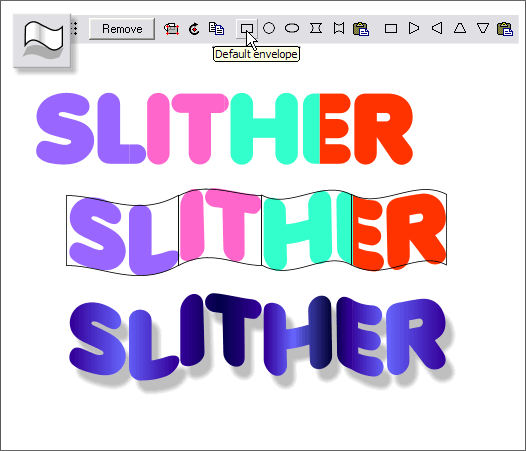
Snakes slither. We can make text slither too. Key in the pairs of letters shown above. Using a vertical line, slice the E (Arrange > Combine Shapes... Slice Shapes
) so that each pair of letters is about the same width. Apply and shape a Default envelope to each pair of letters as shown. Apply Linear fills
to the letter pairs to accentuate the in and out of the slithering text. Add a Wall Shadow to pop the text off the page.
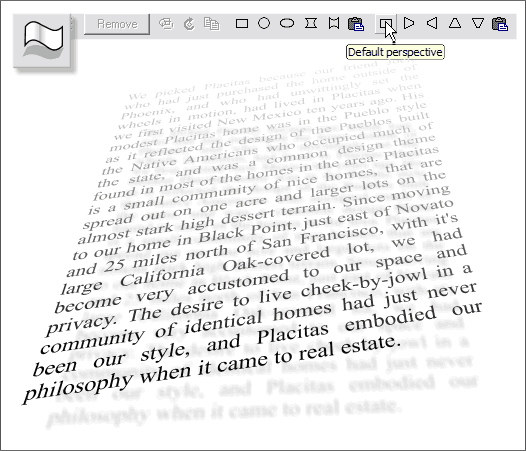
For this last example, I copied some text copied from Microsoft Word to the clipboard and pasted it into a Column text mode. Click and drag the Text Tool
on the page to establish the column width of the text. Then paste (Ctrl v) the text. Press the Full Justify icon on the Text Tool Infobar (the icon with the row of equal lines).
Apply a Default Perspective envelope to the text. Drag the corners of the envelope until the text looks something like the text above.
I added a Wall Shadow, converted the text to editable shapes (Arrange menu) then ungrouped the text and the shadow and skewed the shadow downwards.
|

